
Home›Forums›Members’ Builds and Rides›VN – VP – VR – VS›Nicks VR Exec
This topic contains 124 replies, has 22 voices, and was last updated by ![]() VRSenator065 4 years, 7 months ago.
VRSenator065 4 years, 7 months ago.
-
AuthorPosts
-
June 1, 2016 at 1:27 pm #17423

VRSenator065Participant- Adelaide SA
- VR Senator LSx454 1960 Kombi (project) 1921 Nash Hot Rod (future project)
View build HERE
Posts: 5 777
Once perfected you could probably have a market for them via ebay or the likes. Even variations for the different model VR/VS consoles. I was trying to fill in this area on a exec console using a mould made of fibreglass to later fit 4 gauges. But unfortunately it is to time consuming & hard to get a neat & tidy look. But funny enough I was later thinking of 3d printing or injection moulding. Cheers
Hey mate, well it just so happens that’s what I am doing. My daughter is setting up a website for me, alreday have a business name, and the plan is to sell the stuff I have designed. In fact a member on here hopefully soon should have a post of a nice part he just got soon

These are the ones I have so far, the 3 gauge cluster under the radio and also the one that replaces the trip computer in the VR/S. Not sure the three cluster would fit a VN/P? (I have never owned one)
Sorry for the thread hijack Nick!!!
June 1, 2016 at 1:36 pm #17424
ImmortalityParticipant- 97 HSV Senator 185i 02 VX L67 Calais
View build HERE
Posts: 535Hmmmm, I might have to get one of the 3 gauge clusters from you for my VS Senator…..
June 1, 2016 at 4:23 pm #17427
VRSenator065Participant- Adelaide SA
- VR Senator LSx454 1960 Kombi (project) 1921 Nash Hot Rod (future project)
View build HERE
Posts: 5 777Hmmmm, I might have to get one of the 3 gauge clusters from you for my VS Senator…..
Literally in the next day or so the website/company will go live, and I reckon we might even have to do a nice deal with supporting CP members too
 June 1, 2016 at 7:14 pm #17438
NickVRParticipant- Adelaide
- VR V8 Exec, VR SS, VF Redline Reserve
View build HERE
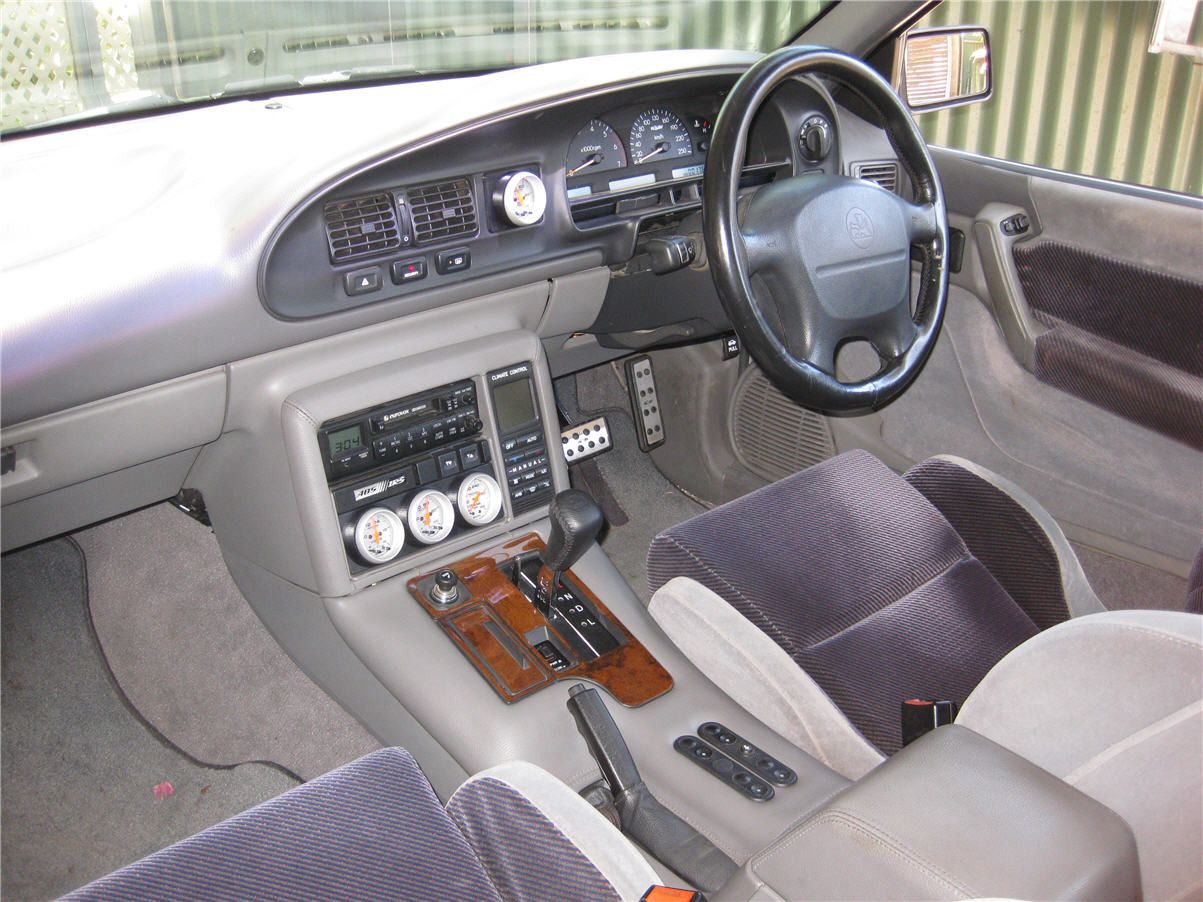
Posts: 264Great to finally meet you tonight Gary. Found the photo of what needs to be cut out to fit this surround. The grey surround had to be cut but if you buy it from a wreck make sure to take that grey part as they are cut from factory. I will take a photo of the spare grey piece I have in the shed. But these can fit easily with some modification.


CLICK THE PICS TO ENLARGE.
June 1, 2016 at 8:21 pm #17445
VRSenator065Participant- Adelaide SA
- VR Senator LSx454 1960 Kombi (project) 1921 Nash Hot Rod (future project)
View build HERE
Posts: 5 777Likewise Nick, very nice to meet you finally after what seems years on forums! No worries let me think about it, i reckon with your ideas today we can come up with somethinb cool.
June 2, 2016 at 1:54 pm #17458
exec24Participant- 2004 VY S2 Berlina 1996 VS 5L Sedan
View build HERE
Posts: 435That’s pretty easy to cut, had to do it before when I had one of those consoles in my vs
UPI has a couple of VS series 2/3 statesmans sitting in there yard at Elizabeth
June 2, 2016 at 2:32 pm #17460
VRSenator065Participant- Adelaide SA
- VR Senator LSx454 1960 Kombi (project) 1921 Nash Hot Rod (future project)
View build HERE
Posts: 5 777^cheers for that, UPI is car guy paradise
 June 2, 2016 at 6:29 pm #17469
exec24Participant- 2004 VY S2 Berlina 1996 VS 5L Sedan
View build HERE
Posts: 435^cheers for that, UPI is car guy paradise
Agreed
June 2, 2016 at 7:05 pm #17472
NickVRParticipant- Adelaide
- VR V8 Exec, VR SS, VF Redline Reserve
View build HERE
Posts: 264Some more photos for you Gary. This is the spare I have in my shed.

 June 2, 2016 at 11:05 pm #17481
VRSenator065Participant- Adelaide SA
- VR Senator LSx454 1960 Kombi (project) 1921 Nash Hot Rod (future project)
View build HERE
Posts: 5 777Thanks Nick. I reckon I have some ideas to go on now.
June 3, 2016 at 6:58 am #17482
OZ38Participant- Jurien Bay W.A.
- VS & VY Sedan & Ute. Ecotec powered Hilux 4WD.
View build HERE
Posts: 59Some more photos for you Gary. This is the spare I have in my shed.
You guys are on the same track as myself. That brown section is what I had a guy try to make up out of fibre glass to re-fit to a exec console section. It was done but just not neat enough for me to be happy with. I actually found some grey ABS pipe that was the right sizing for the gauges to slip inside. Tried to see if I could cut holes it this section to recess the pipe into it. Wanted a look of the gauges projecting out & angles up to the driver.
 your idea.
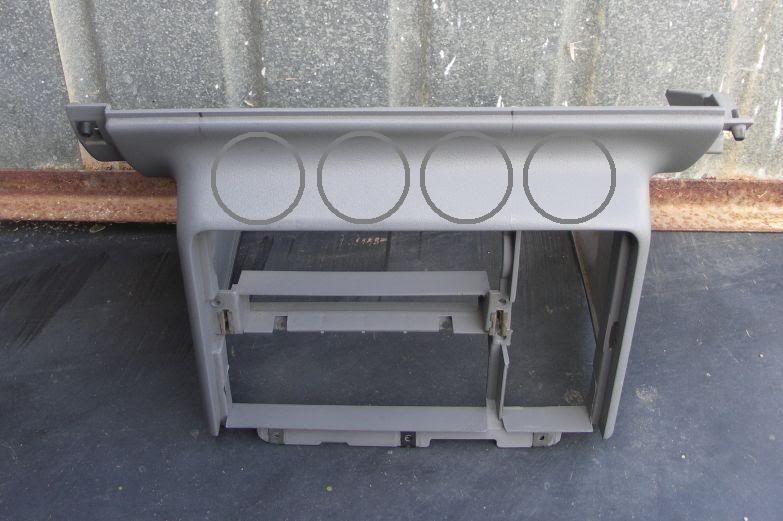 My idea.
Cheers
Deek
 June 3, 2016 at 8:31 am #17483
VRSenator065Participant- Adelaide SA
- VR Senator LSx454 1960 Kombi (project) 1921 Nash Hot Rod (future project)
View build HERE
Posts: 5 777^yea Deek can’t remember where but I have seen someone (maybe on here?) who made up pods like you have sketched above and they looked really neat. Now I have Nicks gauges and switch I can play around a bit more with his. With the stato one they need to be deep so the lid still closes. It actually pushes deeper before it releases if that makes sense. So the top section needs to be cut away to clear the body of the gauge but I am thinking part of the kit may be a supplied 3D printed guide you slip on and trace around so you know exactly where to cut. Unfortunately right now super busy so it may be on the back burner for a little while.
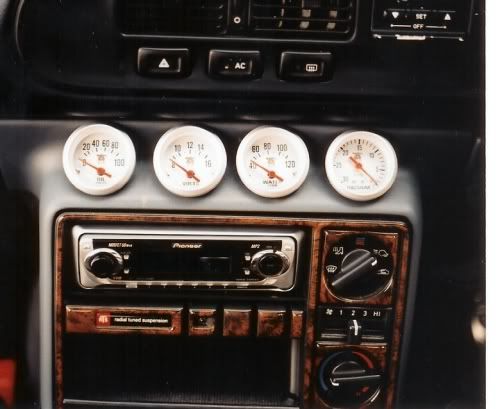
June 3, 2016 at 12:25 pm #17500Your thinking of the red vn STOWLN.
3 gauges graphed above the radio.
June 3, 2016 at 12:32 pm #17502
VRSenator065Participant- Adelaide SA
- VR Senator LSx454 1960 Kombi (project) 1921 Nash Hot Rod (future project)
View build HERE
Posts: 5 777Your thinking of the red vn STOWLN. 3 gauges graphed above the radio.
Can you find any pics? I don’t remember the car I am thinking of being red but could be wrong.
June 3, 2016 at 12:51 pm #17503 June 3, 2016 at 1:05 pm #17504
VRSenator065Participant- Adelaide SA
- VR Senator LSx454 1960 Kombi (project) 1921 Nash Hot Rod (future project)
View build HERE
Posts: 5 777Thats not exactly the one I was thinking off but same idea. I reckon the one I have seen the pods aren’t molded in like that?
June 3, 2016 at 8:53 pm #17512
NickVRParticipant- Adelaide
- VR V8 Exec, VR SS, VF Redline Reserve
View build HERE
Posts: 264Here are a few ideas of what people have done.


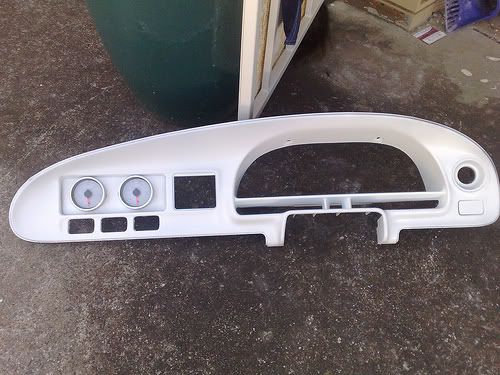
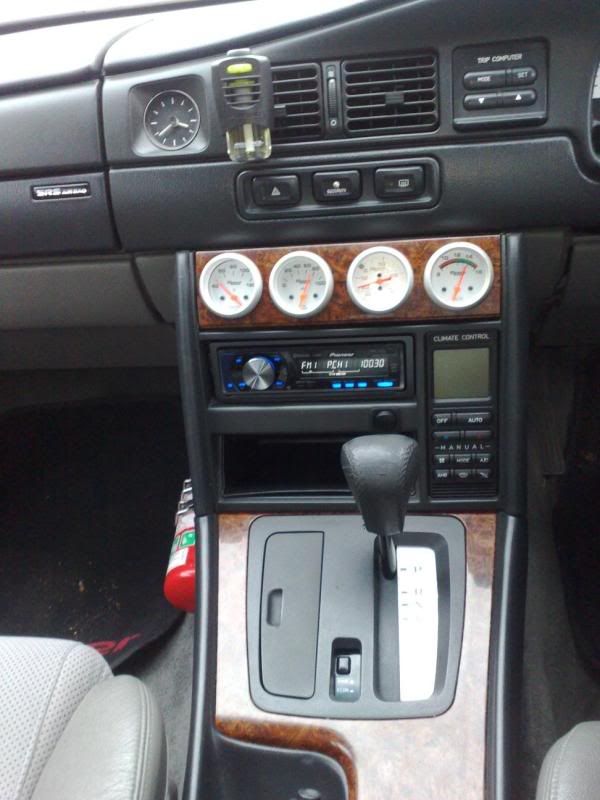


Nothing I have found like I want to do.
-
This reply was modified 7 years, 11 months ago by
 NickVR.
June 3, 2016 at 11:05 pm #17514
OZ38Participant- Jurien Bay W.A.
- VS & VY Sedan & Ute. Ecotec powered Hilux 4WD.
View build HERE
Posts: 59Hey Nick, yeah pic 7 & 8 going down are a bit like what I was trying to do. Mainly for me (as I have the Exec console), pic 7 is close as I wanted to have the gauges single pod like projecting out & angled up to the driver. Hoping it would look almost like a factory thing if it was neat enough. So for pic 7 I would actually have them more centred a little smige lower & projecting.
With pic 8 I had the brown section made if a black fibreglass, but would then require the bottom half of a stato console to match up with it to look right. So wasn’t really what I wanted to do. The brown section is a flip down door compartment isn’t it ?
Instead of hiding the gauges behind the door I was looking to have them always seen & not use the area behind for anything other than gauge location.
Cheers
Deek
June 4, 2016 at 1:45 pm #17524They look a lot neater hidden if your planning to do them under that wood grain door.
If you can angle them also it makes a difference. Esp if they are short sweep.
Out of interest what gauges and how many.
3 under the radio looks the neatest IMO
-
This reply was modified 7 years, 11 months ago by
 cava454.
June 4, 2016 at 2:00 pm #17526
VRSenator065Participant- Adelaide SA
- VR Senator LSx454 1960 Kombi (project) 1921 Nash Hot Rod (future project)
View build HERE
Posts: 5 777I like them under the radio look wise too, but the only thing I have found with mine is even with them angled they are not easy to read at a glance if your concentrating on driving. That’s why I did the one for the trip computer spot for oil pressure so its a much easier spot to keep an eye on at a glance, would also be a good spot for boost or maybe even lamda. Having a good mess around right now actually on the CAD trying to see if I can get them for Nick sitting so the bezel sits inside the recess in the lid, so he has that clean look in the stato dash.
-
AuthorPosts


You must be logged in to reply to this topic.
