
Forum Replies Created
-
AuthorPosts
-
July 21, 2017 at 1:05 pm #23684
Love the starforms!
April 28, 2017 at 3:21 pm #22604Yeah I’ve no idea what difference it will make. It won’t make it any worse, though. So that’s the main thing.
I’m trying for 180rwkw N/A with the manual. That should mean I can exceed 300rwkw on 10psi boosted on a stock bottom end. Not sure why but that’s the target for now.
Also decided I’ll go roller cam on this.
April 28, 2017 at 9:05 am #22585Been a while. Have been on the go slow as I keep saving for the bike. Licence booked for this weekend and hopefully pick up the bike a few weeks after so probably July I can start spending money on this again (maybe).
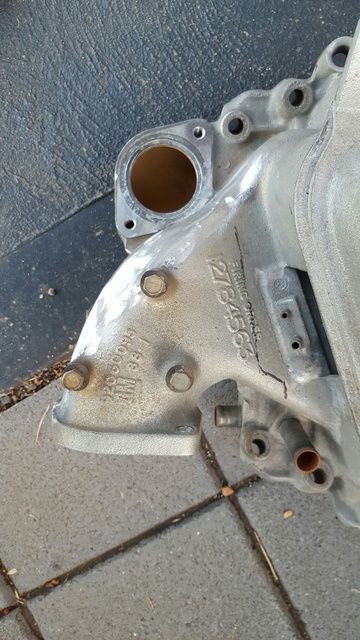
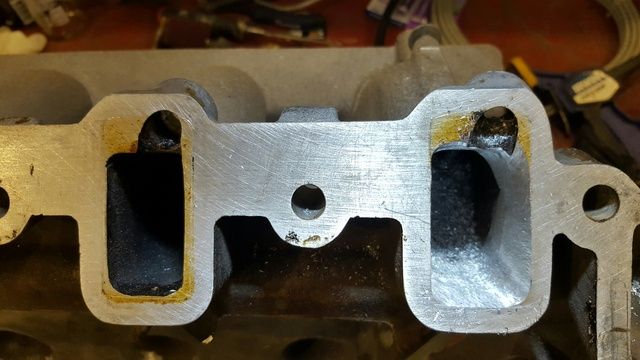
In the meantime, I thought I’d finish off the manifold. In the end I was not able to find any way to hone each of the runners completely. Any method I looked at trying failed miserably. So I’ve had to settle with match porting to the head (which took a lot of metal out!) and blending the inlet of the runners on the floor. Since I couldn’t get the runners done, I also couldn’t stomach the $850 for the last alloy Starr neck and throttle body.
Enter the Ghetto Super-Starr.
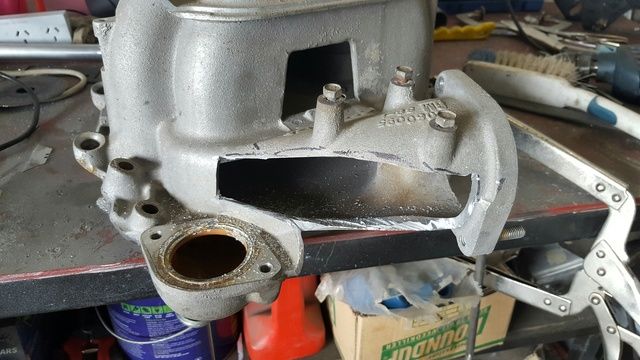
I cut out a bunch of the factory neck.
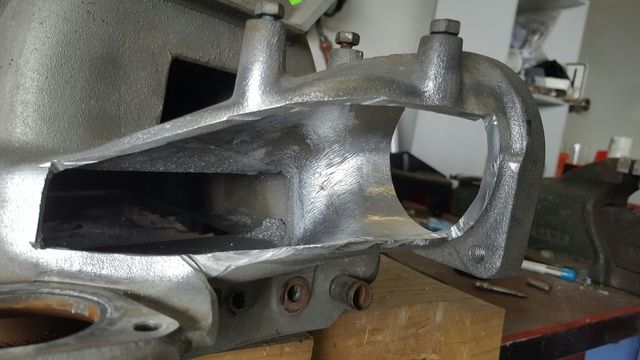
Then gave it a port, focusing on the short turn. Opened it up from 68mm to 72mm at the narrowest point. Will be running a 70mm TB.
I then welded in my valley breather.
I then proceeded to add in new plates and weld the bejeezus out of it.
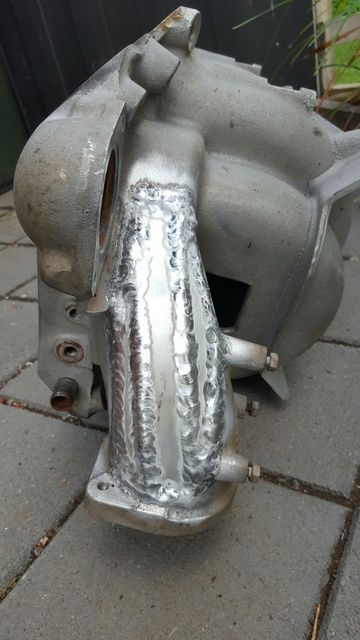
Then ground it back.
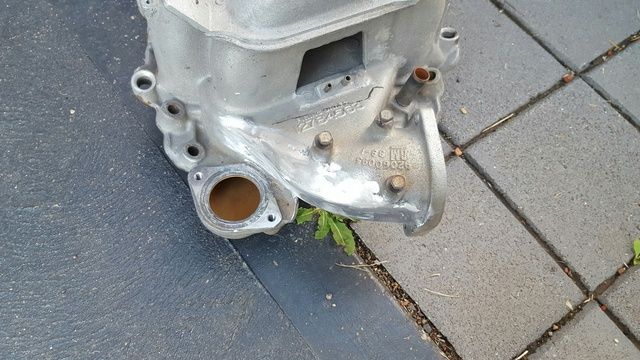
Then welded the floor back in. Which was tough due to old oil impregnated cast alloy.
Valley breather with an old aero-fail fitting (they’re seriously shit).
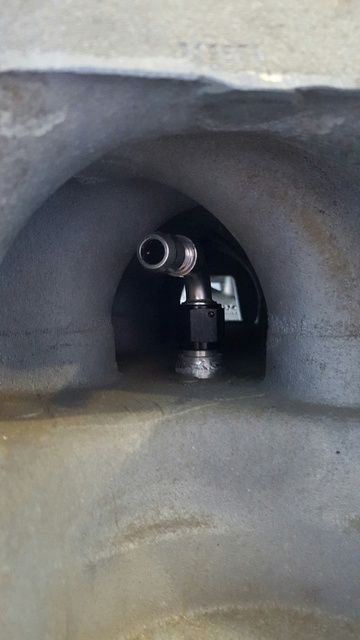
With the covers on, none the wiser.
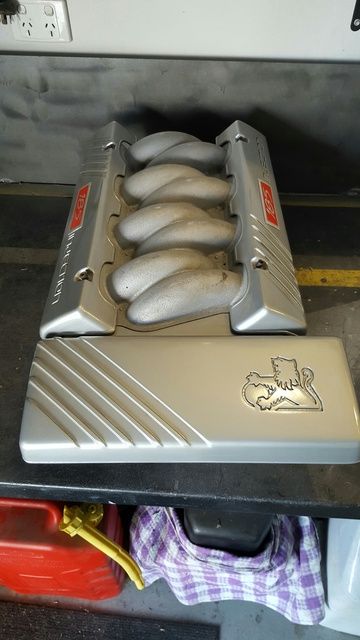
I will get it ceramic coated black after machining the gasket faces to ensure they’re flat as I put a lot of heat into it.
April 19, 2017 at 12:39 pm #22454Not sure if you watch the Sloppy Mechanics channel, but Matt is running a dead stock 4L80e with a Transgo shift kit the only mod with 1075rwhp.
He claims to have never used anything other than stock OEM high km trans with a shift kit on any of his builds (multiple turbo LS combos over 700rwhp).
March 21, 2017 at 4:11 pm #22099An easy google search found the book: “The Step-by-Step Guide to Enginer Blueprinting” by Rick Voegelin
Might be helpful for more in-depth discussion on general engine principles, rather than specifically the HV8. Still a good read (I remember learning about piston gas ports on this when it came out, for example).
March 21, 2017 at 10:13 am #22096There’s also an engine blueprinting book I bought a few years back that has good general information in it. I’ll try and get the name of it at home.
March 21, 2017 at 10:12 am #22095I’ve got a VN 63L tank at home in really good shape (no marks), probably doesn’t help you because I don’t know of the differences in the floor and it’s also in Melbourne!
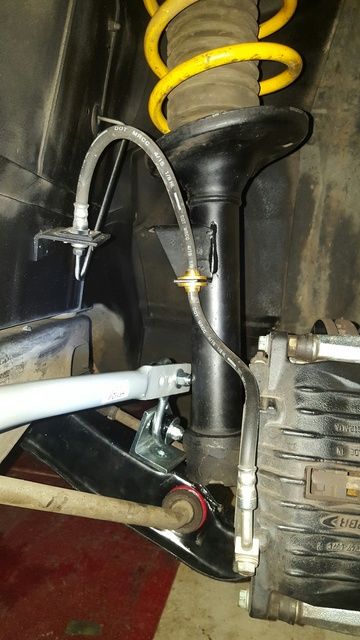
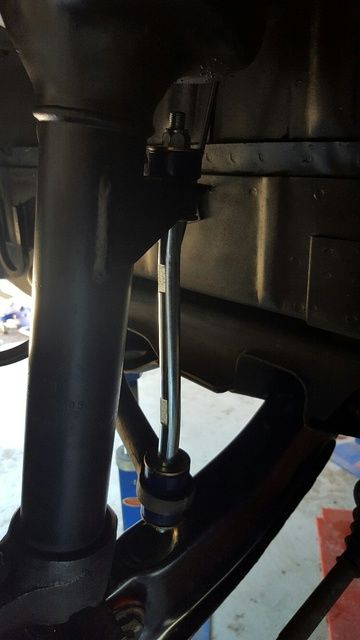
March 14, 2017 at 9:44 am #22033Fitted the sway bar Friday night, ran it up through the hills towards Yea Saturday morning.
I should say that I changed the link bush arrangement after this photo as I stuffed it up.
Obvious first impression – my tyres a a bit average. They at least let you know before they’re about to let go, but they’ll need to be replaced soon. Stock steering wheel sucks, both in size and position. Factory seats are comfy but don’t do much in the way of support.
Also it is woefully under powered and the auto ruins the fun. (Who would’ve thought?)
Improve one area to find the weakness in others.
-
This reply was modified 7 years, 2 months ago by
![Profile photo of [TUFFVQ]](http://www.commodoresplus.com.au/wp-content/uploads/avatars/86/415b3c931a93cef3c2bc51efc23b2e0a-bpthumb.jpg) [TUFFVQ].
[TUFFVQ].
March 10, 2017 at 3:49 pm #22002Replacement swaybar showed up today.
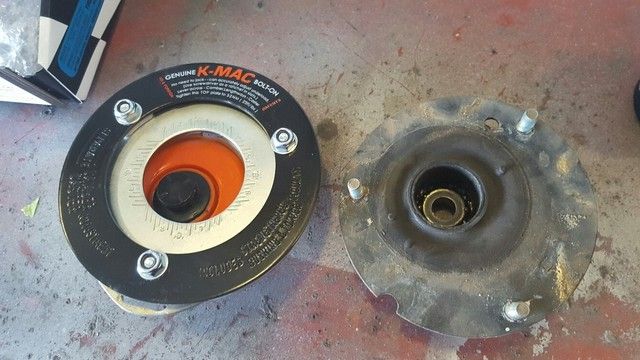
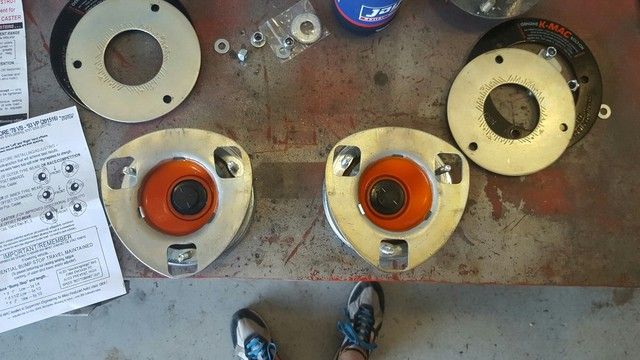
March 9, 2017 at 10:41 am #21979Oooook,
Thanks to Kroozer for supplying the strut tops (and the free stuff).
After fighting with the courier for the delivery of the Whiteline swaybar, it finally arrived on Tuesday Night – Except I don’t own a HD/HR Holden so obviously it wouldn’t fit! So now have to try and get another one (thanks to the supplier for sending completely the wrong item).
I’m sick of it being on stands so I decided to put everything back together with the stock swaybar. My dog thought the stock rubber link pin bushes looked tasty and stole two, so I just picked up a HD Link Pin replacement kit.
The K-Mac strut tops are a really nice thing, even if the instructions suck. One thing I didn’t account for originally was that they are about 15mm taller than the tops that came out of the car. I think this is a combination of sag in the stock items and the additional plates on the new ones. I took 3/4 of a coil off the springs to compensate, so it now sits at the same height as before. Will drop marginally following the engine conversion so it should be sweet.
Put it all back together. The radius rod and K-Frame bush are still standard. The V8 K-frame I have already has Nolathane bushes in it so no point changing it now. I might grab some adjustable radius rods also.
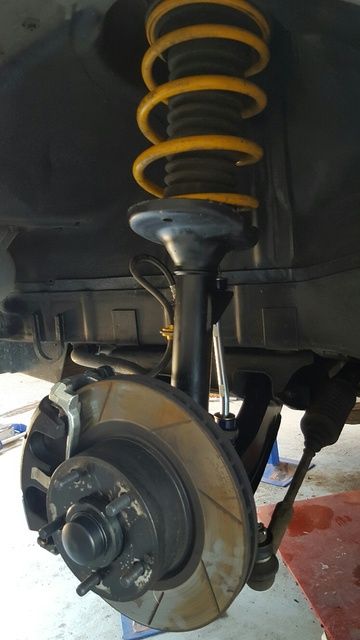
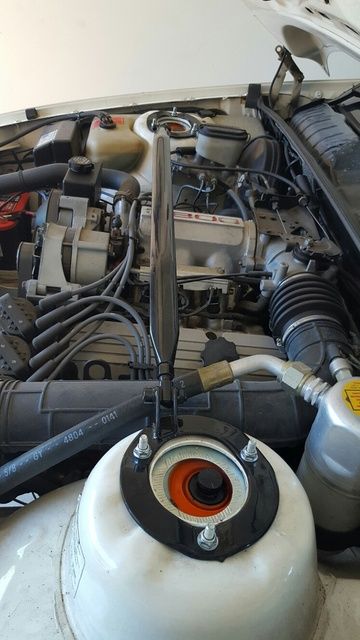
I also fitted a powder coated strut brace. Please excuse the poor excuse for an engine there.
I set the initial alignment fairly aggressively.
(The irony being I took a photo from the same spot with my VQ on the rear suspension noting how much camber it had and how I wanted to get rid of it, then spent weeks fabricating new pickups to eliminate it!)
Overall the car drives a LOT better now, even with some more changes to be made and a proper alignment required. The new shocks (obviously) has greatly improved ride quality and the car really wants to turn in and rotate now. Haven’t had the chance to give it a really good test but all I can say is that the automatic now really takes the fun out of it :p
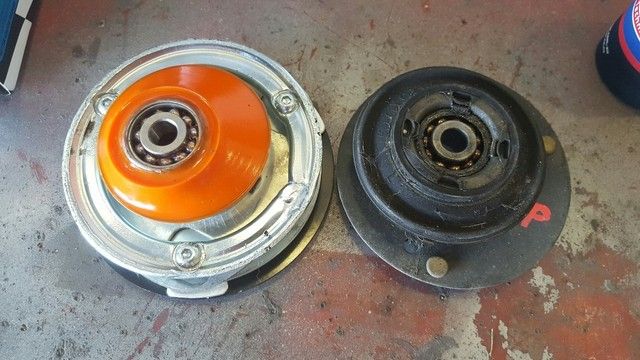
February 27, 2017 at 3:38 pm #21856Your original are “wet” struts thus the oil and the seal with the nut. The replacements are gas struts so no oil is required
Thanks mate – figured that out when I was less tired and looked at it again!
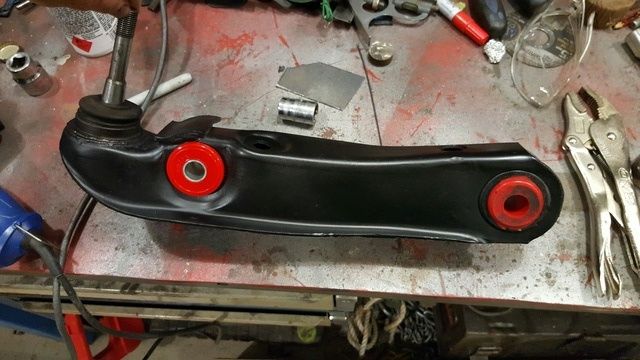
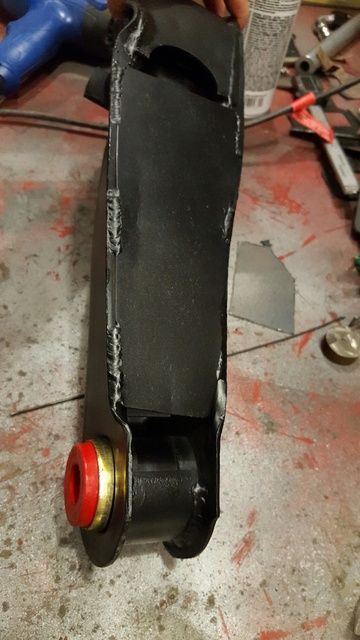
The primary reason I plated the front arms is for removing and replacing the bushes – In the past I’ve had issues where the arm effectively crushes when pressed to get the bush out. So instead of making a removable spacer for the press work, i just welded said spacer in!
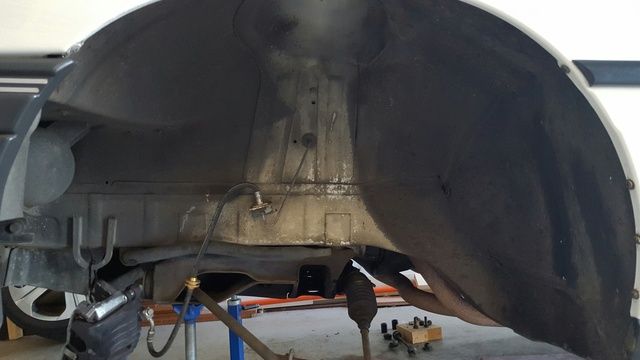
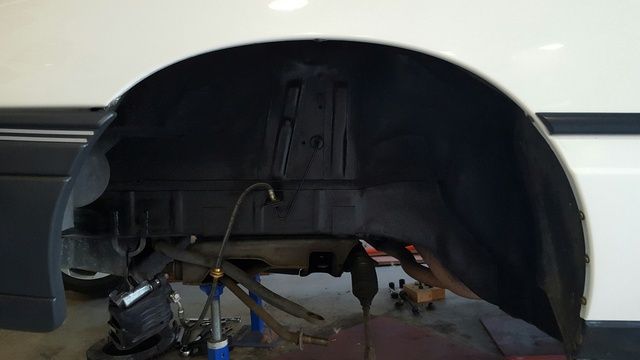
Finished the other side in terms of painting the wheel arches, installed the shocks and cleaned them up also. Just waiting on the delivery of the strut tops and swaybar before slapping it all back in.
February 24, 2017 at 2:30 pm #21804Talking to myself here. Other side done. I think it looks better than the first one. Also cleaned up the passenger side inner guard. Strut boots and bump stops arrived, Whiteline blade adjustable sway bar arrived today but then the courier took it back because I wasn’t home. Should arrive Monday (again). K-Mac strut tops should be here Tuesday. Chipping away.
 February 20, 2017 at 10:54 am #21757
In my usual approach of jumping between jobs before they’re finished, I started on the front suspension yesterday.
Only did the passenger side but from what I learnt the driver’s side should be much quicker.
I welded in a piece of plate to tie the two sides of the control arm together. Probably not necessary but what the hey. I also put in a piece of steam pipe to brace the inner bushing area, mainly so that I could press the bush out without deforming the arm.
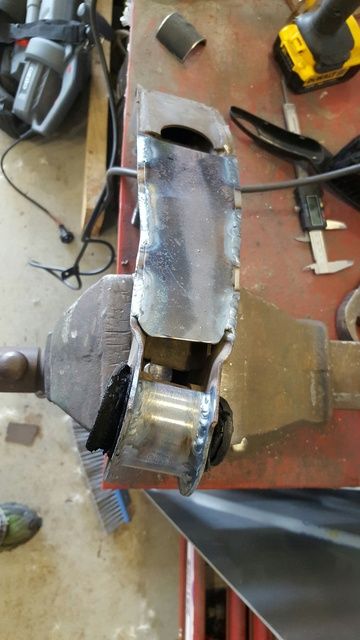
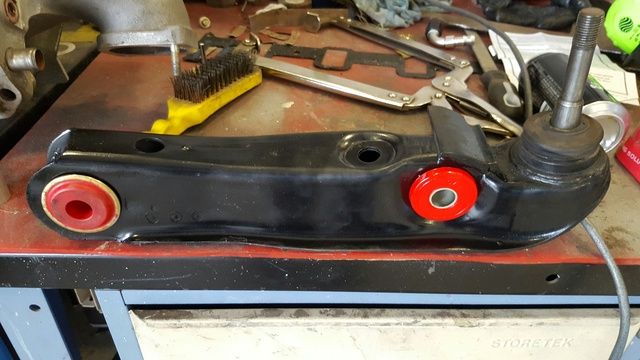
Cleaned up a bit, quick splash of paint and new bushes in (crush spacer missing on inner bush). Ball joints are only about 6,000km old so didn’t touch them.
Pulled out the strut and removed the stock shock absorber, which was (unsurprisingly) toast. I’ve ordered the K-Mac strut tops through Kroozer, but also need to pickup replacement bump stops and dust boots. The one’s already on there are in good shape but it makes sense to just replace them while they’re off. Also need to order a new front sway bar.
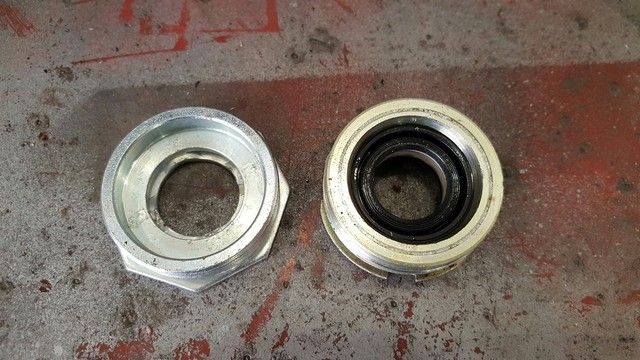
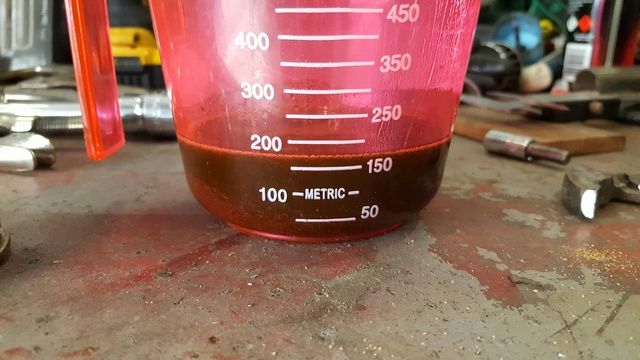
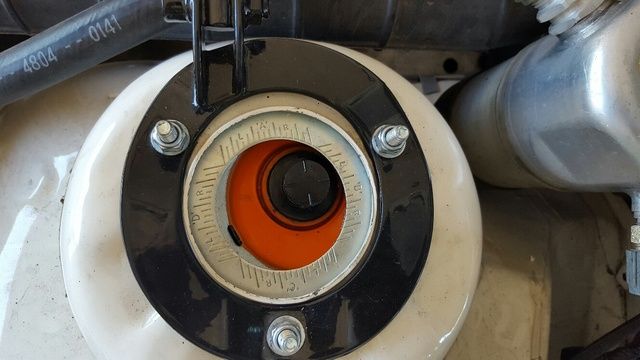
I noted that the old oil within the strut was less than half what was recommended in the GM Service Manual.
Can anyone advise whether the oil needs to be added to the Replacement Monroe GT strut? (Shock horror – regular street car uses regular shocks, not $1k Bilsteins :P)
They look to be a sealed unit as opposed to the factory type which use a seal in the locking nut as shown in the photo. Replacement doesn’t have a provision for the seal so it leads me to believe I don’t need to. Just checking.
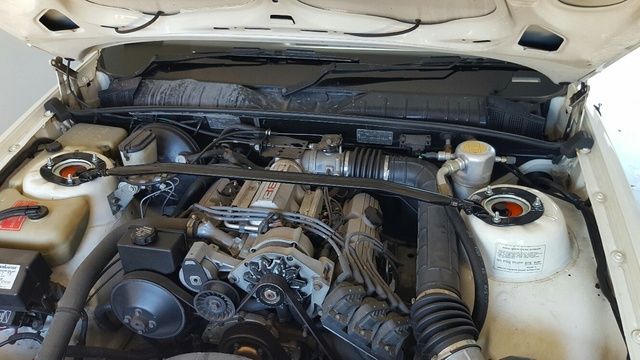
February 14, 2017 at 3:46 pm #217233.45 diff gears arrived on Friday. Will source a Trutrak also then shoot it off to the diff builder.
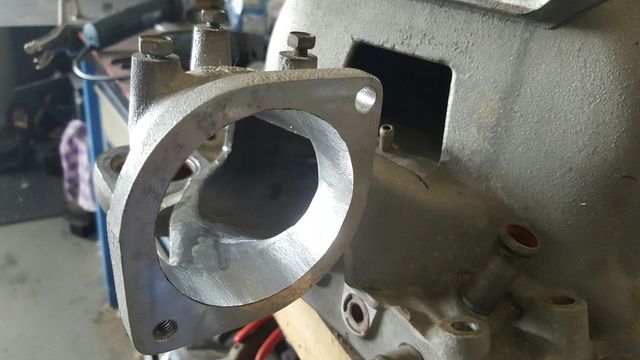
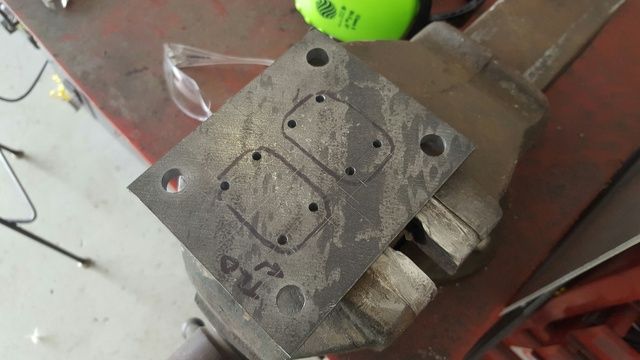
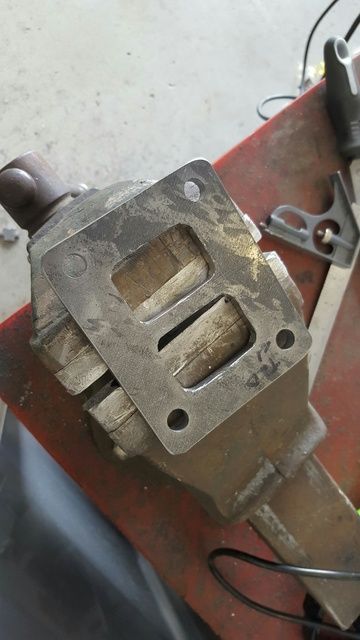
Almost done with the lower runners of the manifold. Awaiting some round tube stock to weld in a valley breather, finish the runner inlet smoothing then hold off finishing it until I decide on a Starr Throttle neck or not.
I also made a flange to suit the 4088. Had the plat already (for free) so saved about $80 plus post for buying one. Took a while though :p
 February 9, 2017 at 10:12 am #21695
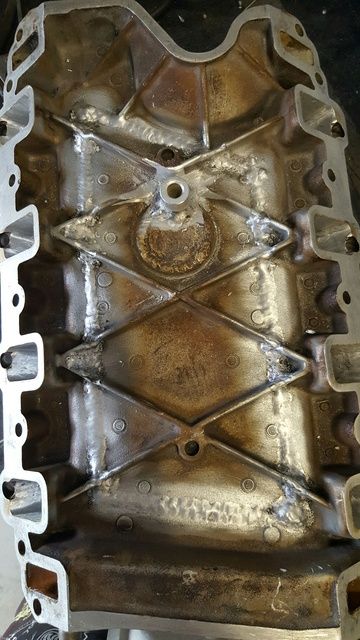
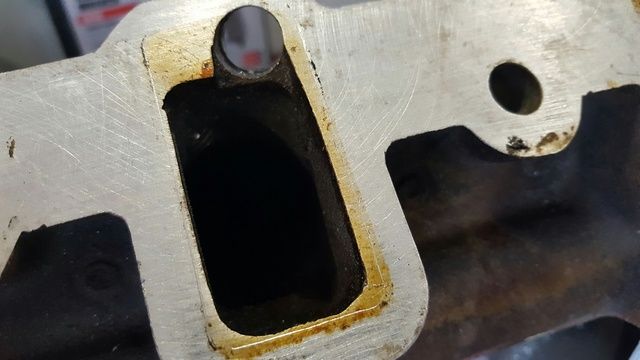
Halfway done with the manifold to head transitions.
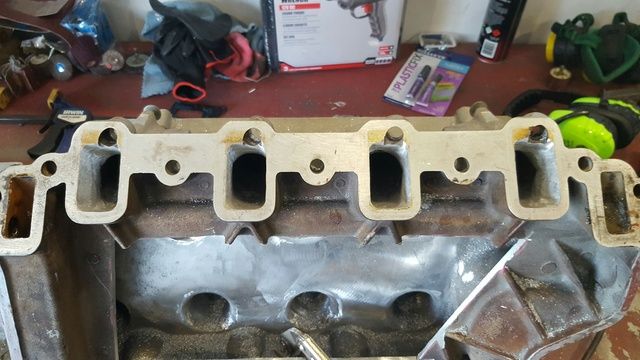
Probably half of the swarf from 4 x ports

Stock for comparison.
Also ordered some thick wall aluminium tube stock to make my valley breather, and contemplating a Starr performance weld-on neck and 90mm TB. Not sure yet…
February 3, 2017 at 9:11 pm #21646OK so this week’s progress has been pretty average due to work.
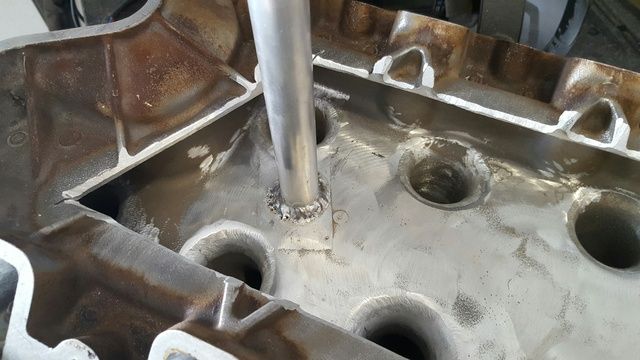
What I have had time to do is try and figure out a hone for the curved runners. And I’ve figured out three different ways that won’t work…
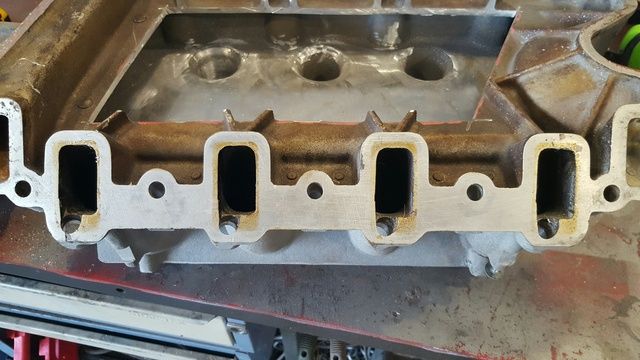
Anyway, started port matching the manifold to the head runners. A very long way to go. But at least I’ve both improved
– The runner to head transition (round to square)
– The MCSA of the runner and
– The proportion of runner wall length to flow area at the rectangular cross section. (Good for boundary layer effects.)All of which means pretty much jack under boosted conditions. Which this will eventually be….
Unfinished Port vs as-cast.
Stock vs my heads
 January 23, 2017 at 1:33 pm #21526
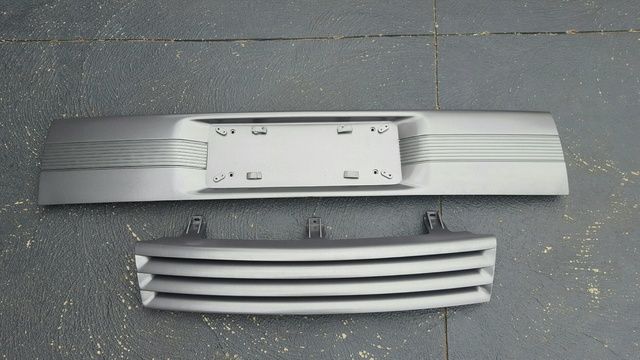
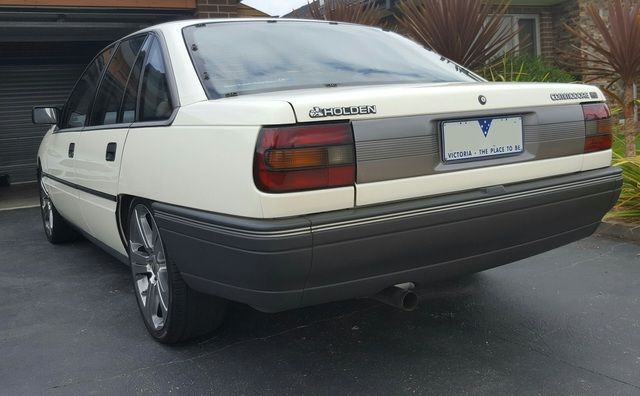
Not a big change this weekend but one more thing off the list. After trying a couple of times to get the paint right, I eventually found a Nissan touch up paint that matched what I wanted for the grille and garnish. Both are now de-badged, with a replacement 5.0 badge to go on when the engine is converted. I played around with the mounting brackets and got the garnish to mount up much better than it was before.
Also removed the rear louvre as the look of it kind of wore off. I still have all the clips and everything so easy to put back on if required. The photos show the clips still on but I removed them later that day.
That pretty much wraps up the wore externally that I wanted to do, except for maybe a couple of very minor things here and there. Looks like I’ve picked up some 3.45 gears for it also. Next stop, suspension.
 January 18, 2017 at 4:09 pm #21471
So u removed the hard line for the flow and return?
Nope – still factory hardlines, just replaced the soft lines.
I’ve got -6 alloy line and fittings for that that if the time comes.
January 16, 2017 at 11:08 am #21439Was this a car that the guy pulled the LS engine in it out to put into his VN race car? (“Thelightyear” username)
January 16, 2017 at 11:06 am #21438Dale. Do u mind listing the hoses you used. I need to do this for mine. Did u replace fuel hose front to back.
Hey mate.
I used 5/8″ Fuel Hose (E85 safe) from Enzed for the tank overflow line. I couldn’t get this from regular auto parts stores. Needed about 600mm of hose length. I also replaced all of the breather tubes, as well as the charcoal canister line to the filler neck. Used 3/16″ hose for this. Also replaced the tank pressure and return hoses with E85 safe 5/16″ rubber line (Aeroflow). The charcoal canister line is standard 5/16″ hardline, but the factory basically have the 3/16″ hose stuffed into the 5/16″ hose as a conversion of hose size to suit the filler neck. I used a 3/16″ to 5/16″ adaptor instead.
Engine bay fuel lines will be replaced when I pull the engine.
-
This reply was modified 7 years, 2 months ago by
-
AuthorPosts


