
Home›Forums›Members’ Builds and Rides›VN – VP – VR – VS›VS GTS/R LS1 replica project
This topic contains 22 replies, has 6 voices, and was last updated by ![]() KAL SPL 9 years ago.
KAL SPL 9 years ago.
-
AuthorPosts
-
February 18, 2015 at 11:59 am #594

KAL SPLParticipant- Orange NSW
- L67 VS Calais FSM Niki VS GTS/R replica
View build HERE
Posts: 64Name: GTS/R
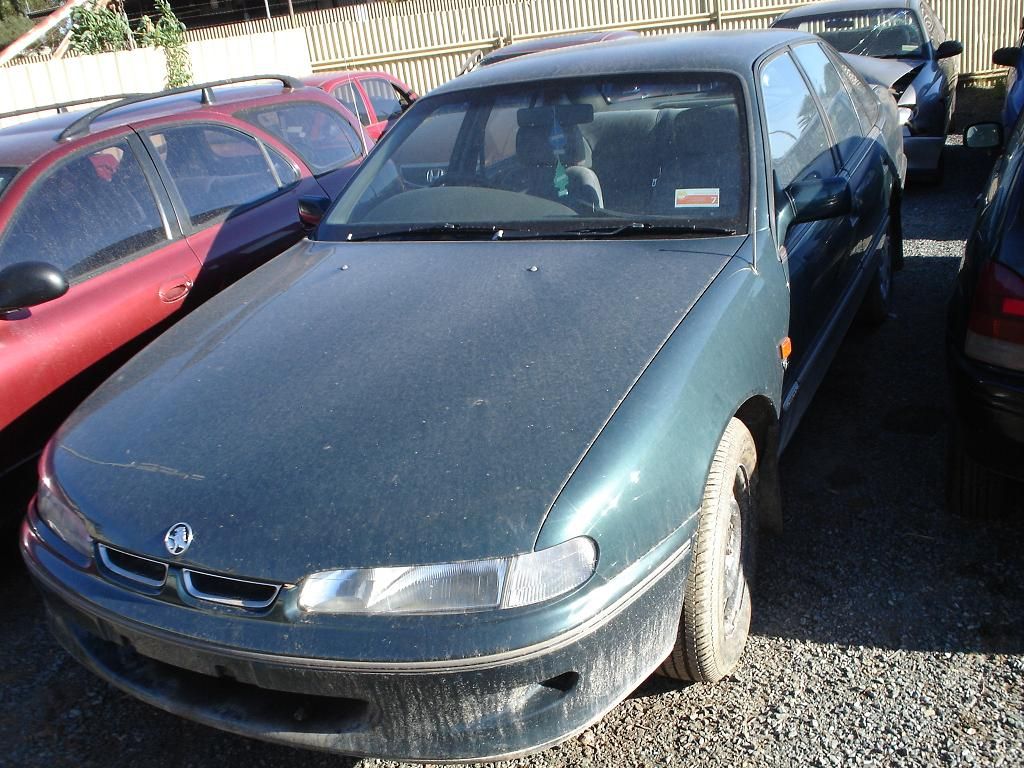
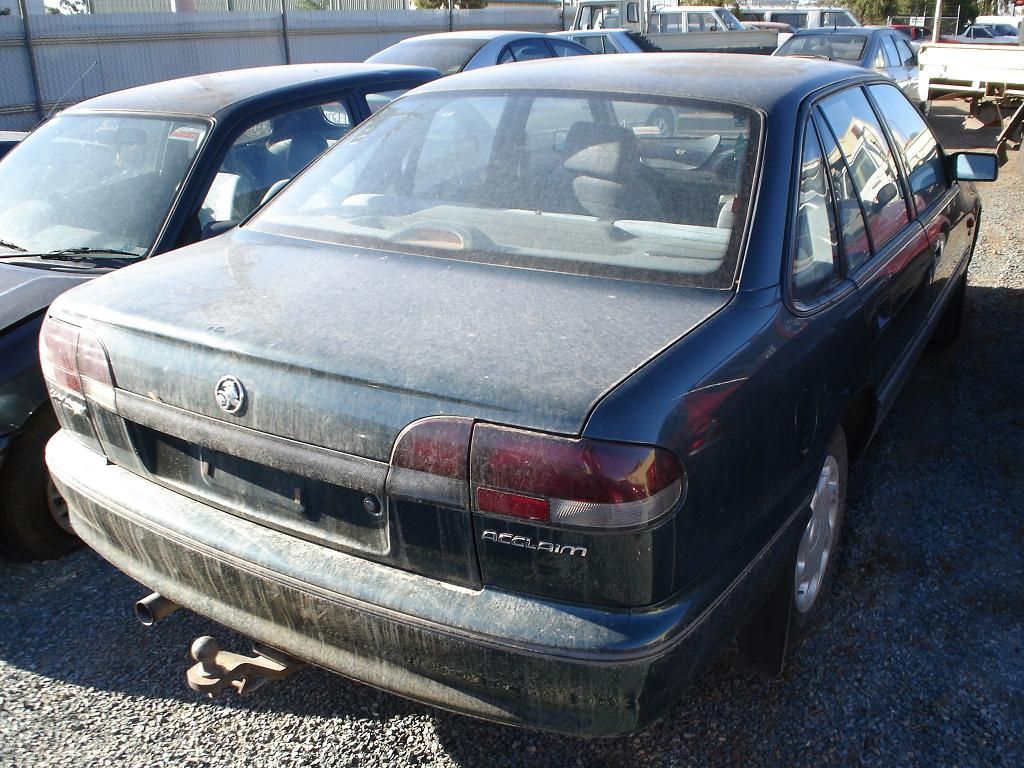
Model: 95 VS Acclaim
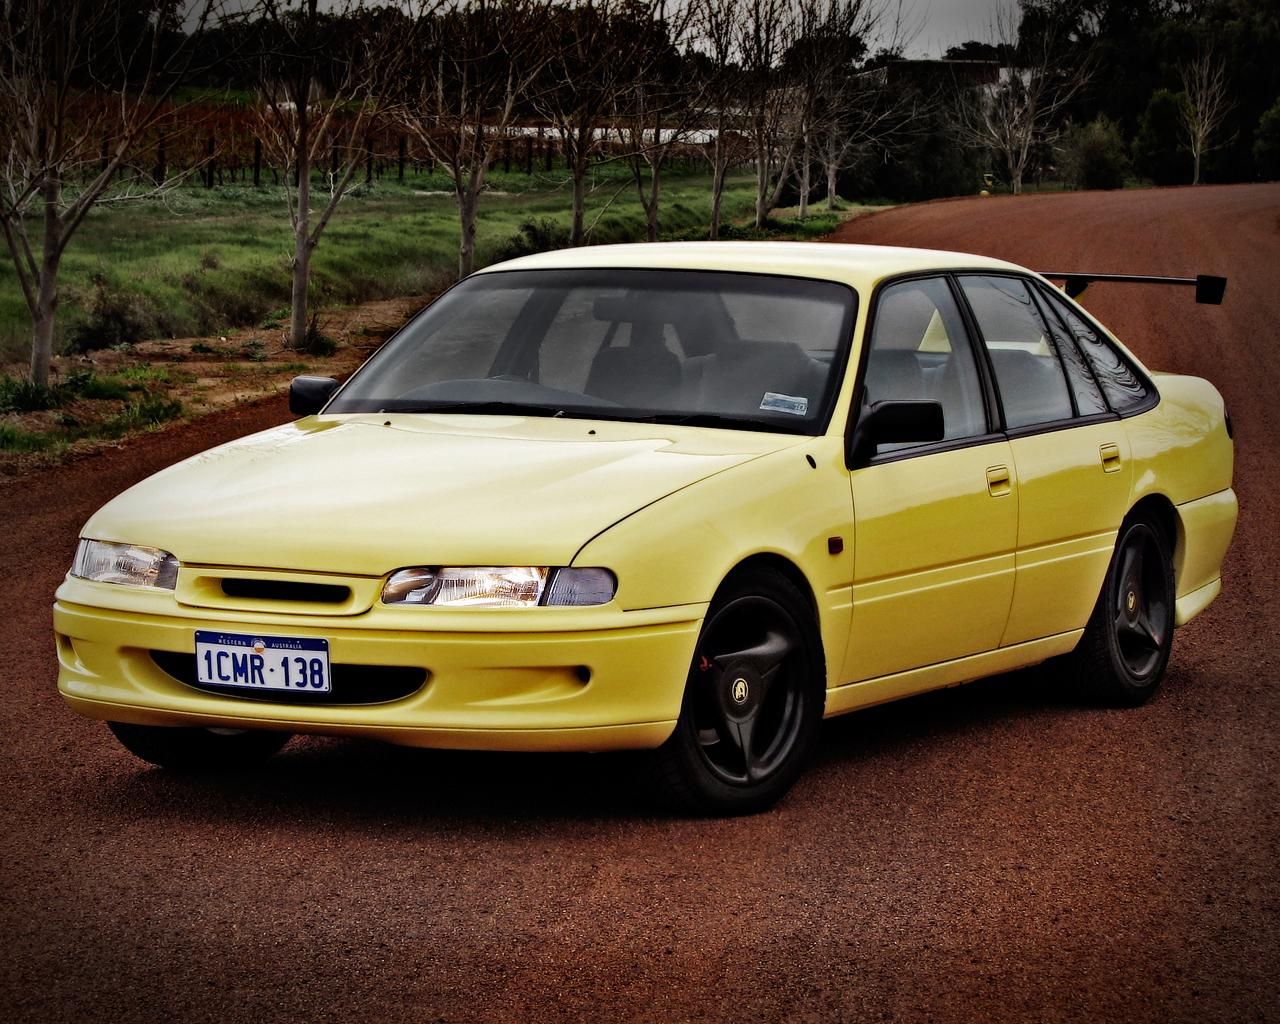
Colour: GTS/R XU3 Yellah Taxi Yellow D131
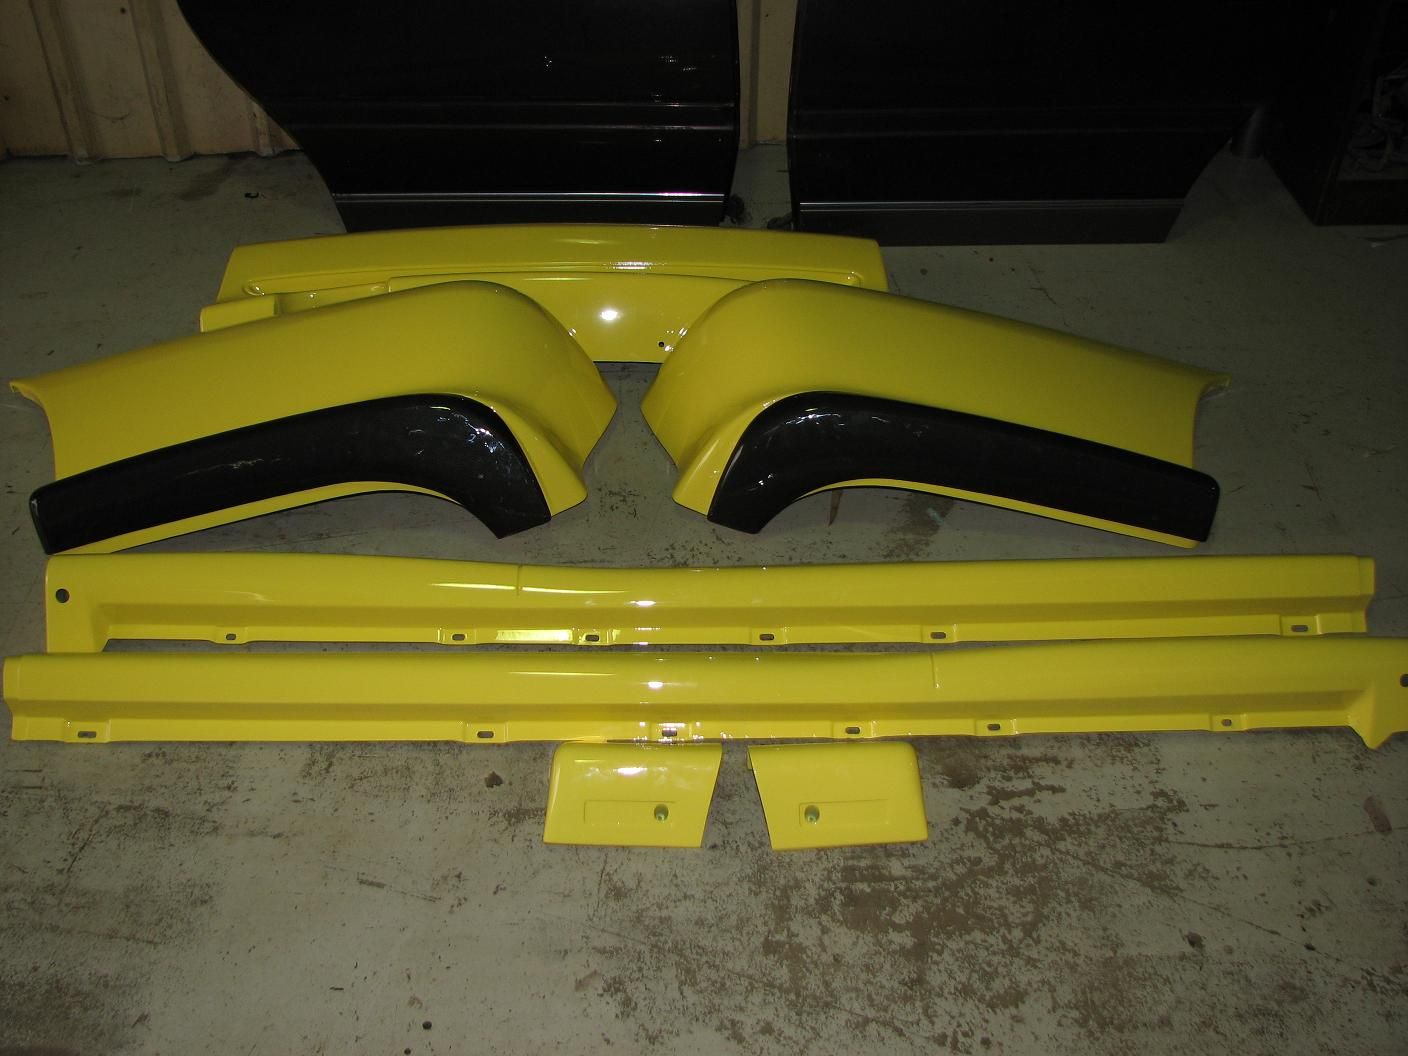
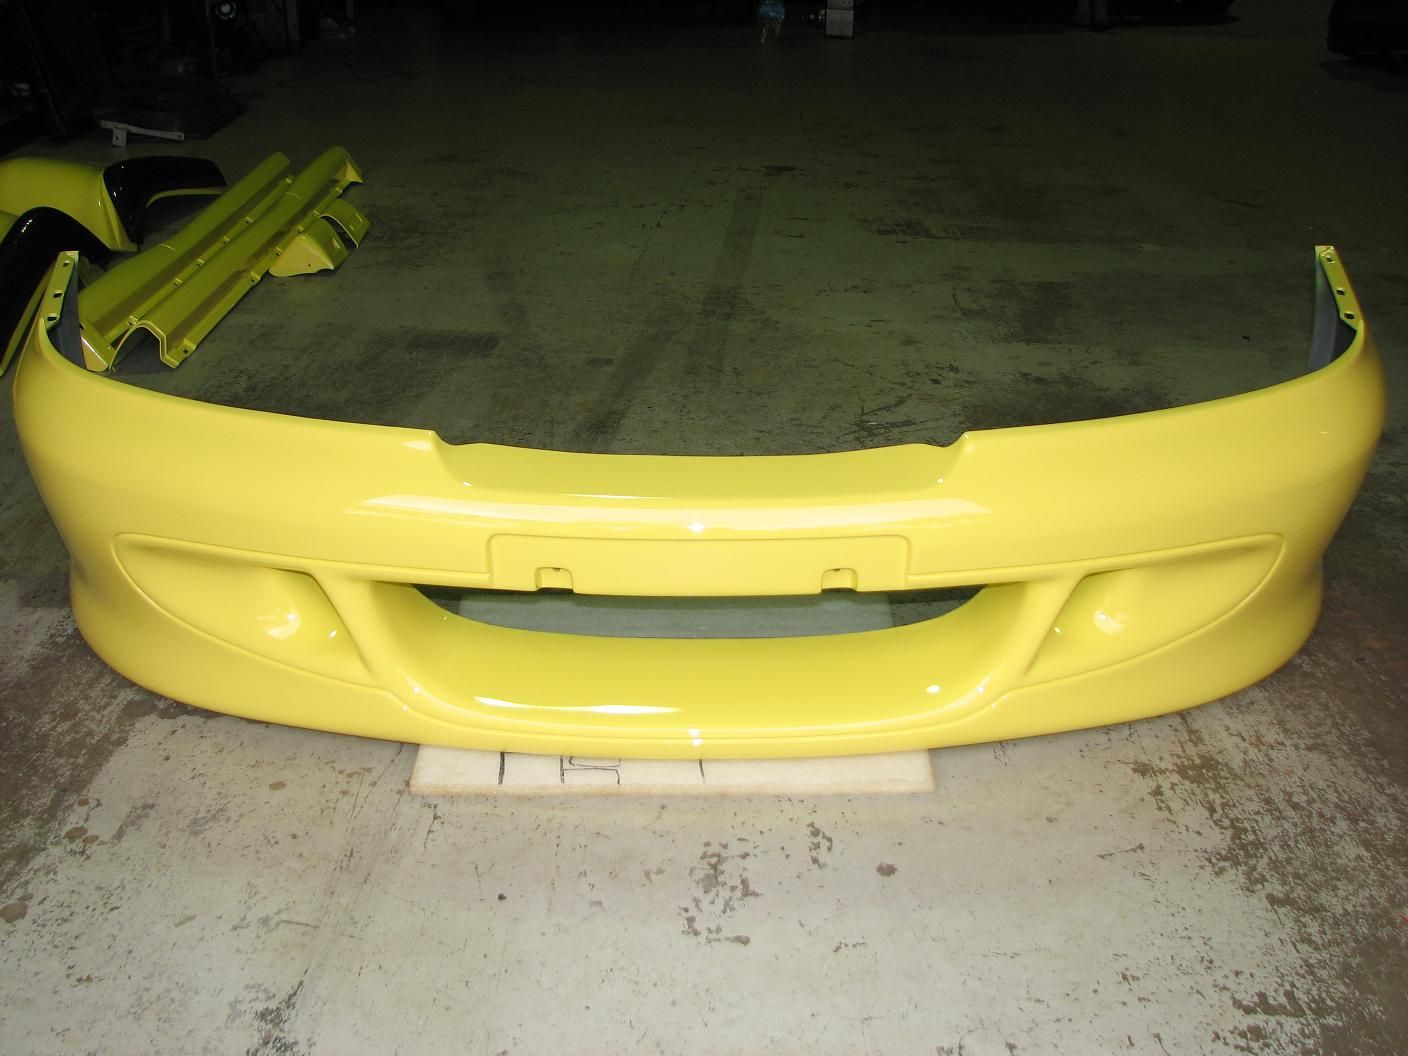
Bodykit: HSV genuine front bumper , side skirts and rear bumper.
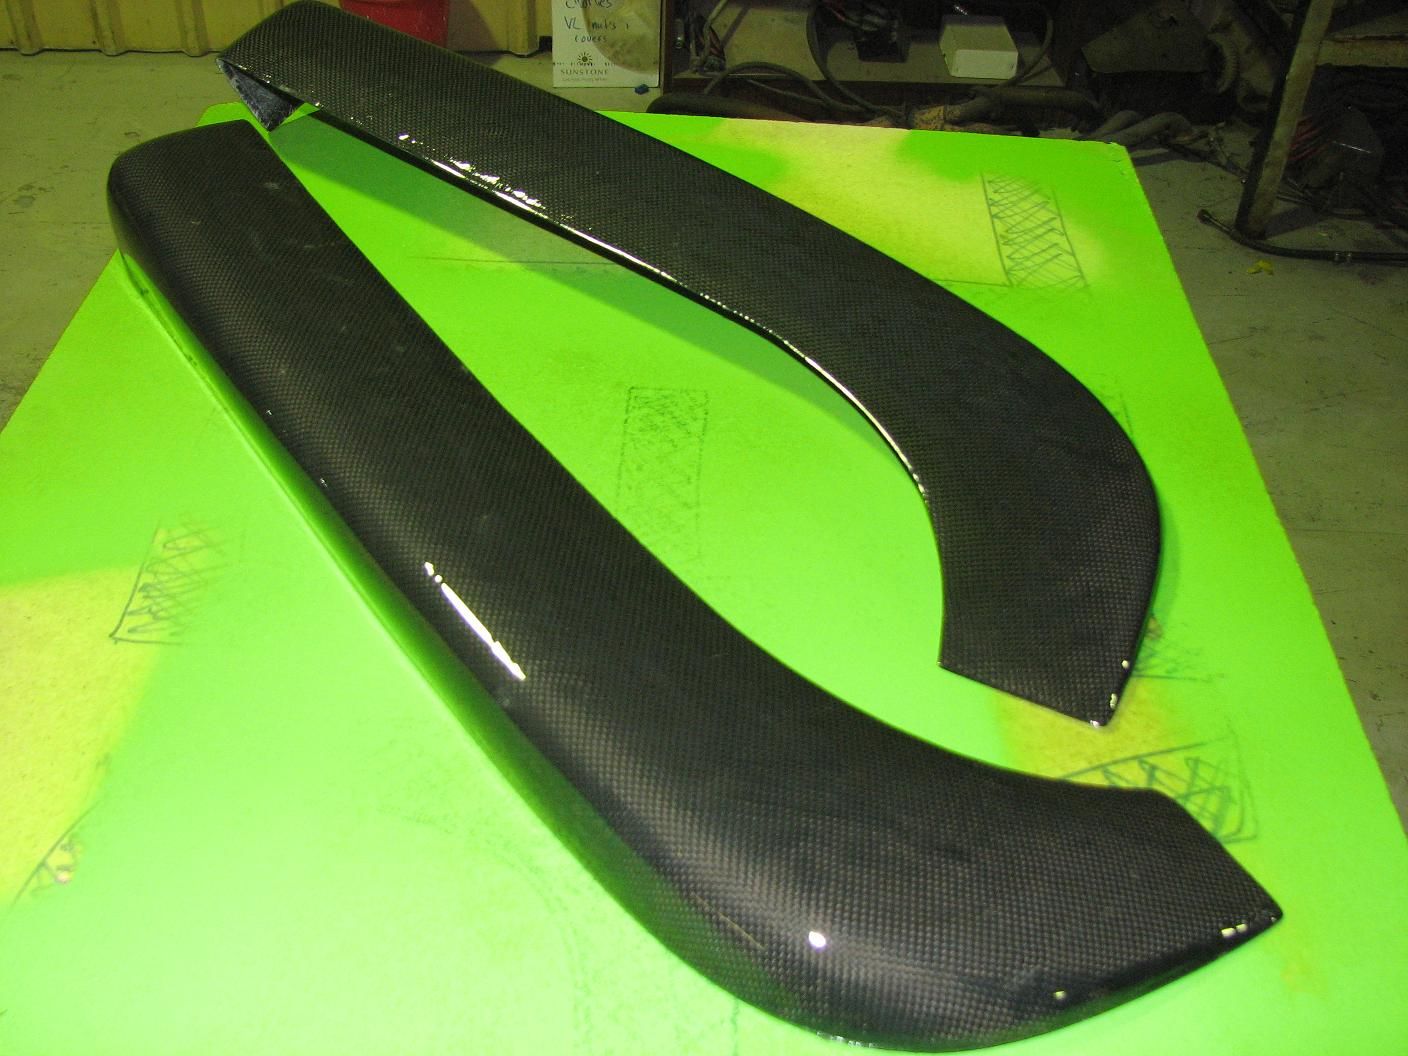
Genuine carbon fiber inserts
Replica wing
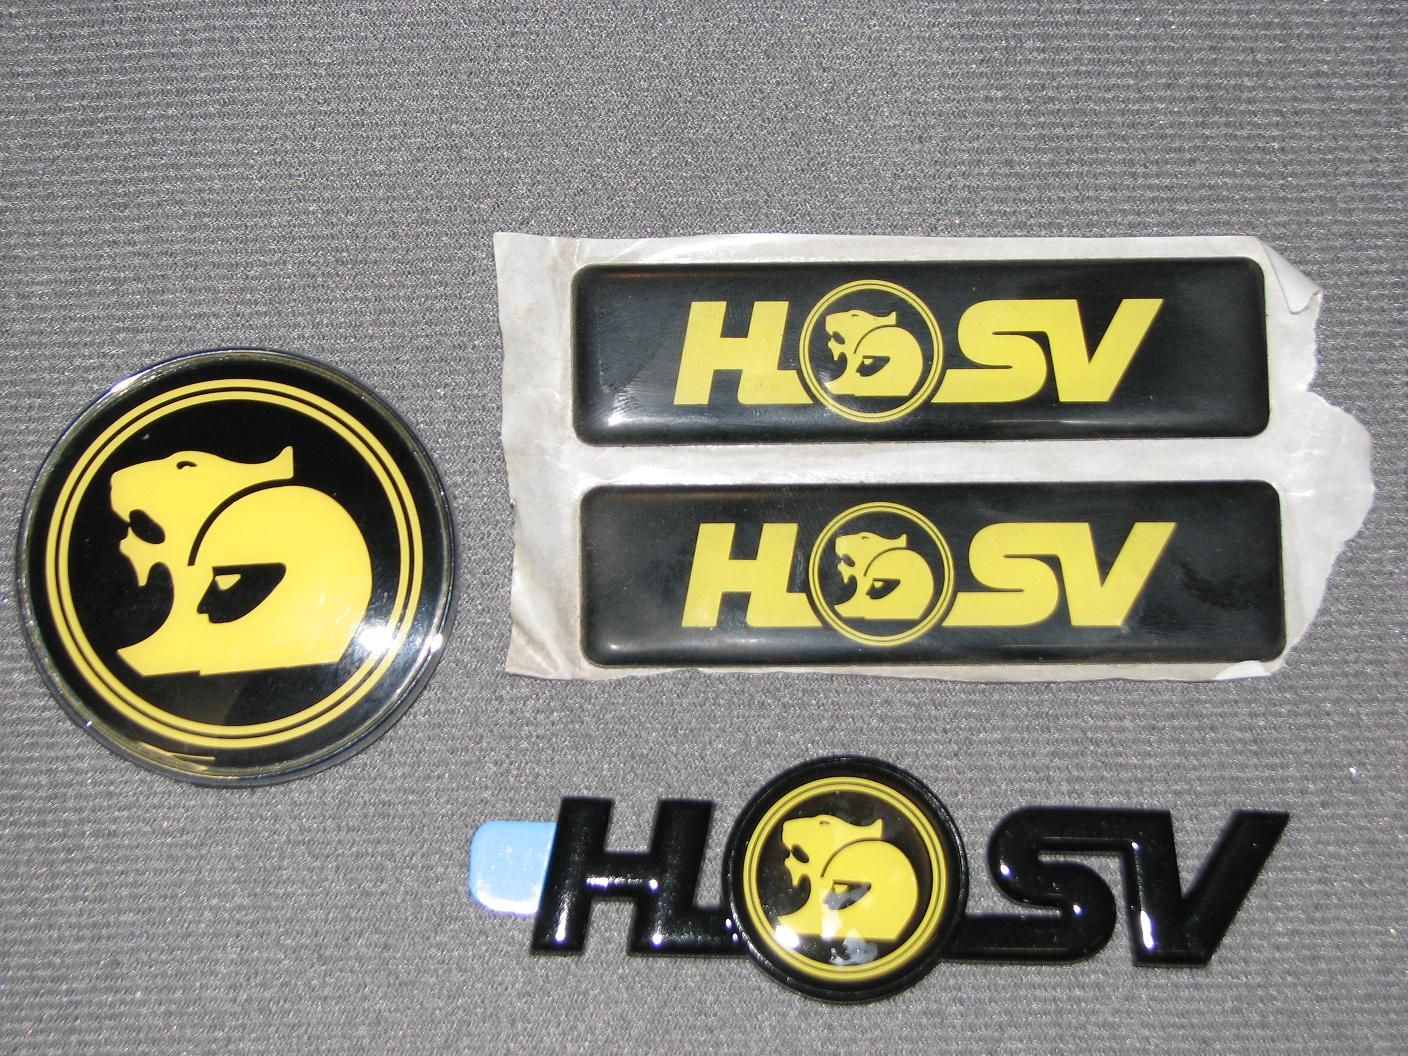
Genuine GTS/R Badges
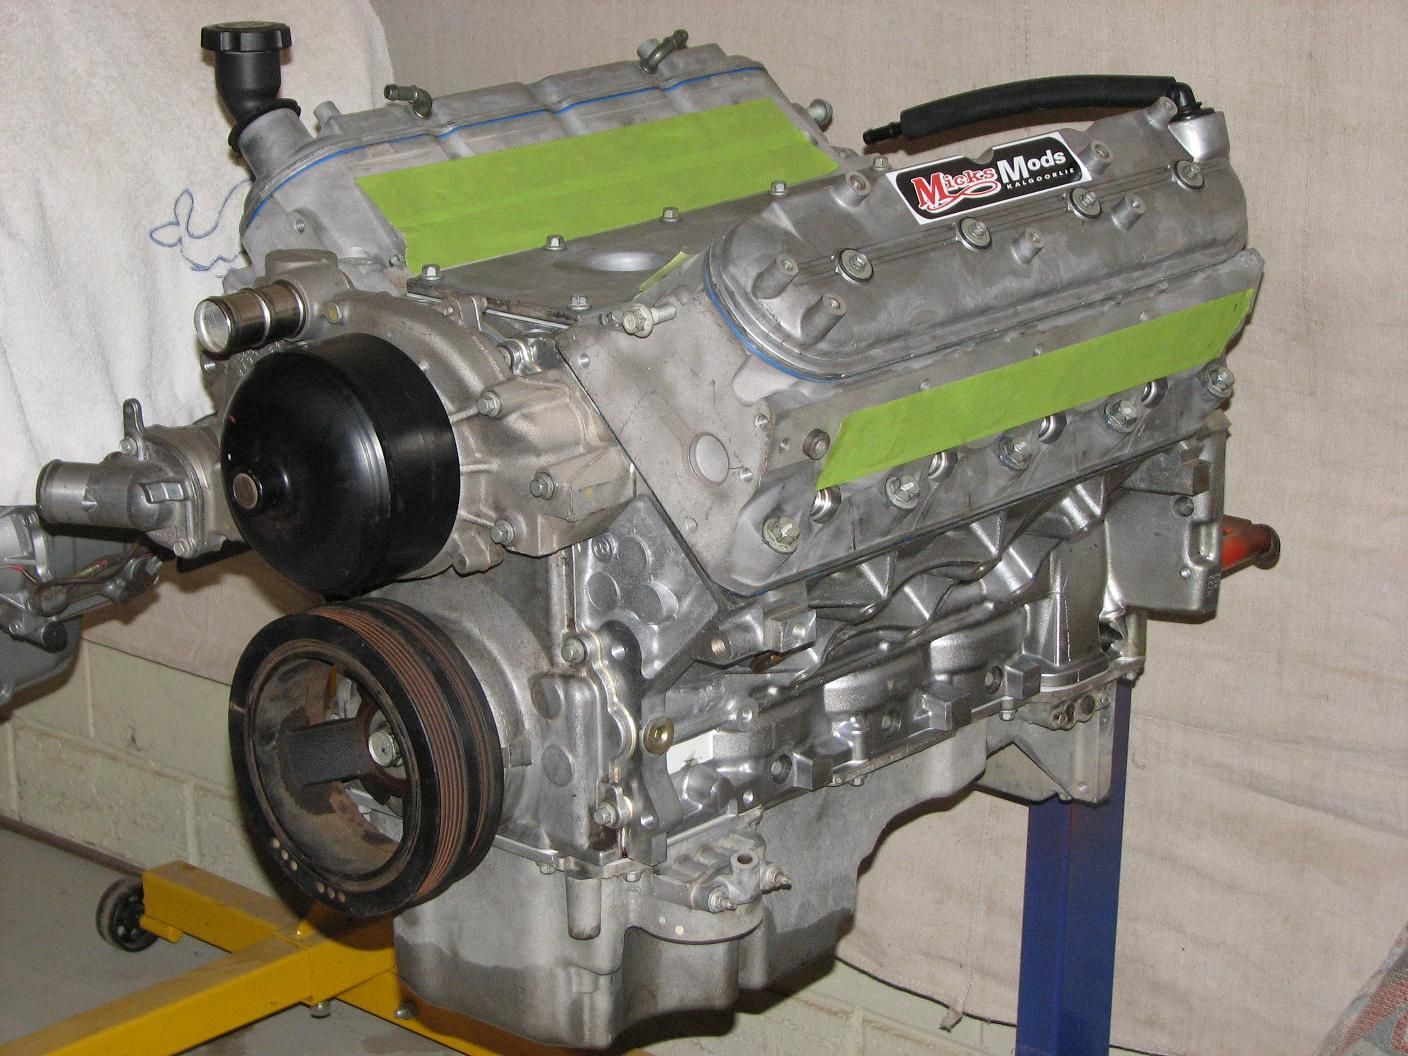
Engine Type: Gen 3 LS1
Engine Mods:
Forged rods and pistons
COMP Cam 224-230 @114
Power: 300rwkw+
Exhaust: Extractors and thats it I hope ! Maybe side pipes.
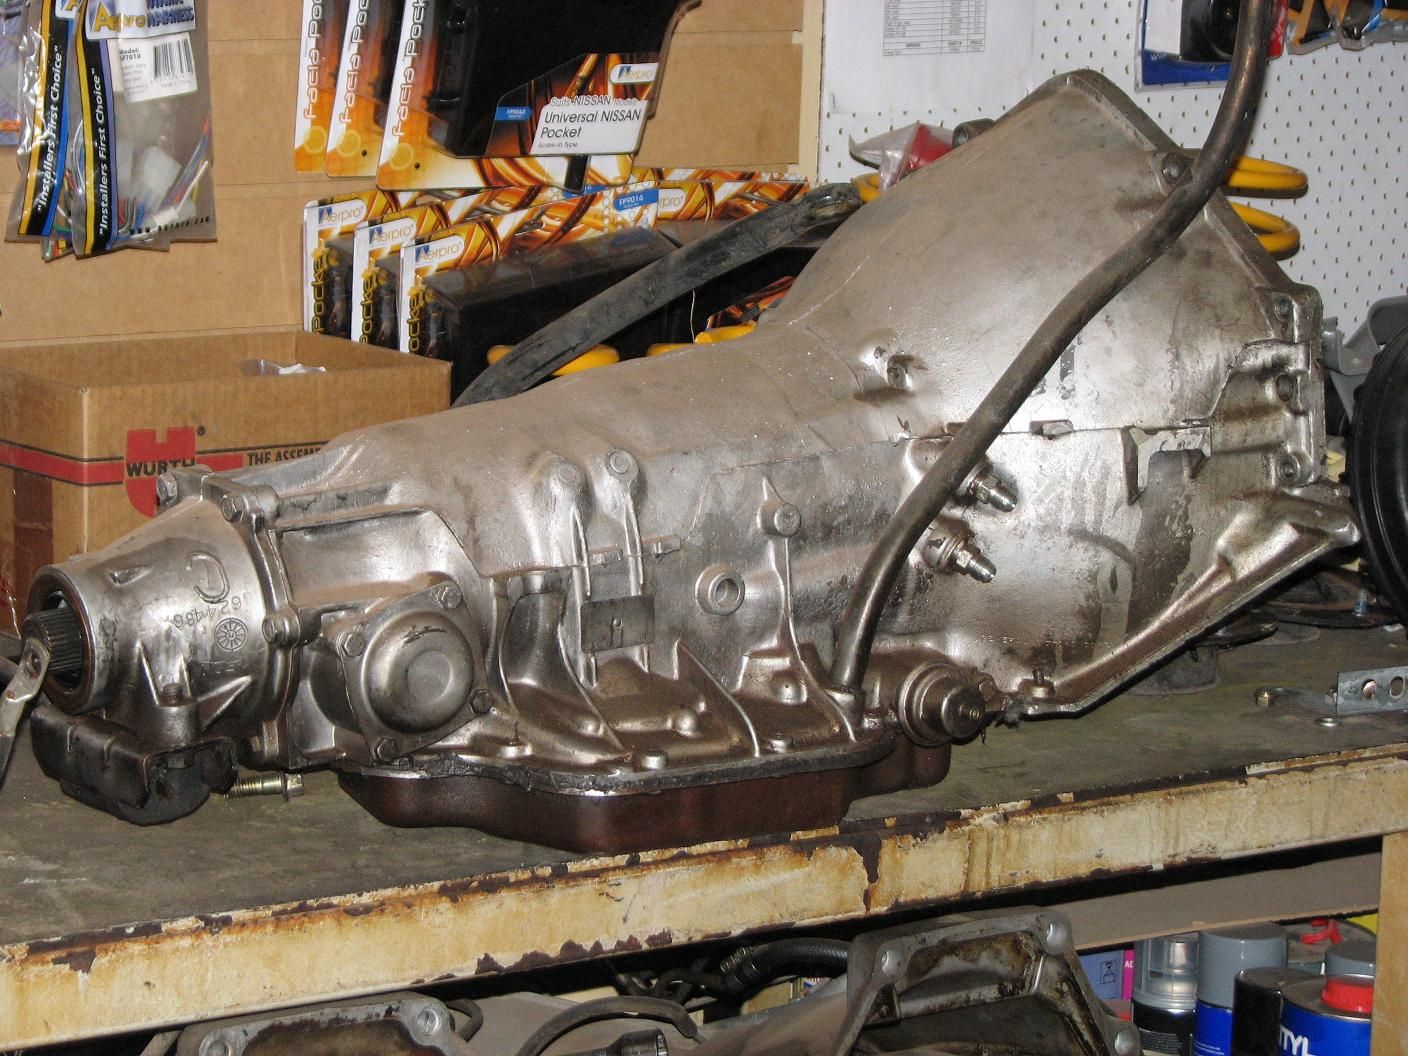
Gearbox: Turbo 400 with hi stall
Diff: 3.45s and mini spool !
Brakes: DBA slotted discs front and rear with ultimate pads.
Suspension: Everything brand new !
FRONT
Monroe short throw struts
King spring SL
Nolathane strut top bearings
Nolathane sway bar bushes
Powder coated Z bar , control arm and K frame
New front hubs
New shockie boots
REAR
Monroe shocks
King springs SL
Nolathane control arm kit
Nolathane diff mount
Nolathane Outer K frame mounts
New hub bearings
Powder coated control arms and K frame
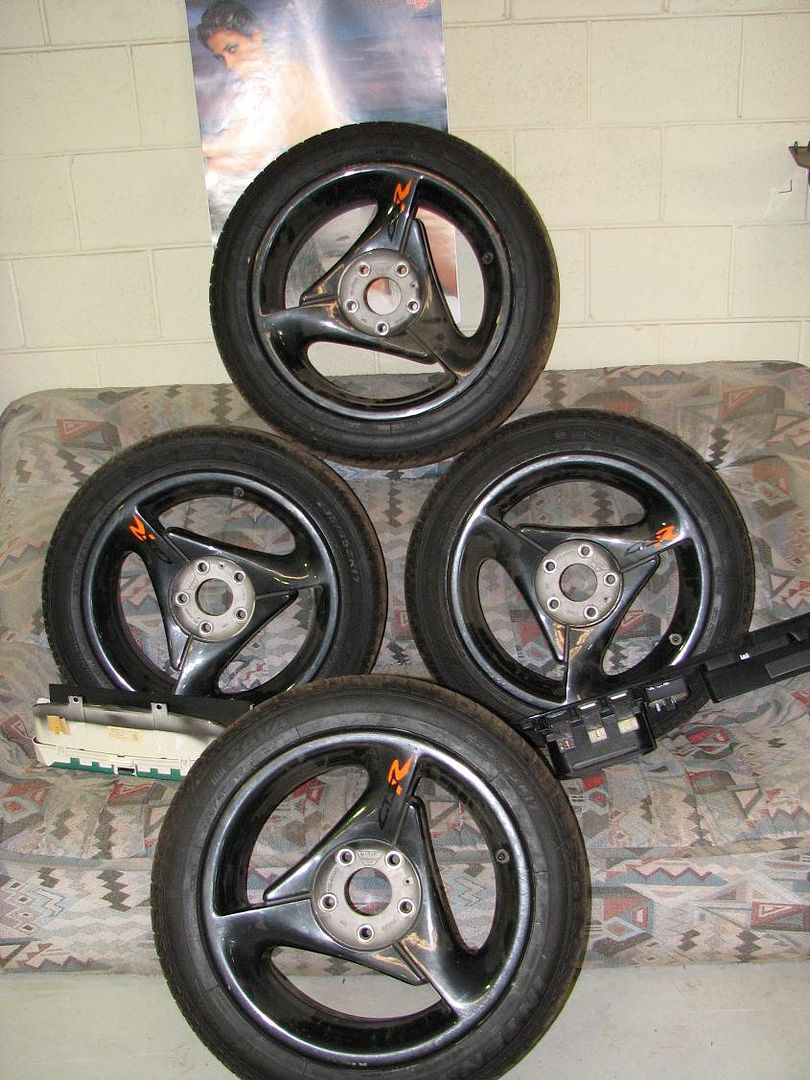
Wheels/Tyres: 6 x Genuine GTS/R rims
Interior:
VS HSV 25i trims
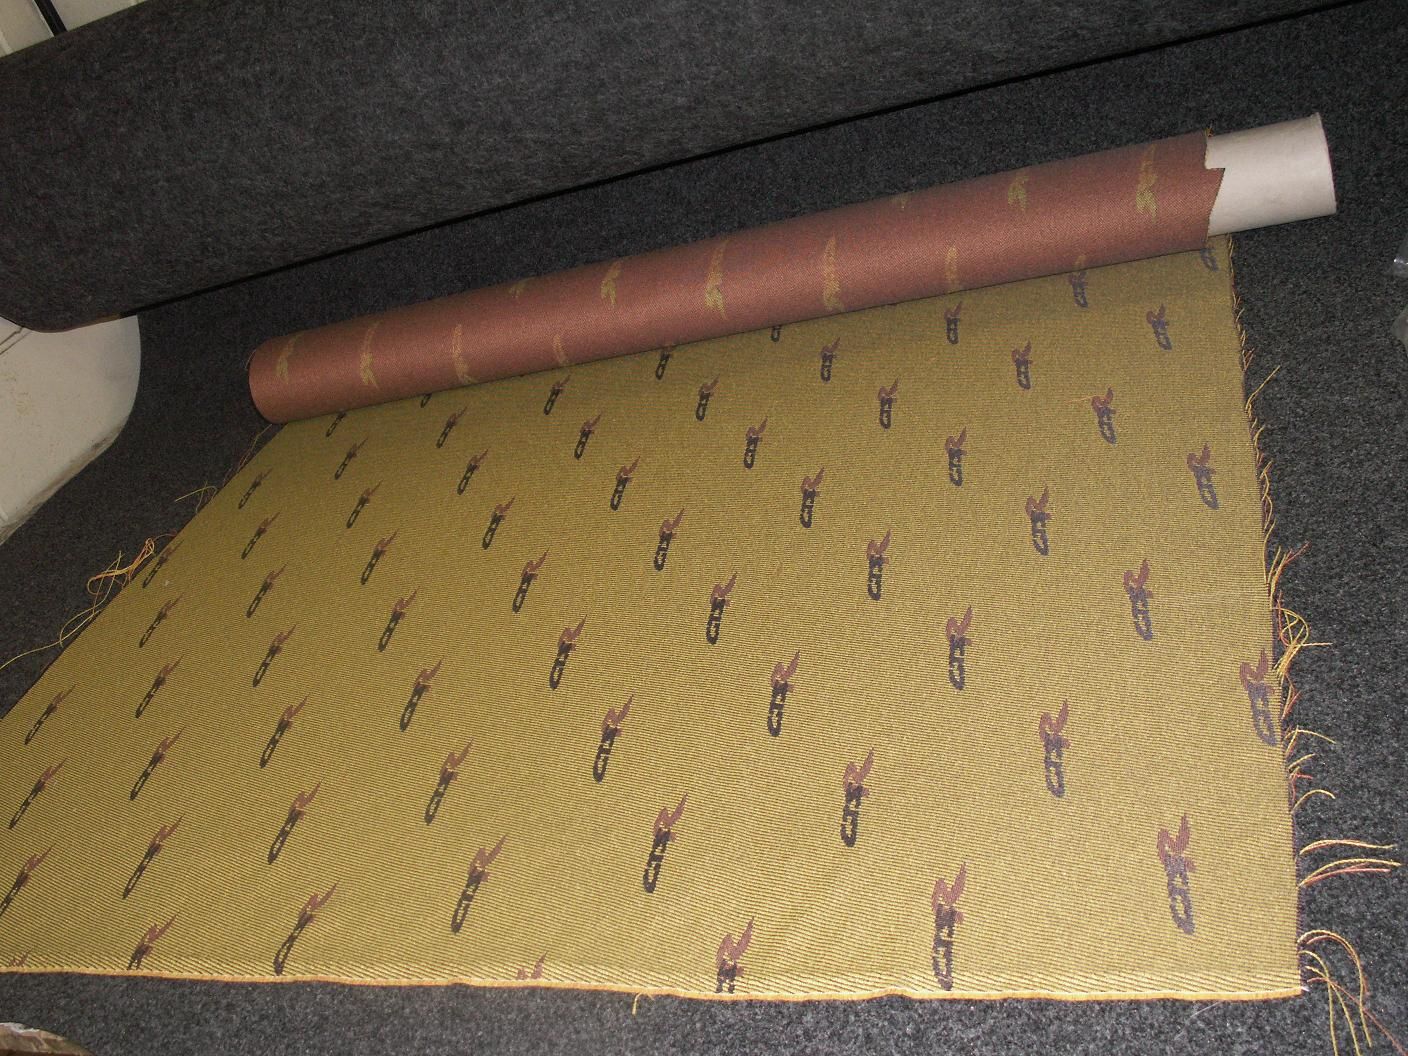
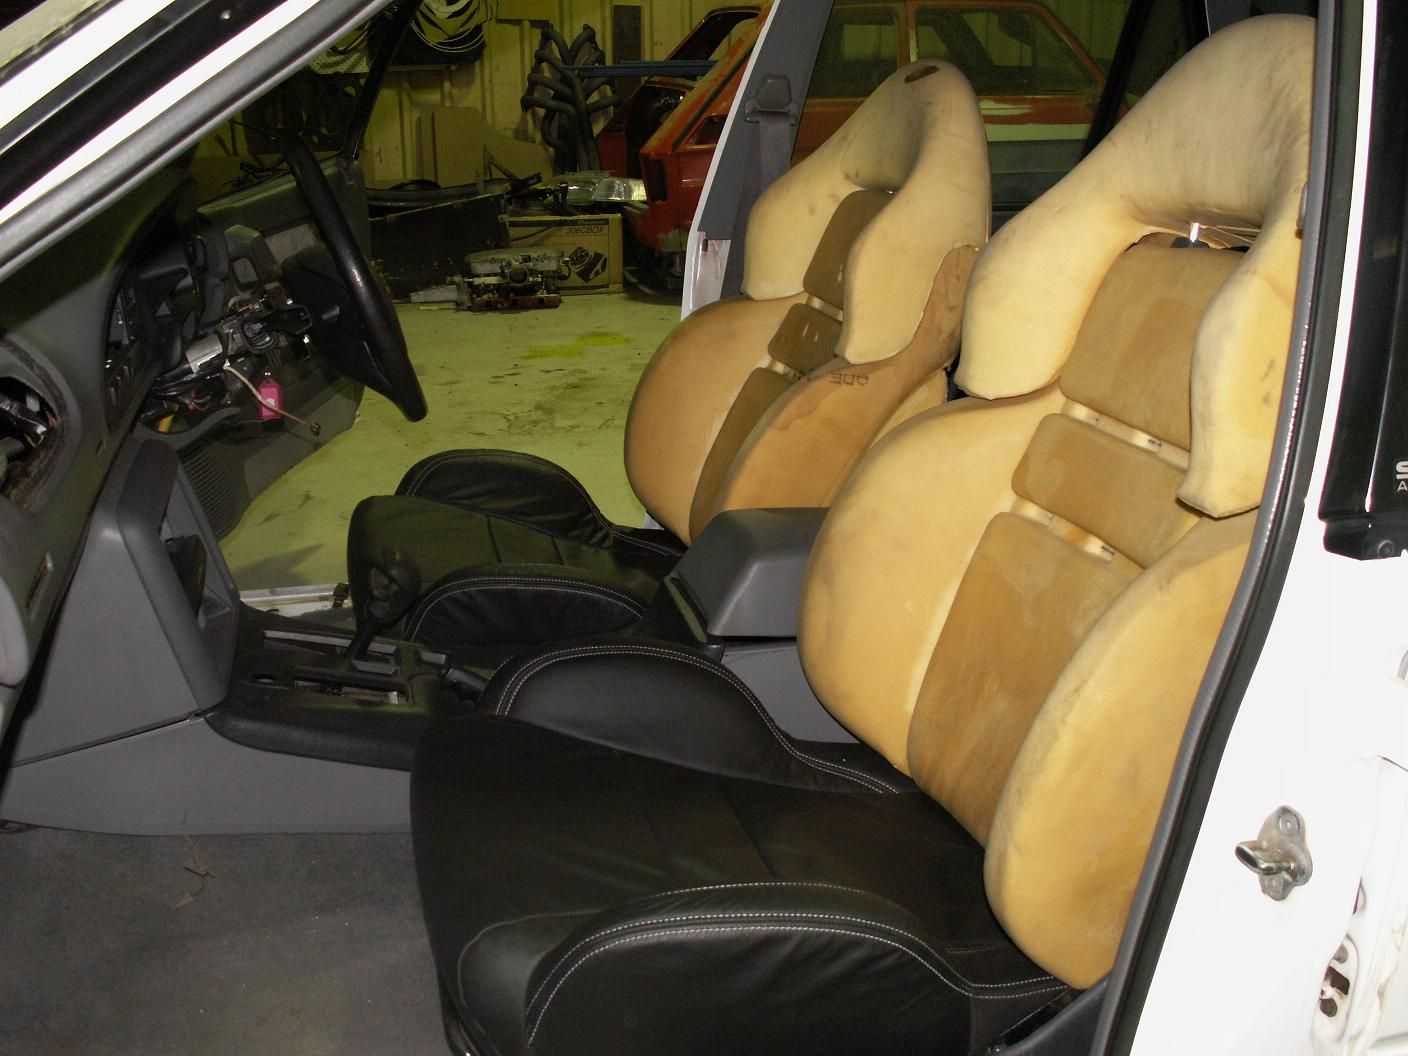
Coulson front seats & VS HSV rears with genuine GTS/R trim
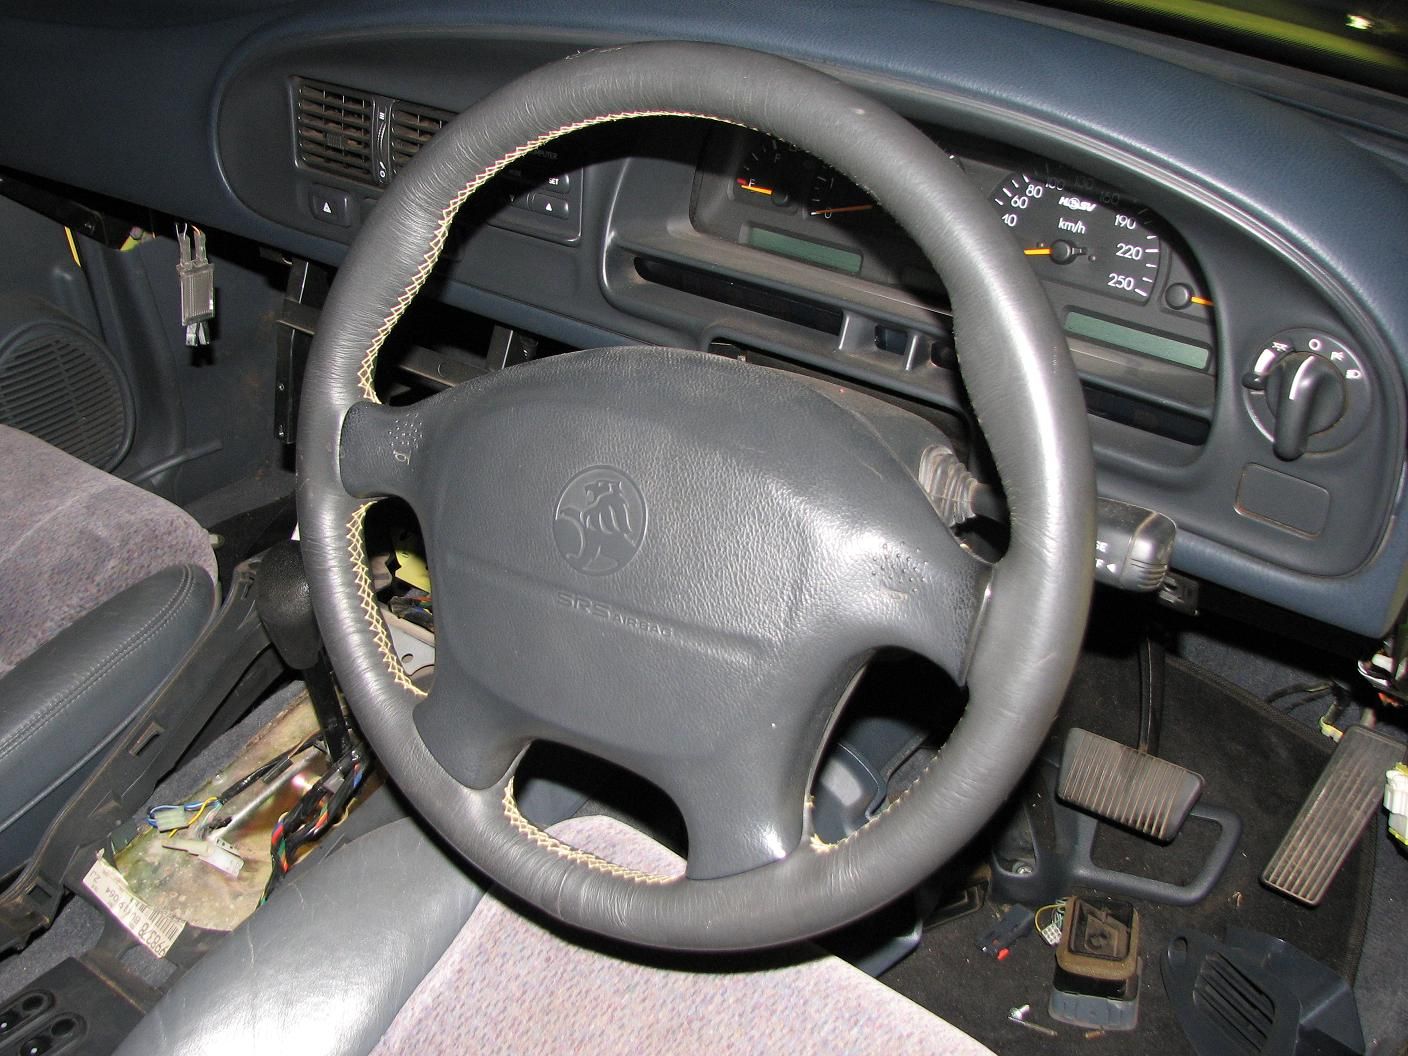
Genuine GTS/R steering wheel.
1/4 mile: All in good time
Stereo: Maybe . . .
Build Period: Purchased 23rd November 06
Body respray and interior change 30/05/07 – 03/08/07
Engine bay smooth / engine swap 12/08/07 – ?????
Engine out and swap begins 21/10/07
Moved to Orange 12/12/12
New wheels and carbon 22/2/14
Works begins 1/12/14
Cost:
Car $1500
Rims $1000
Seats $700
V6 Rebuild $100 and 5 cray fish
Suspension $2000
Bodykit $2000
Steering wheel $350
Badges $250
Engine $7000
Still to do :
Exhaust
Seat trimming
Drivers door skin
Console trimming
Paint underside
T400 box
Fuel system
Flat Firewall and engine bay paint
Drop floor in boot for tank
 March 2, 2015 at 1:24 pm #1145
KAL SPLParticipant- Orange NSW
- L67 VS Calais FSM Niki VS GTS/R replica
View build HERE
Posts: 64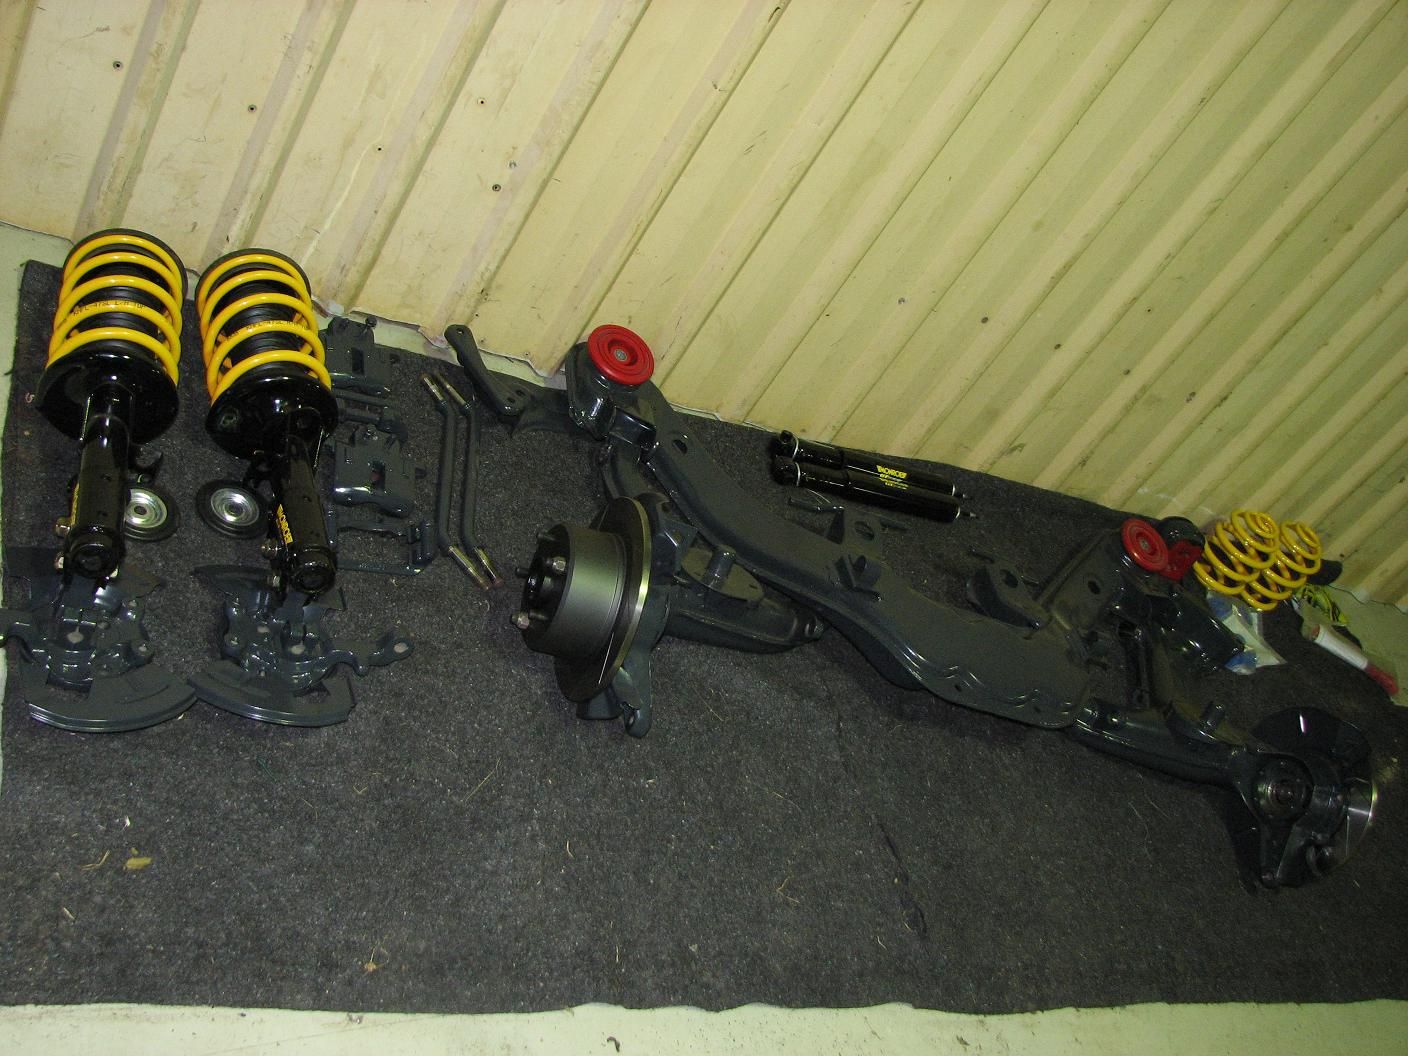

Now for some history.
I was going to be doing this with a VN except . . .
I purchased this car mainly because after tracking down several genuine GTS/R parts I made the decision to build 1 up purely as a burnout drag car.
This car is written off believe it or not
The owner ran over a curb and smashed the front of the sump out and dropped all the oil but he kept driving , the motor siezed which resulted in write off , bad for him good for me
So the strip begins again !
Car seems straight as but as I havnt even got it to my shed yet its hard to say.
It only has 128,000km so how bad can it be !
March 2, 2015 at 8:29 pm #1349
NickVRParticipant- Adelaide
- VR V8 Exec, VR SS, VF Redline Reserve
View build HERE
Posts: 264
Keen to see more progress on this thing and all the mods to it.
March 2, 2015 at 8:33 pm #1353
KAL SPLParticipant- Orange NSW
- L67 VS Calais FSM Niki VS GTS/R replica
View build HERE
Posts: 64Same :( , I did find an hour to spend on it yesterday making bits for the rail extensions to bolt the rad support up to but it’s not worth sharing yet. Should make some progress this weekend on it of some sort.
March 2, 2015 at 9:17 pm #1390
NickVRParticipant- Adelaide
- VR V8 Exec, VR SS, VF Redline Reserve
View build HERE
Posts: 264All in good time I’m sure. Can’t rush perfection.
March 25, 2015 at 9:49 pm #3392This time frame between updates is clearly unexcaptable
March 26, 2015 at 9:09 am #3393
VRSenator065Participant- Adelaide SA
- VR Senator LSx454 1960 Kombi (project) 1921 Nash Hot Rod (future project)
View build HERE
Posts: 5 777This time frame between updates is clearly unexcaptable
I concur with this!!!
March 26, 2015 at 10:39 pm #3409
KAL SPLParticipant- Orange NSW
- L67 VS Calais FSM Niki VS GTS/R replica
View build HERE
Posts: 64I agree , unfortunately for me I’m working late every night and weekends to help finish a big job off for a show over Easter , might get some time to myself after that.
March 29, 2015 at 5:08 am #3538
MistikalParticipant- From: Perth
- 1995 Nissan K11 Micra 2004 VY2 LS1 Calais
View build HERE
Posts: 57Pretty spiffy Acclaim you got there!
April 12, 2015 at 9:02 am #4521
KAL SPLParticipant- Orange NSW
- L67 VS Calais FSM Niki VS GTS/R replica
View build HERE
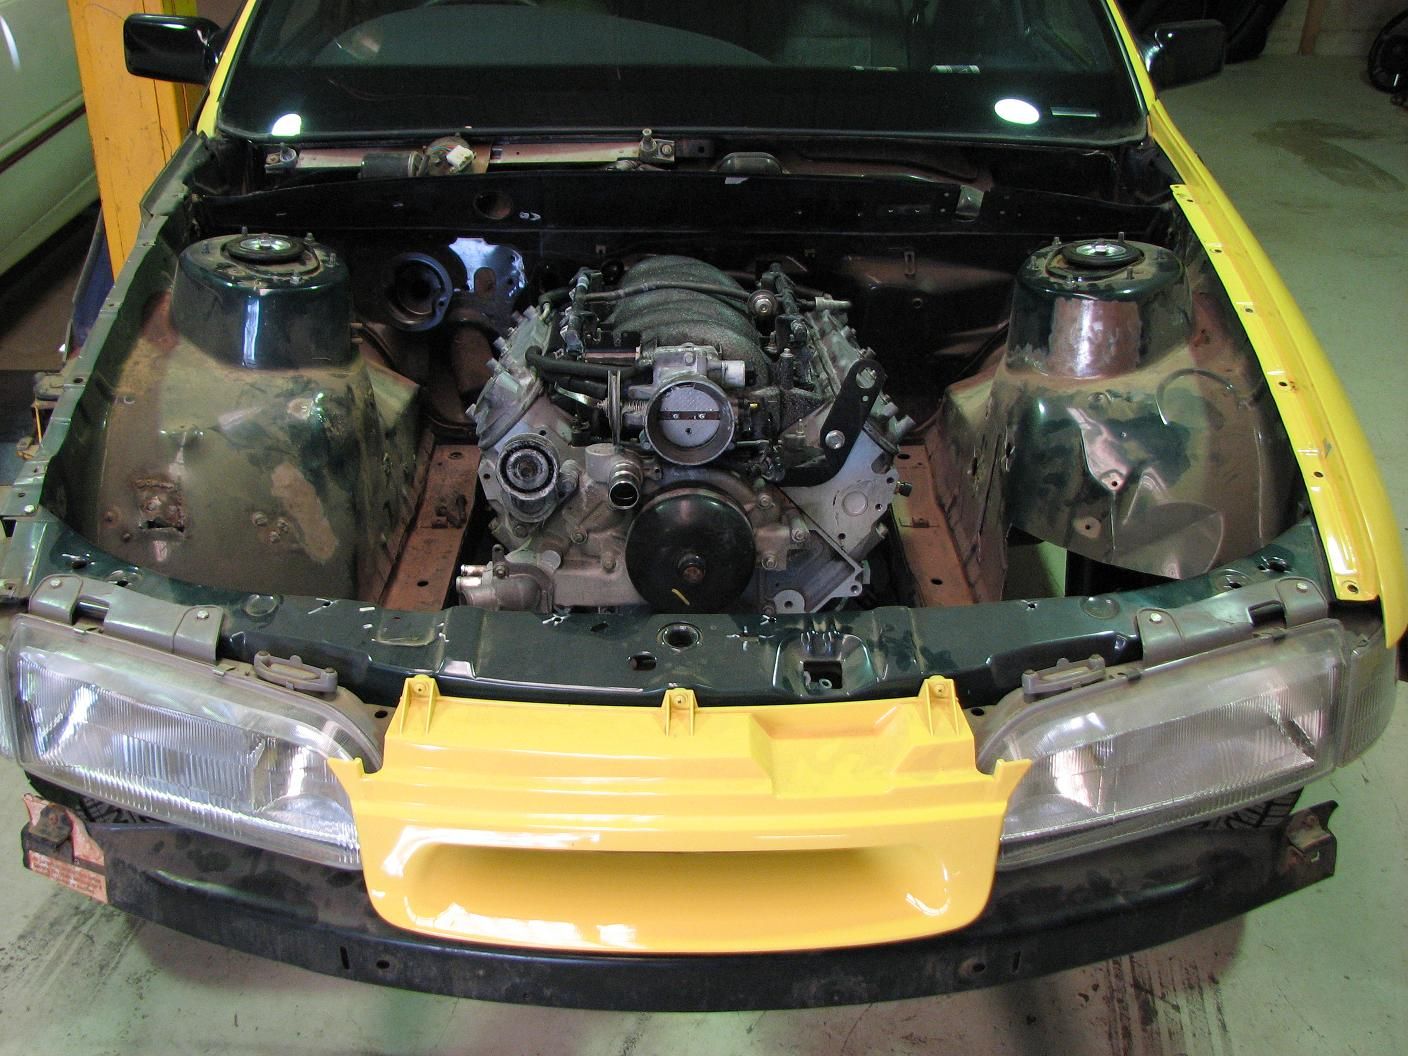
Posts: 64So this happened yesterday
 April 12, 2015 at 10:23 am #4526
VRSenator065Participant- Adelaide SA
- VR Senator LSx454 1960 Kombi (project) 1921 Nash Hot Rod (future project)
View build HERE
Posts: 5 777Nice, going flat firewall?
April 13, 2015 at 9:51 am #4607
KAL SPLParticipant- Orange NSW
- L67 VS Calais FSM Niki VS GTS/R replica
View build HERE
Posts: 64Yup that has always been the plan l won’t be the same old flat firewall though , watch this space
 April 24, 2015 at 8:23 pm #5571
KAL SPLParticipant- Orange NSW
- L67 VS Calais FSM Niki VS GTS/R replica
View build HERE
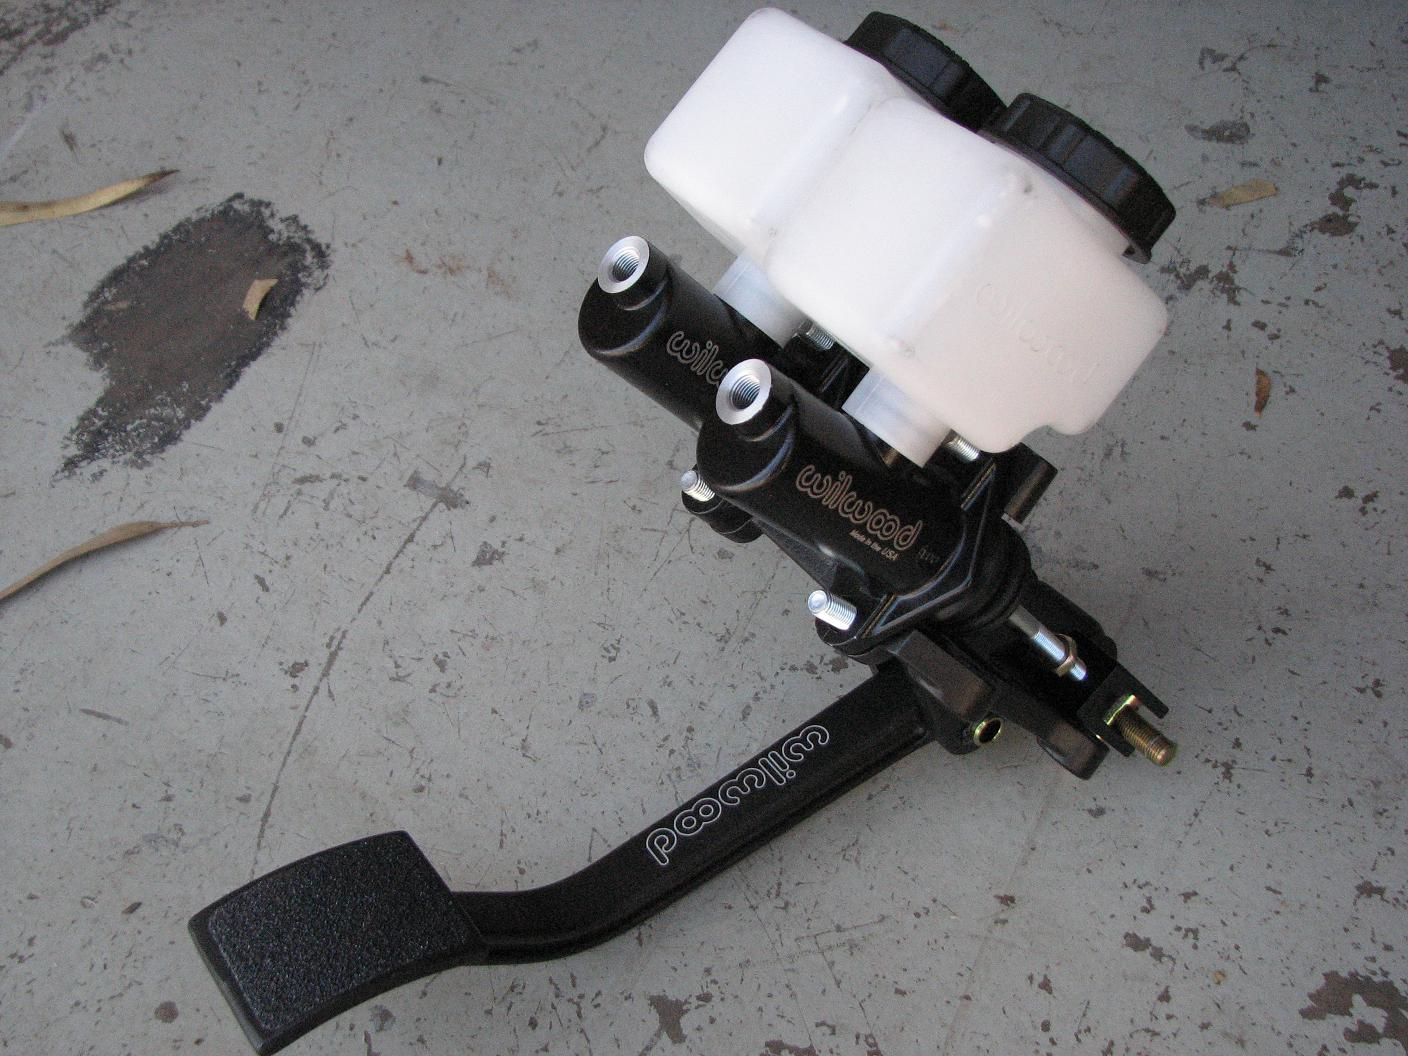
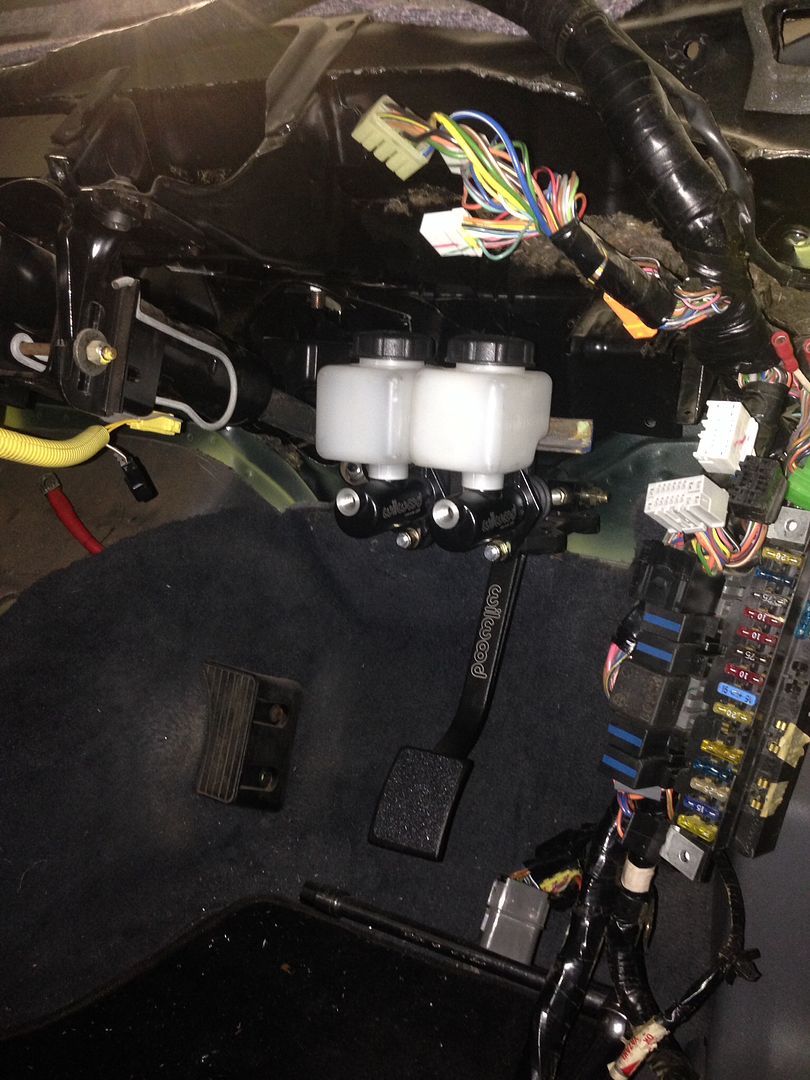
Posts: 64Have spent many hours doing wiring and modifying the harness to all fit under the dash pretty much as it came from factory , trying to keep all the panels in place while making space for the reverse mount pedal and relay box etc has taken some careful planning and execution but I think I have it all under control now , last thing to do is make my acc pedal modifications to allow the cable to go across the firewall inside the car then through to the engine just behind the inlet manifold , I need to purchase the cable first though.
 April 24, 2015 at 8:26 pm #5572
Always amazed at how many hours/days one can pump into 5 minute jobs
 April 24, 2015 at 8:28 pm #5573
KAL SPLParticipant- Orange NSW
- L67 VS Calais FSM Niki VS GTS/R replica
View build HERE
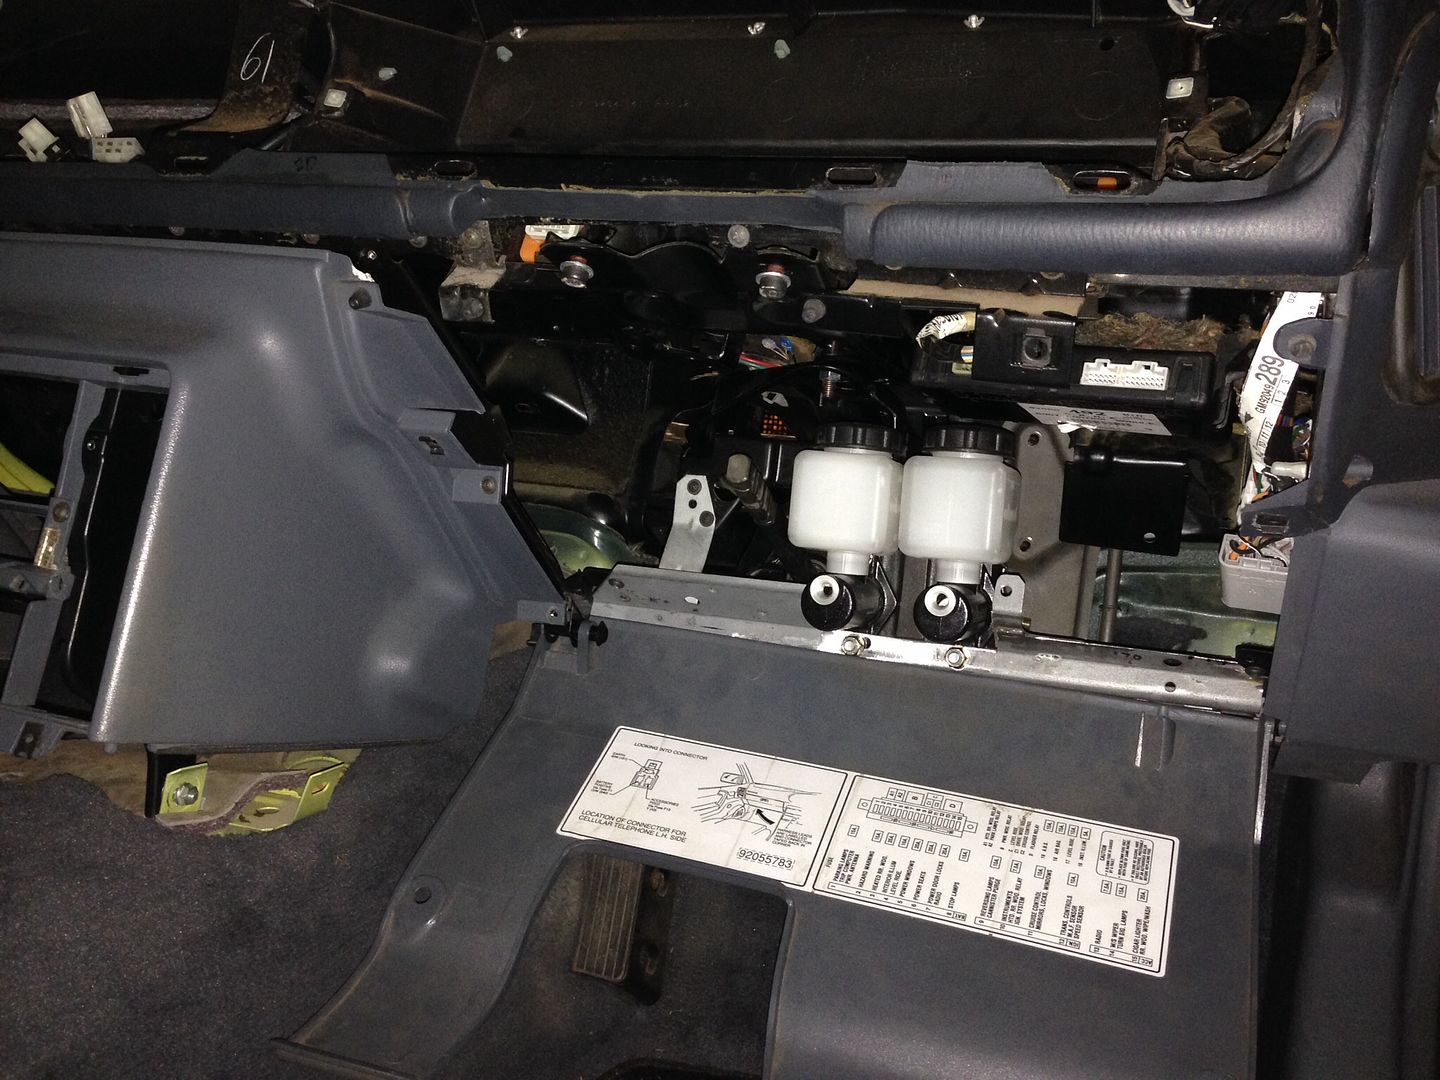
Posts: 64I was hoping there would be enough clearance to get to the bottles to fill without having to run remote bottles because that would have meant access from engine bay or below windscreen but with my plans of having complete flat flush firewall that was never going to fit in with my plan lol
With everything in there I can still remove the lid easily enough and plenty of room to check levels when needed. I still need to make a decent structure to mount the pedal box which is why everything is back in there at the moment , because the pedal box is taking up room where the fuse panel was I modified the steel frame to move it all over 40mm , still retains factory look and accessibility.
 April 24, 2015 at 8:33 pm #5575
KAL SPLParticipant- Orange NSW
- L67 VS Calais FSM Niki VS GTS/R replica
View build HERE
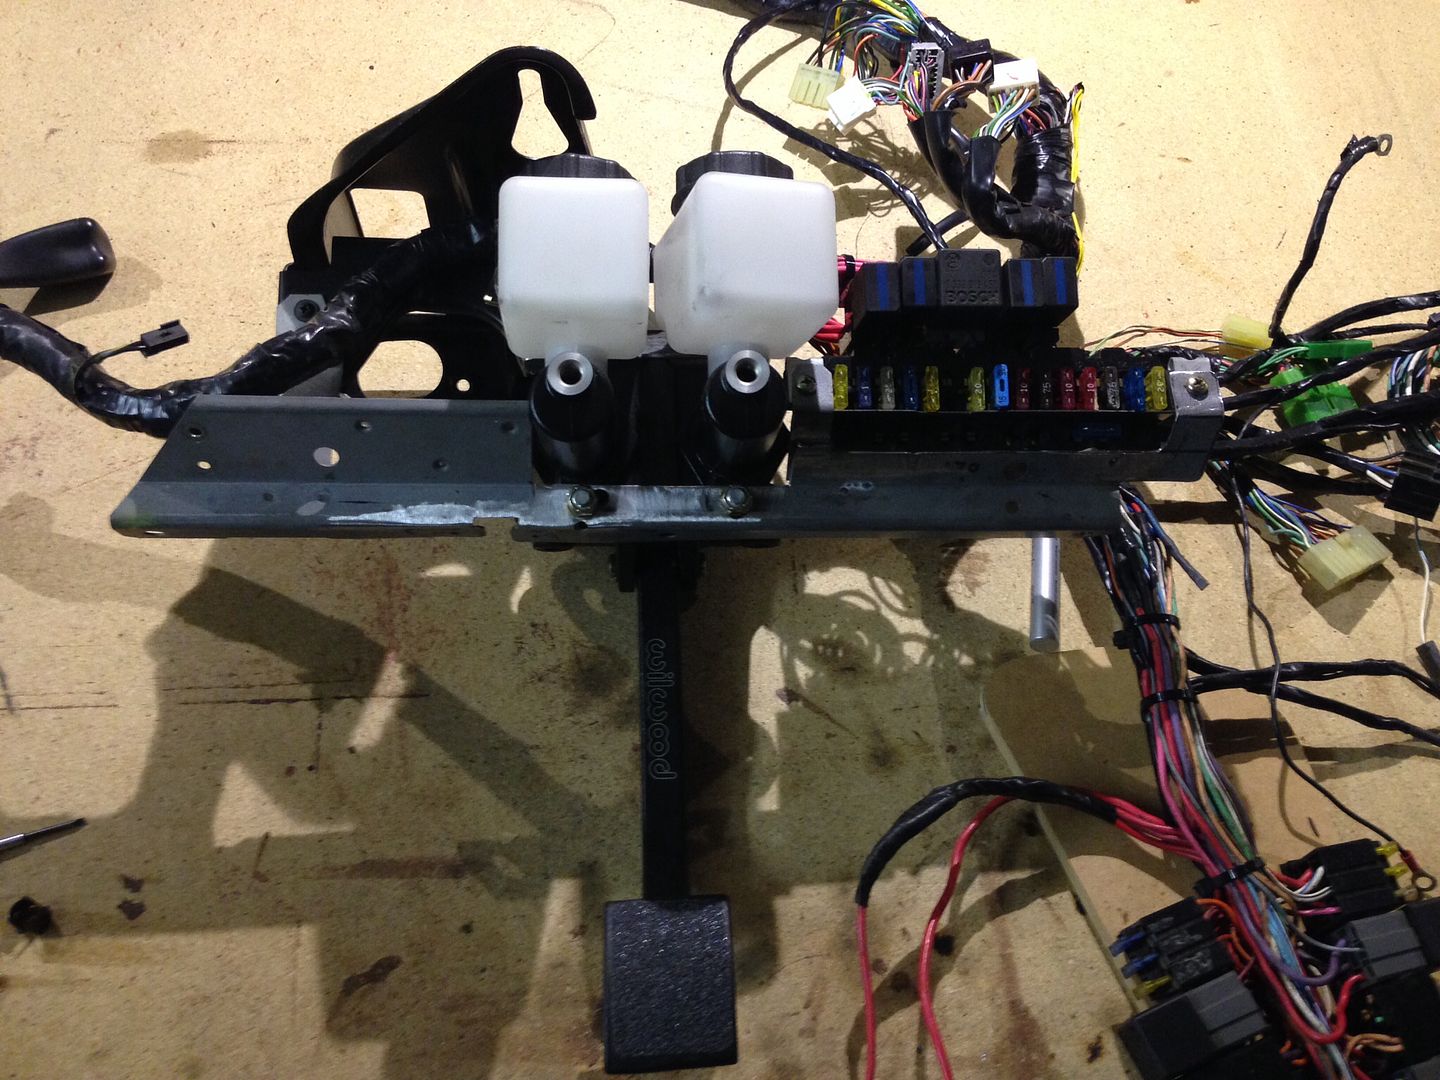
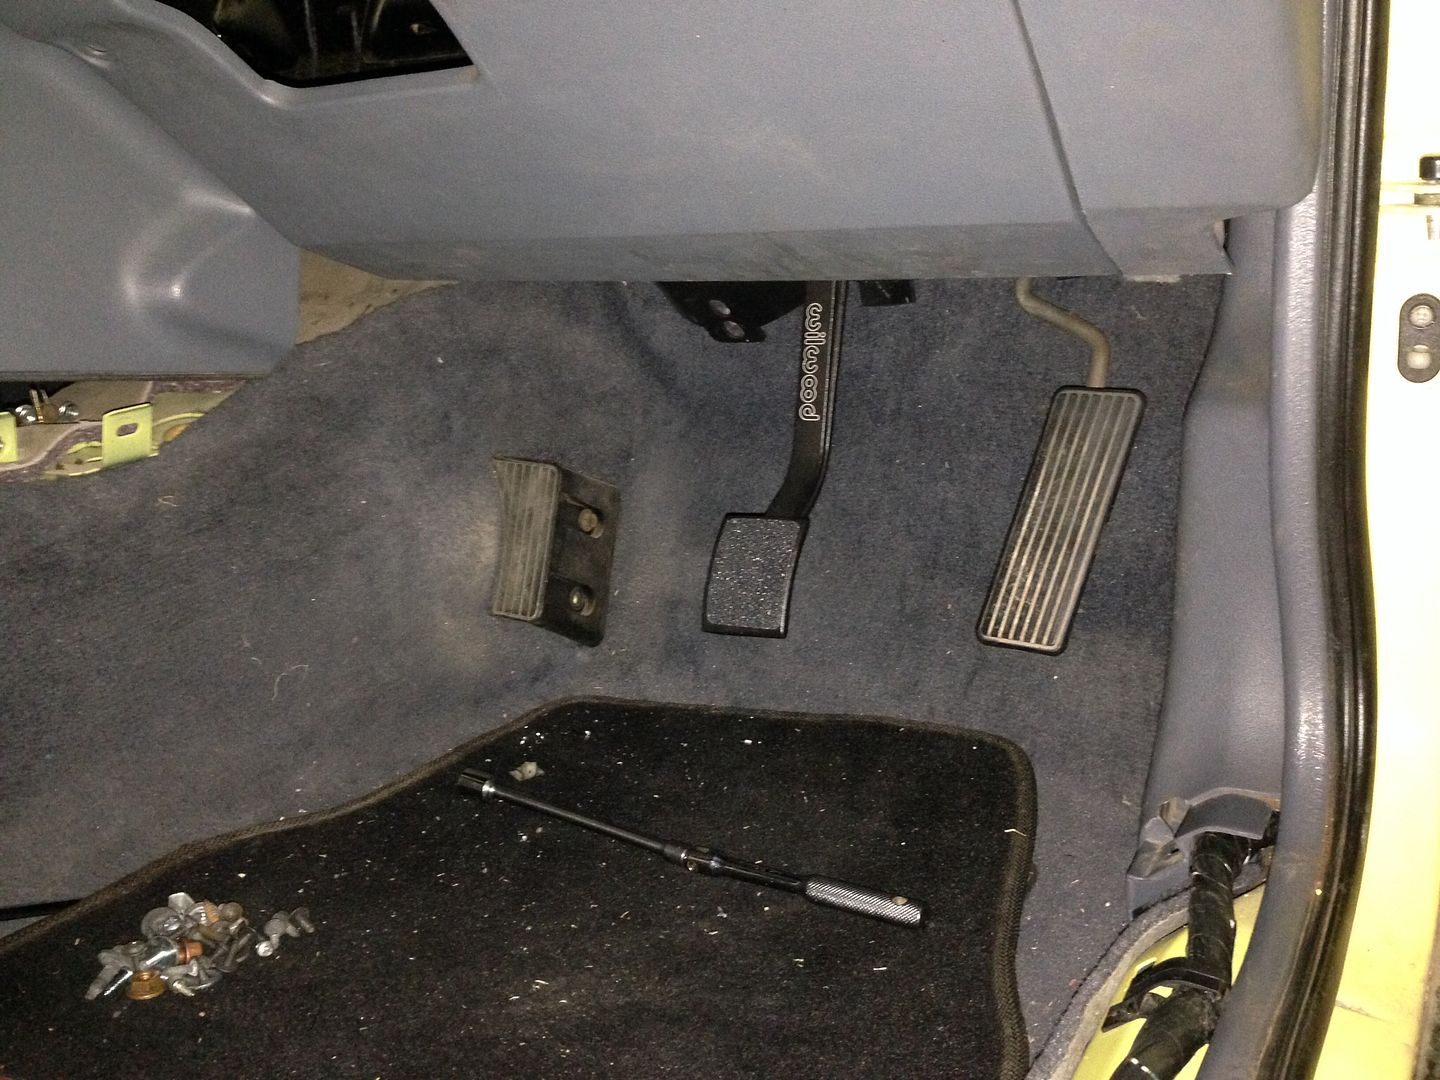
Posts: 64Thinking about attaching a factory brake pedal plate/pad to look original as possible and paint the brake pedal arm too. Haven’t had a drivers seat in there yet but it should be pretty much where the old pedal was , it’s adjustable anyway if need be.
Next in the agenda is making mounts for the ecu and coil packs behind the stereo , need to cut a shit load of original firewall where out first so I can start planning the firewall and new mounts for the wipers
April 24, 2015 at 11:04 pm #5581Lookin good
is that like adjustable bias or how ever it’s spelt ? (Adjust pressure to increase or decrease either front or rear ) or is it both equal pressure and one for front and one for rear ??
April 24, 2015 at 11:08 pm #5582
KAL SPLParticipant- Orange NSW
- L67 VS Calais FSM Niki VS GTS/R replica
View build HERE
Posts: 64It’s front and rear 2 different size cylinders , came with no instructions at all fml , the adjustment in the rear is like a pivot between the 2 shafts and assuming that’s for bias or just to balance the pressure between the 2 I dunno going to have to research it.
April 25, 2015 at 8:27 am #5583Just release the rear all the way off
you won’t want them on with all the burnouts you will doin anyway lol
April 25, 2015 at 12:15 pm #5586
VRSenator065Participant- Adelaide SA
- VR Senator LSx454 1960 Kombi (project) 1921 Nash Hot Rod (future project)
View build HERE
Posts: 5 777Looks great mate, will be very slick +1 for a factory pedal and painting over the Willwood logo.
Don’t stress over brake bias, its easy as to fit a bias adjuster if you need too, it literally just goes anywhere in the line to the back brakes and just by turning the knob gives more or less to the rear to balance them. You could event mount it down by the divers seat so you could adjust it from the drivers position for burnouts etc since its a race car

-
AuthorPosts
You must be logged in to reply to this topic.
