
Home›Forums›Members’ Builds and Rides›VB – VC – VH – VK – VL›VK L98 T56 Build
This topic contains 83 replies, has 16 voices, and was last updated by ![]() Heron SSV 4 years, 11 months ago.
Heron SSV 4 years, 11 months ago.
-
AuthorPosts
-
February 12, 2016 at 10:39 pm #14087

rayray07Participant- Newcastle
- 6.0L VK In the build
View build HERE
Posts: 41G’day,
Thought I may as well start a build thread. A lot of information and “how-to’s” around the net at the moment are a little dated, So thought I would post up how I am going about my build. I will try be as detailed as possible. I will also add, this is the first project car I have undertaken and just about everything is new to me. I have been learning everything from this build for when I start the HR ute again.
So,
I have a VK Exec, it started life bog stock, it was my first car my father bought me for $200.
Plan is as follows,
-L98 & T56
-VL Turbo Diff, 4.11 gears.
– Smoothed engine bay
-VN 80ltr tank
-Lowered a little
-VT/VL Disc brakes
-Standard looking rims of some sort
-Standard interior, but with Scheel seats.
I have most of the gear ready to put everything together, with my build I went with
-CAE Starter Relocation kit
-CAE Gearbox crossmember and mount (I thought theirs looked a bit stronger than the competitors)
-VN V8 K-frame that I notched and strengthened
-Tuff Mounts
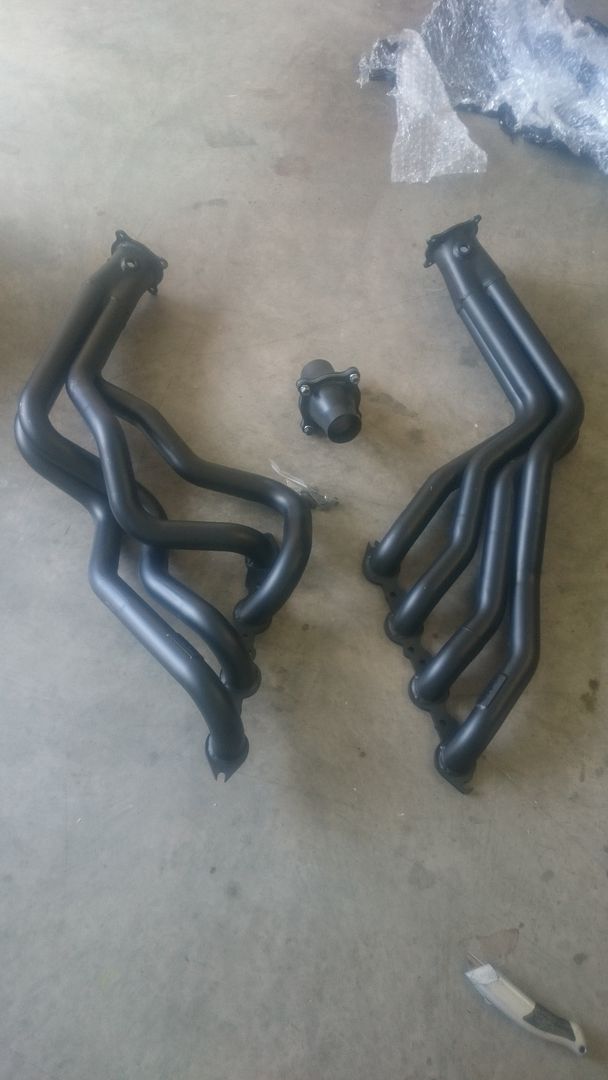
-CRS 1 7/8″ 4 into 1 headers
-VL Manual Steering rack
-Mal Wood shifter and 3/4″ bore VL clutch master.
-Killa Kustom Kables will be sorting out the stand alone loom
-Fuel system will be Walbro GS342 fuel pump running into a WIX filter/regulator all on 3/8″ and -6an lines.
I pulled the sump off the motor last week and found timing chain tensioner everywhere, so just ordered a heap of stuff from summit racing and got carried away. I ended up buying all new Fel-Pro gaskets, stronger timing chain and LS2 tensioner, SLP oil pump and a heap of other gear. Considering the weak Aussie dollar at the moment, I managed to save close to $1000 buying all the gear from the US (I highly recommend). Once the car is engineered, I will be throwing a cam package in it and see what happens from there
 .
.Only thing really left for me to sort out (parts wise) is radiator/thermos, Anyone have recommendations on the best radiator/thermos combo?
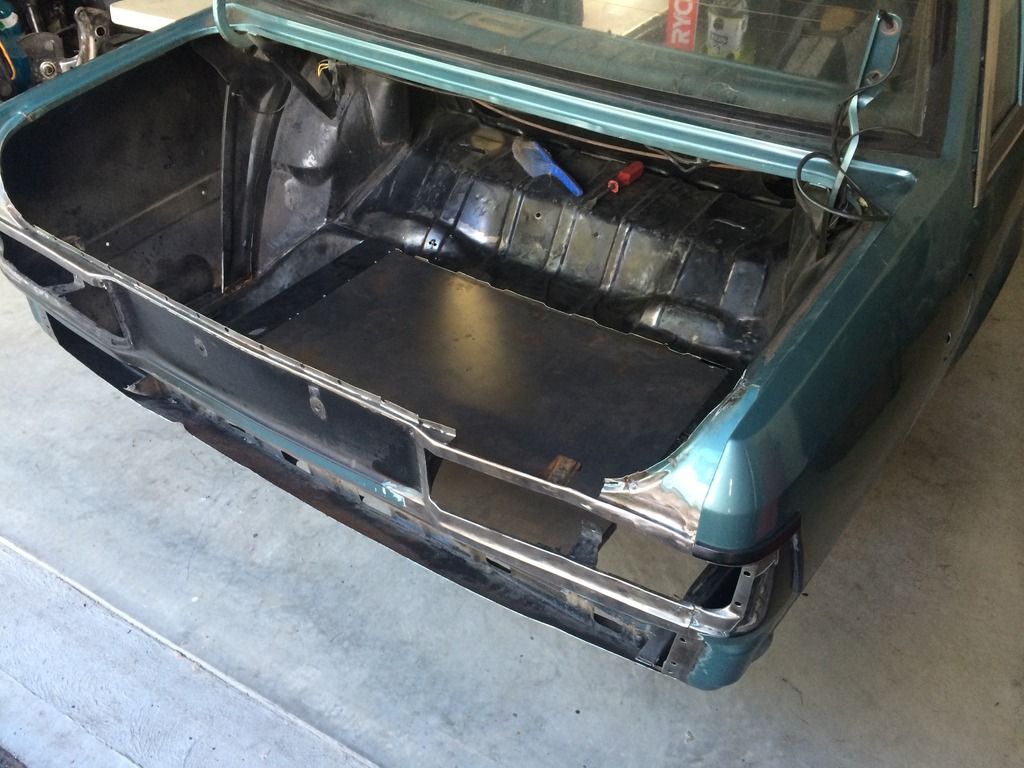
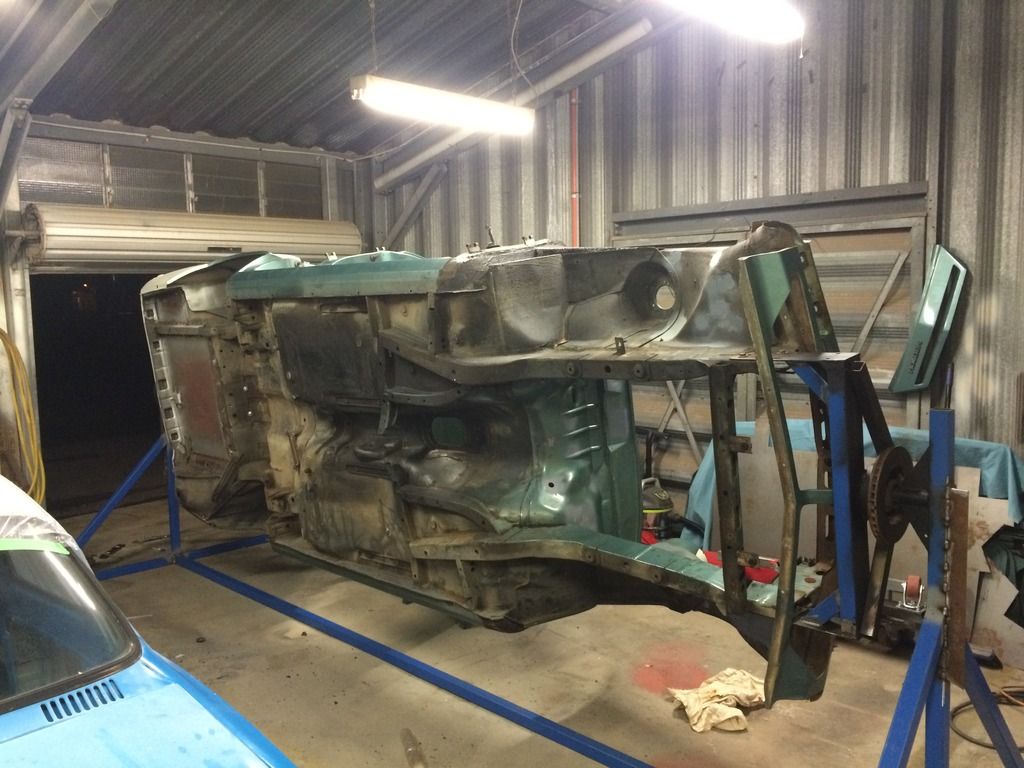
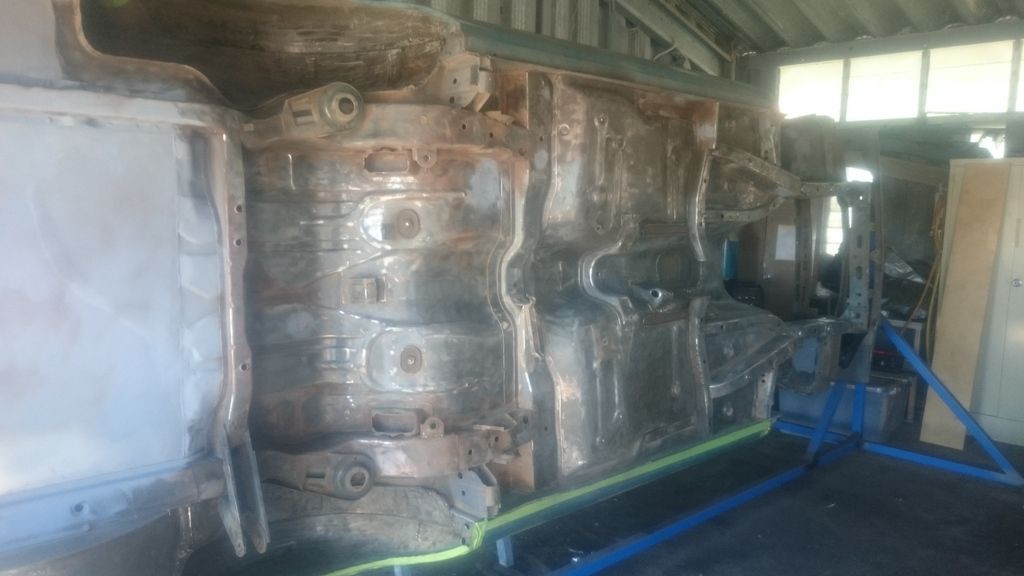
Car is currently on a rotisserie, whole ass end was rusted out so had to fabricate boot floor and beaver panel. In the next couple weeks, I should have the whole under body and engine bay sand blasted and in epoxy primer. Going to raptor liner the whole under body and paint the engine bay in standard cerulean blue to match the rest of the car. I did contemplate re-spraying the entire car again, but the paint on it is only 7 year old and I’m not going for the show car look (sleeper all the way). I have stacks of pictures of every little thing I have already done, so once I go through them I will throw them up and explain all the stuff I’ve done differently.
February 12, 2016 at 11:16 pm #14090
rayray07Participant- Newcastle
- 6.0L VK In the build
View build HERE
Posts: 41This is the current state of the car, new rear end, smoothed engine bay a little. Got rid of battery tray and fuse box and filled in a heap of holes.
 February 13, 2016 at 7:46 am #14094
SLE-881Participant- Sydney
- Daily - 2012 VW Golf R Weekend - 1981 VH SL/E
View build HERE
Posts: 81Nice. Looking forward to seeing this come together.
Daniel
Instagram - @SLE881February 13, 2016 at 8:51 am #14095
HDN05LParticipant- Canberra ACT
- VS Olympic Edt 383 stroker Ute
View build HERE
Posts: 289
Wow thats some serious work getting done, will def be keeping an eye on this!
February 13, 2016 at 10:57 am #14098
VRSenator065Participant- Adelaide SA
- VR Senator LSx454 1960 Kombi (project) 1921 Nash Hot Rod (future project)
View build HERE
Posts: 5 777Very nice, def following this. I went with a double pass PWR radiator with single Spal unshrouded fan. Works perfectly on mine. Seen a few with AU Falcon twins shrouded. Be interesting to see how you go with the CRS 4 into 1’s, they don’t have slip on collectors right?
February 13, 2016 at 9:06 pm #14107
Judge1 FrazerParticipant- new zealand
- 1983 VB LSA MG9 6060 6 speed
View build HERE
Posts: 775That’s going to be cool love the car on the rotisserie will be doing that to mine when time comes
had a pwr core radiator and twin Au fans in my vk s/c 5.7 304 motor 500rwhp awesome in traffic
will diff follow as similar plan I have
February 14, 2016 at 12:42 am #14114
rayray07Participant- Newcastle
- 6.0L VK In the build
View build HERE
Posts: 41Yeah, I was looking at PWR and Aussie Desert Coolers with either AU or VT thermos, unsure at the moment.
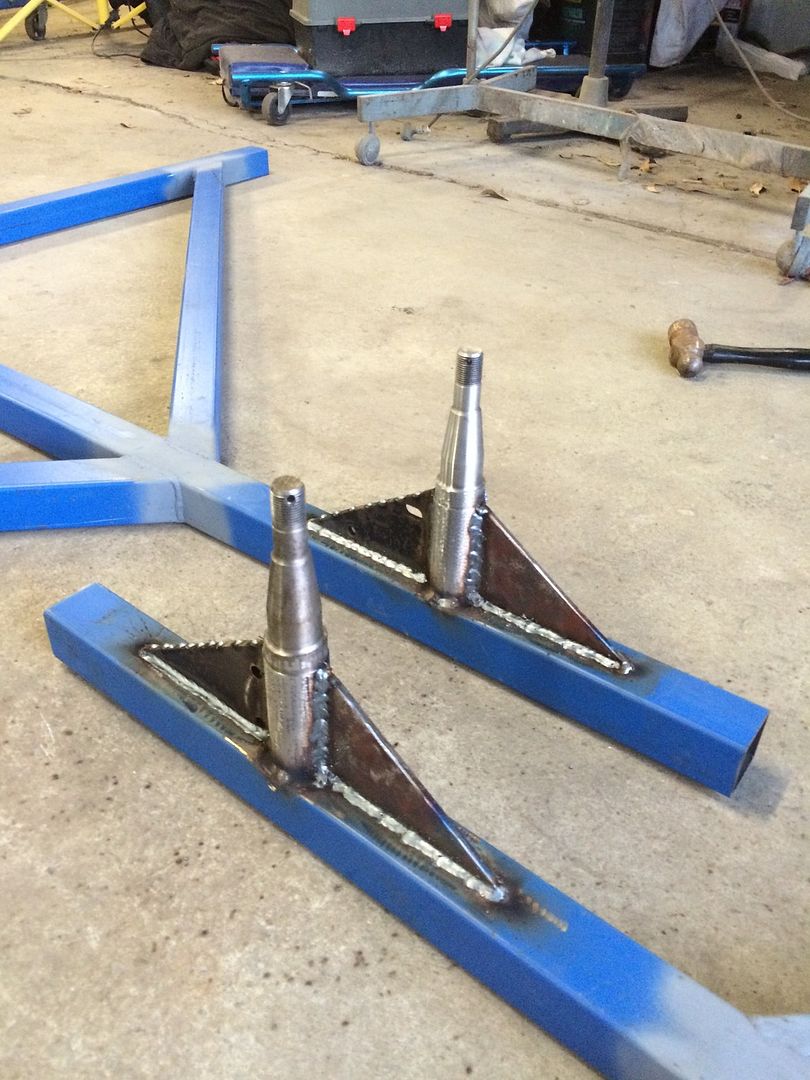
The rotisserie works awesome, only thing I messed up was the balance, a little top heavy. I just used the old front discs and bought a pair of trailer axles from supercheap for $50 and about $200 in RHS and knocked it together in a weekend. You can turn it with a finger. It’s not all that adjustable, but I plan on modifying it for my HR ute when I get back to it.
Not sure what you mean by slip on collectors, but the 4 pipes merge quite nicely. They came with flanges to build the rest of the system off. Hopefully I don’t need to modify them to get them to fit.
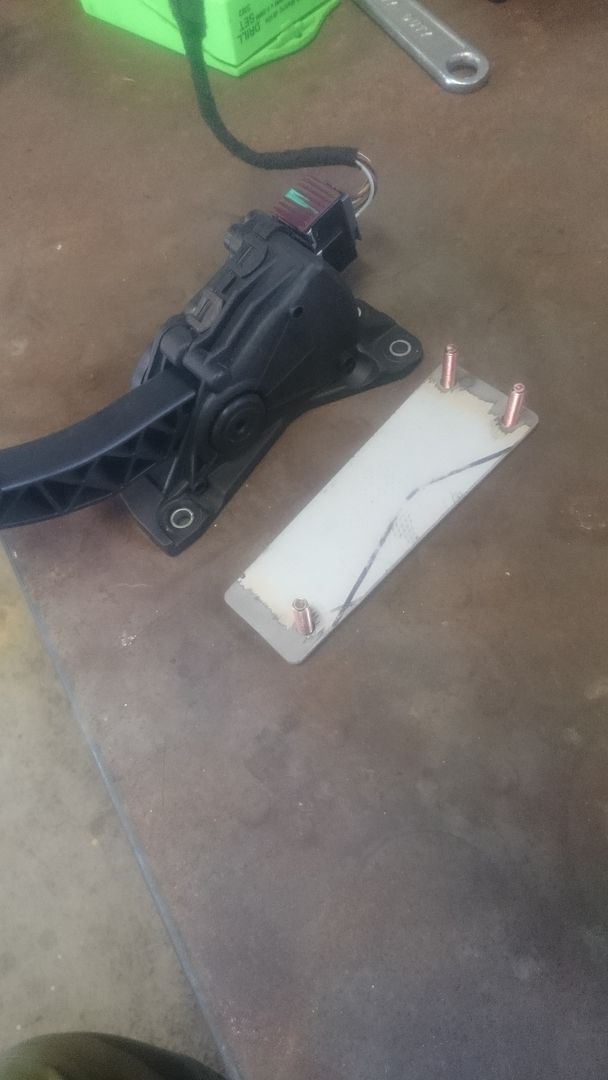
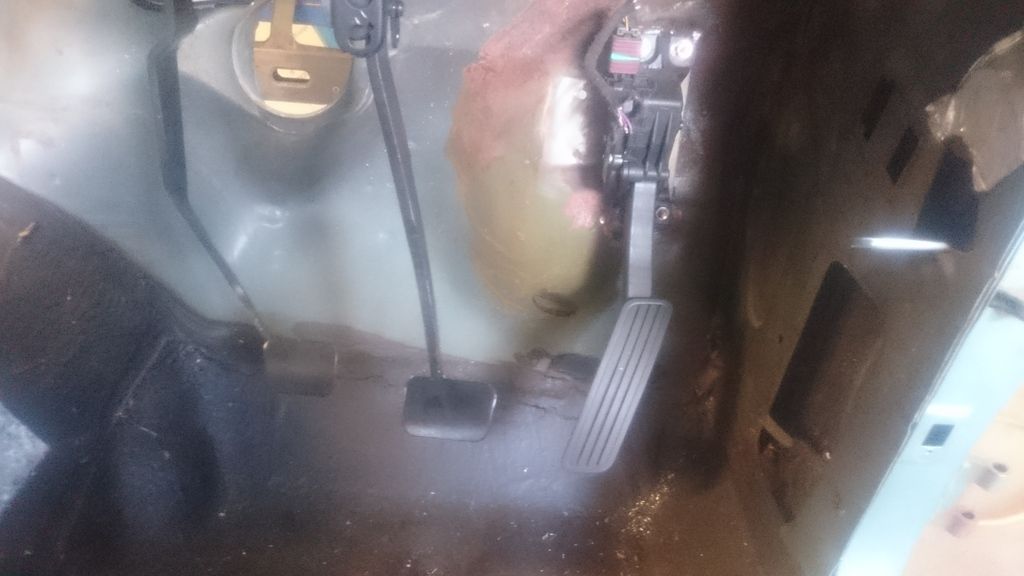
Spent most of today with the wire wheel, getting off all that old deadener from the under body. Also made up a bracket for the FBW pedal and mounted it.
 February 14, 2016 at 6:08 am #14116
Mate
Looking good. I went through a similar build not so long a couple of years ago with my VK Calais. I like your rotisserie. I tipped my shell on its side on a couple of tires. Did the trick.
I used a LS1 with cable operated throttle body. One less issue.
I offer you the following advise. Before you paint set the engine up in you bay to check clearances with the alternator, extractors, steering rack and brake booster. The AC compressor will not fit in the original location.The tunnel will need a massage to accommodate the reverse lockout solenoid on the box.
I used an alloy V8 radiator and twin thermos that are advertised on eBay. The ones advertised now are a bit different. Used a ED falcon six top hose. I replaced the thermostat housing with a straight one. The original one points in the wrong direction.
I have had mine recently engineered. It has been on the road for the last few months and I am very happy with the performance and reliablity. Well worth it.
Good luck with yours.
February 14, 2016 at 8:32 am #14117
Judge1 FrazerParticipant- new zealand
- 1983 VB LSA MG9 6060 6 speed
View build HERE
Posts: 775Found a picture of my fans if that helps , I’ve add a picture for the radiator support that I changed to a late model vn -vs makes it better so you can get bottom hose lower in radiator, engineer mate built a rotisserie for his hq so might see if I can get that if it fits in my garage ,car is coming along nicely


-
This reply was modified 8 years, 2 months ago by
 Judge1 Frazer.
February 16, 2016 at 11:35 am #14170
rayray07Participant- Newcastle
- 6.0L VK In the build
View build HERE
Posts: 41VBRED thanks for the advice. I might just do that. I was originally relying on all the info on the net and wing it with the fitment. But I have done quite a few things differently with my setup, so test fit might be the go. How much massaging did the tunnel need for the reverse lockout solenoid? And what did you use to power it?
Judge1 that looks like a sweet build you got going there. Thanks for the pics. How did you go about mounting the Thermos to the radiator exactly? And is that just the standard inlet/outlet for VK V8? Reason I ask is im leaning towards PWR/AU Thermo setup and don’t want to pay extra for LS1/VK radiator if I can get normal setup to work.
Cheers.
February 16, 2016 at 6:14 pm #14174
Judge1 FrazerParticipant- new zealand
- 1983 VB LSA MG9 6060 6 speed
View build HERE
Posts: 775Hey bud the vk in pic got stolen 4 years ago ,so three weeks ago just picked up a vb to build up now will l98 in the vb, it’s in this section
the radiator was modified how I wanted it so if your going to get a pwr just get them to make it to suite
I put the top outet on the side not the face and two 6mm bolts at the top in first photo, bottom just had it sitting there with the hose on wasn’t going to move
also depends on how you wire them if not though computer have a rely for each fan but use a timer relay on one so they don’t come on at the same time as they draw heaps of current hope this helps


 February 16, 2016 at 7:35 pm #14176
VRSenator065Participant- Adelaide SA
- VR Senator LSx454 1960 Kombi (project) 1921 Nash Hot Rod (future project)
View build HERE
Posts: 5 777Not sure what you mean by slip on collectors, but the 4 pipes merge quite nicely. They came with flanges to build the rest of the system off. Hopefully I don’t need to modify them to get them to fit.
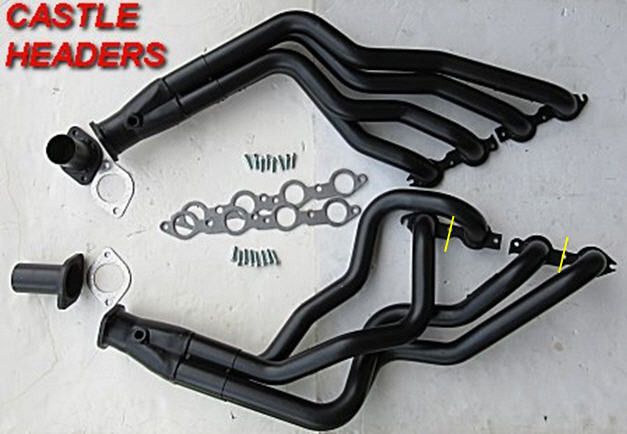
Sorry what I meant was the collectors on those are welded to the pipes, and the pipes are basically one piece each side. Everyone I have ever seen (and I mean everyone) try to use them they are impossible to fit like that. CRE make virtually the same style but the collectors are a slip on, and the pipes are made as two pairs of two, even then with mine I cut them into 4 separate pipes, that way you can feed each in (still a bitch) then do the header bolts up loose, then knock on the collectors and fully tighten the header nuts. These are the CRE hopefully you get what I mean (cut mine where the yellow lines are). Btw not trying to be a smartass, just trying to save you some heart ache and skinned knuckles…
-
This reply was modified 8 years, 2 months ago by
 VRSenator065.
-
This reply was modified 8 years, 2 months ago by VRSenator065.
February 17, 2016 at 8:18 pm #14221
rayray07Participant- Newcastle
- 6.0L VK In the build
View build HERE
Posts: 41Thanks for the info Judge1, I think I will do something very similar to what you have. I’ll get a PWR Radiator and mod some AU’s.
VRSenator065, Now that is some food for thought. I knew it was tight around there, but not quite that bad. I guess I will just have to wait and see how I go with the test fitment. Thanks for the heads up though.
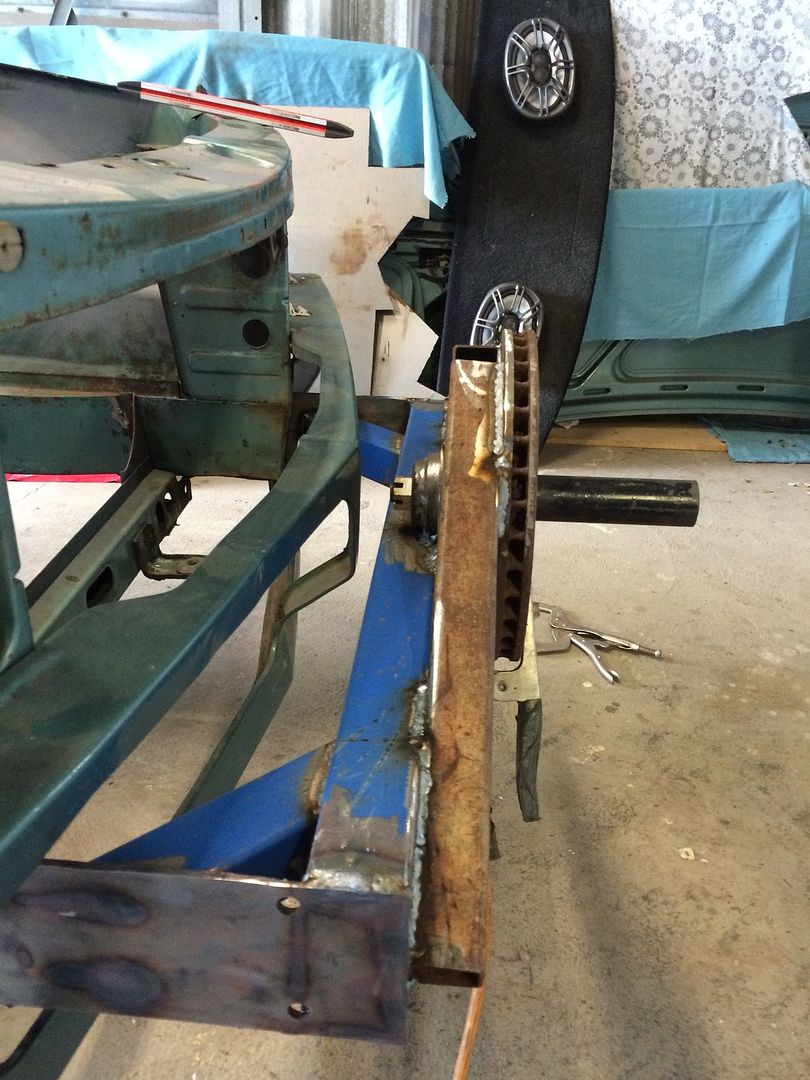
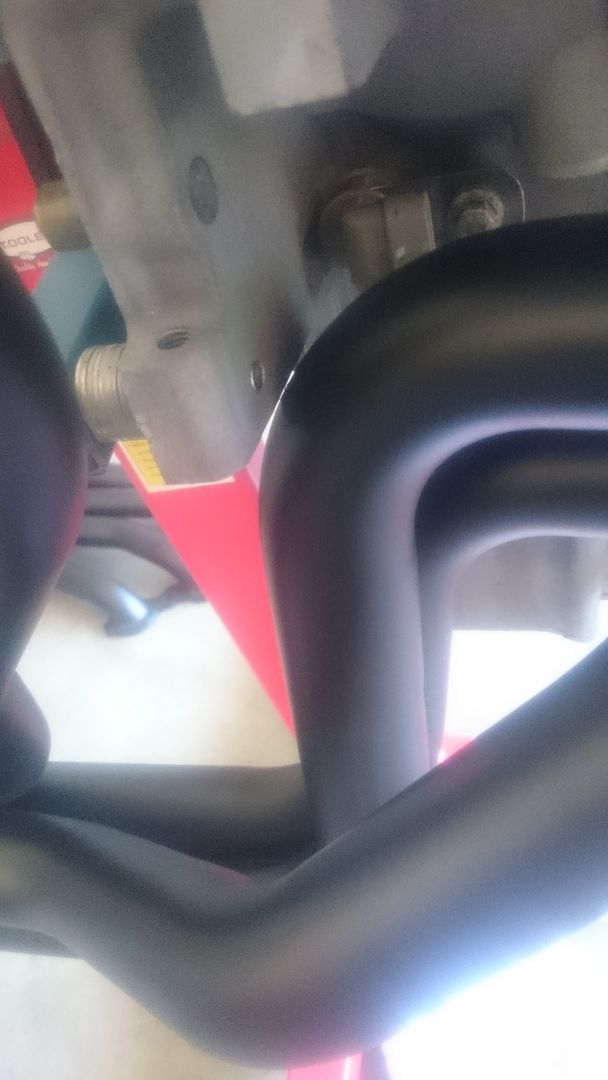
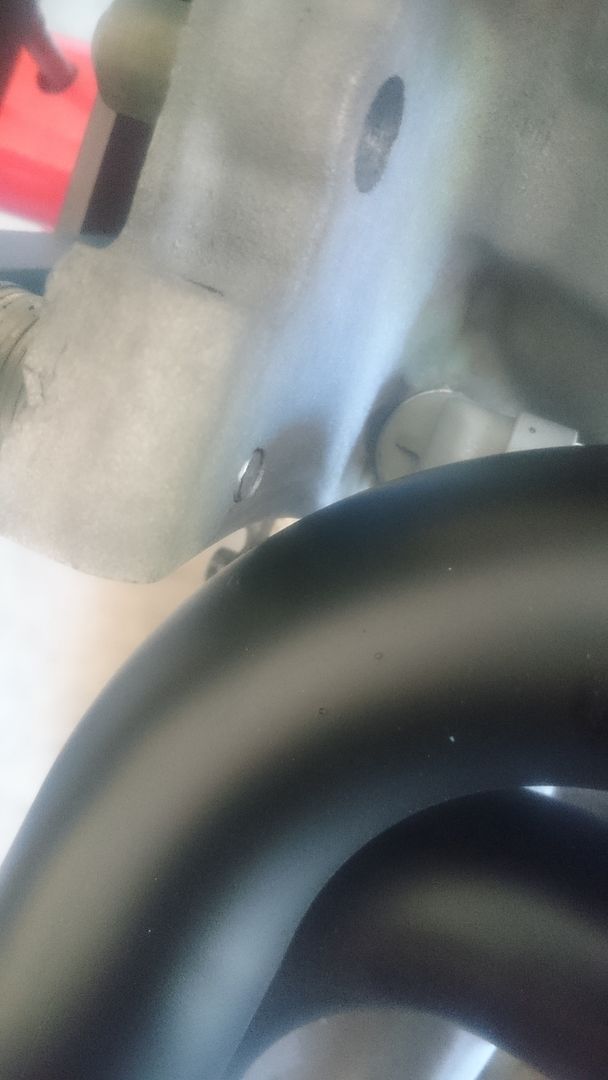
I did a little bit of clearance mods for the headers on the weekend. I needed to remove the rear RH casting block, also one of the pipes gets quite close to the rear of the block, so I shaved a little off there too.
To add to my dramas, I discovered an exhaust bolt that had broken off flush with the head and I’ve already broken off 3 easy-outs on it. Looks like it will be going to a machine shop.
Here are some pictures of the headers fitment.
 February 17, 2016 at 9:50 pm #14224
Best of luck fitting those pipes in the bay👍
February 18, 2016 at 10:27 am #14239
VRSenator065Participant- Adelaide SA
- VR Senator LSx454 1960 Kombi (project) 1921 Nash Hot Rod (future project)
View build HERE
Posts: 5 777You will sort it I’m sure, but honestly I think your pushing it uphill with those particular pipes. Even the CRE aren’t a drop in, but being able to separate them into 4 individual pipes made it so much more workable. Btw if your prepping, dress back the vertical chassis flange in the bay on both sides back at about 45 degrees, it give more room for the pipes. It wont effect engineering and if you do it with the engine out you can do it neatly and it will still look factory. I didn’t and had to massage mine on the passenger side, next time the engines out I will do it properly.
February 18, 2016 at 1:38 pm #14245Fit your engine and box in together. Bolt up the gearbox x member and leave the engine supported by the engine crane. Fit the extractors from below and the fit up the k frame rack and steering.
I have not wired up my reverse lock out sensor. You can still select reverse with a little muscle.
-
This reply was modified 8 years, 2 months ago by
 VBRED.
February 18, 2016 at 6:51 pm #14265
Judge1 FrazerParticipant- new zealand
- 1983 VB LSA MG9 6060 6 speed
View build HERE
Posts: 775I am seeing a common thing with the ls conversion that everyone has trouble with is the headers
how is it that company’s make products that don’t fit right
February 19, 2016 at 8:32 am #14276
VRSenator065Participant- Adelaide SA
- VR Senator LSx454 1960 Kombi (project) 1921 Nash Hot Rod (future project)
View build HERE
Posts: 5 777Well, depends, the tri y Pacemakers fit well, I had no issues at all with them. Its just the primaries are only 1″ 3/4″ which is fine for a mild swap, actually on mine with them I made over 500 rwhp, but when you chase more hp and go to larger primaries and 4 into 1’s with CRE or CRS its not as straight forward. I think it really comes down to the fact its tight in there, and the larger primaries mean the bend radius is broader so its juts more difficult to fit them. And when I spoke to the guys at CRE (who are very helpful btw) they said its also because there are so many combinations of engines/gearboxes/engine mounts etc. And the bays vary from 1st gen to 2nd gen, so its hard to make an off the shelf option fit everything.
-
This reply was modified 8 years, 2 months ago by VRSenator065.
February 20, 2016 at 2:12 pm #14305
rayray07Participant- Newcastle
- 6.0L VK In the build
View build HERE
Posts: 41Thanks VBRED, Was sort of thinking something along the lines of that approach. But having the K-frame out as well will free up more room to play with. VRSenator065, you’re spon on about that and I was sort of expecting to make modifications to get them to fit which doesn’t bother too much. I will just have see how it goes with the test fit and I’ll update the build thread.
February 20, 2016 at 5:00 pm #14310
Judge1 FrazerParticipant- new zealand
- 1983 VB LSA MG9 6060 6 speed
View build HERE
Posts: 775hey VRsenator I see your point they can not make it for every combination
-
AuthorPosts


You must be logged in to reply to this topic.
