
Home›Forums›Members’ Builds and Rides›VB – VC – VH – VK – VL›GMVL86 | 10.50 @ 129mph, Ls2, Vic Jr, Th350, 58oo Stall, Willwoods
This topic contains 357 replies, has 25 voices, and was last updated by ![]() Bdj_007 5 years, 3 months ago.
Bdj_007 5 years, 3 months ago.
-
AuthorPosts
-
September 4, 2016 at 9:57 am #19427

Bdj_007Participant- 2002 Holden Vx Commodore 1986 Holden Vl Berlina
View build HERE
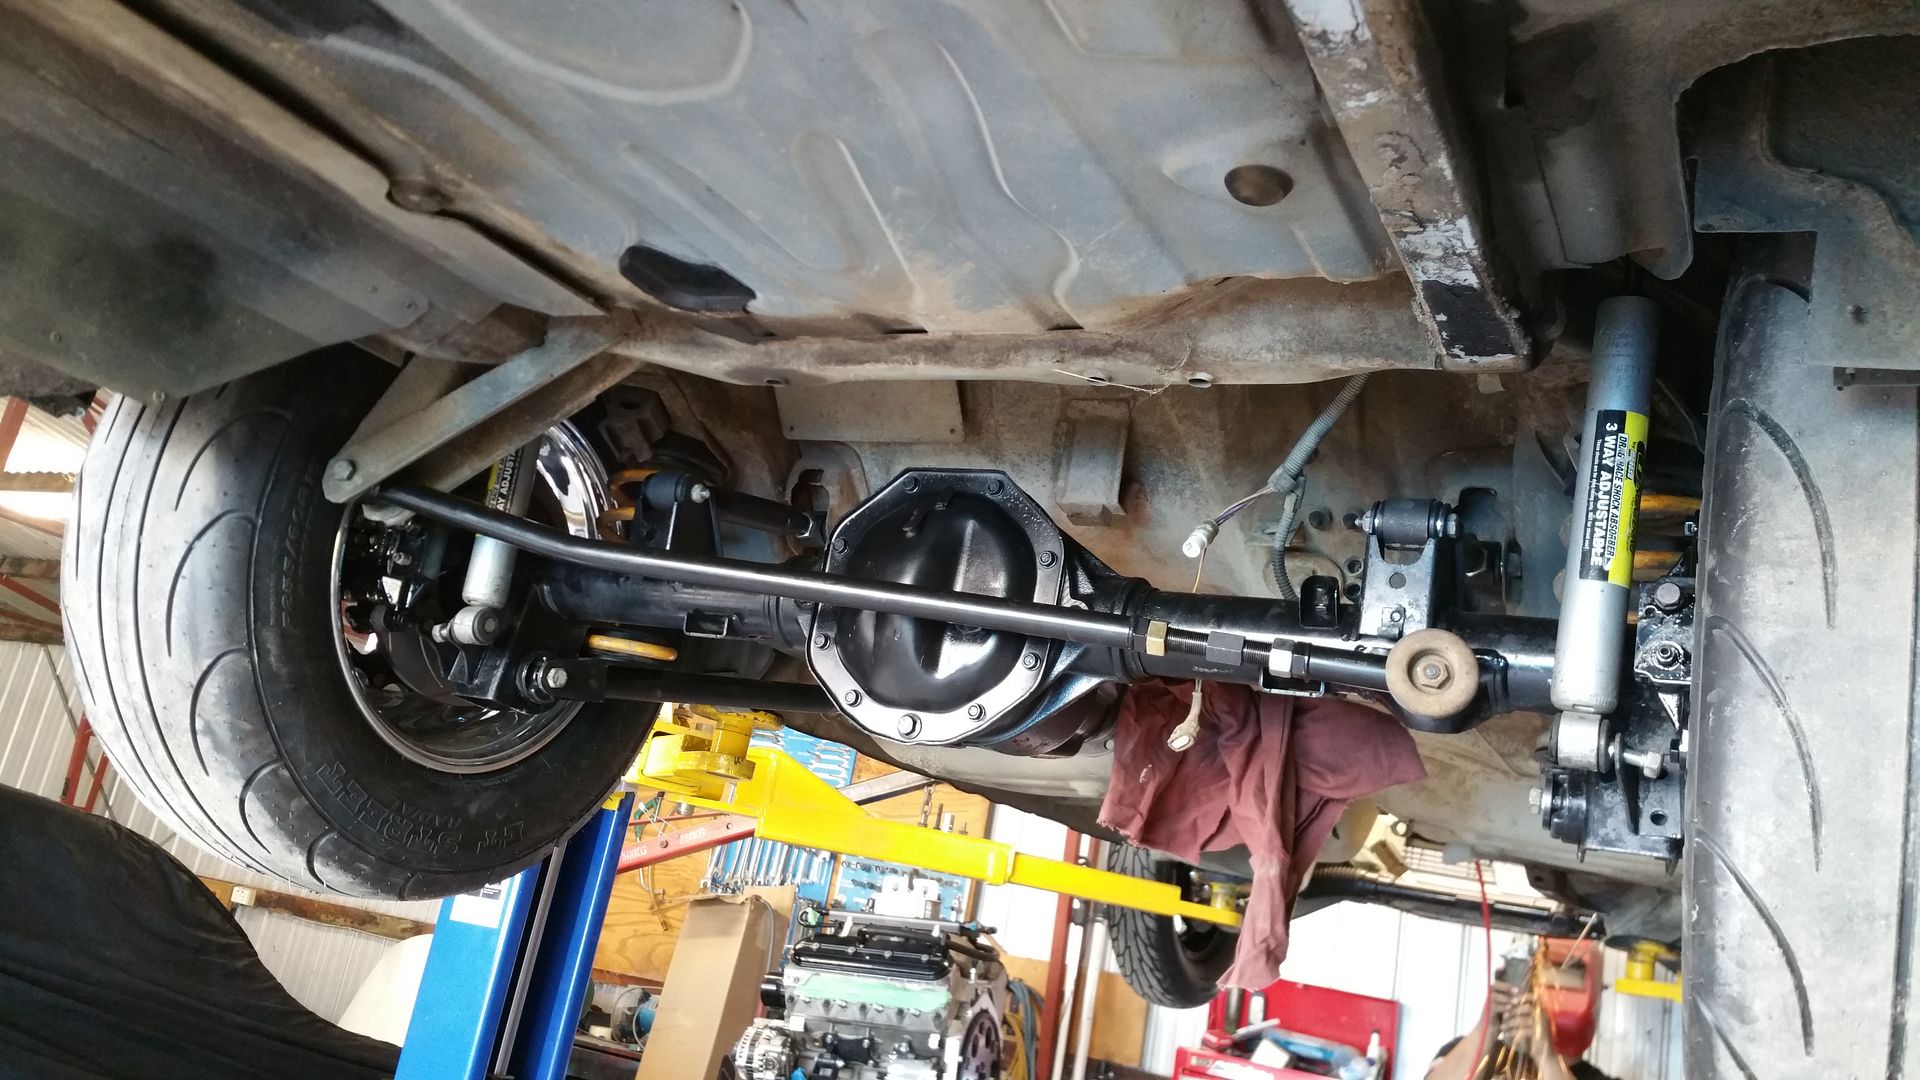
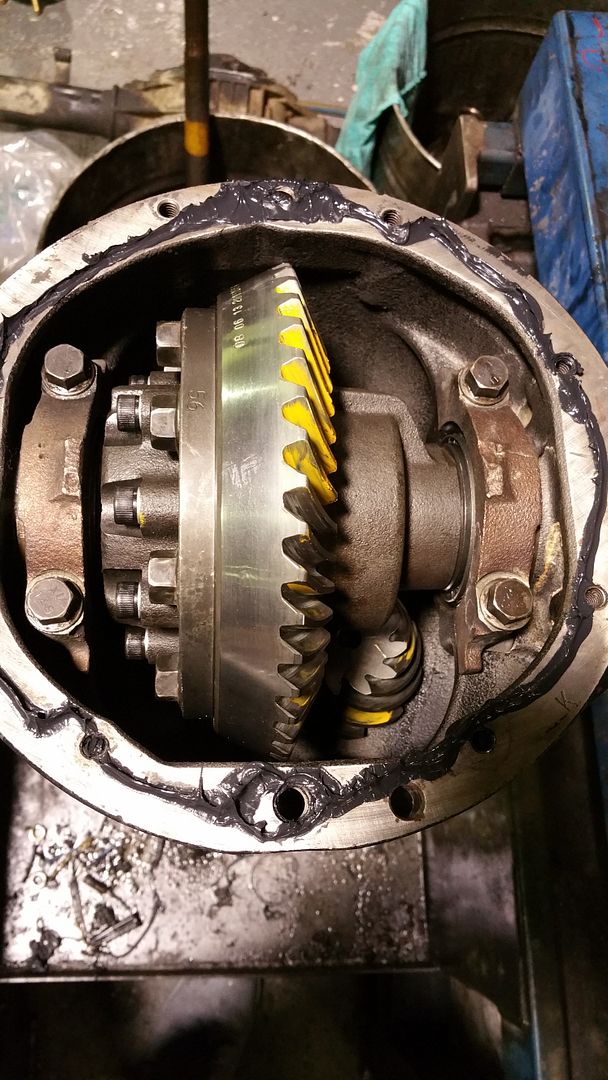
Posts: 206Got the diff back from Recce at diffco. He did an absolutely outstanding job!
Only thing i need to do is move the shocker bracket in either side.
[p.s. yes, i know the m/ts are on the wrong way]

 September 4, 2016 at 9:59 am #19428
Bdj_007Participant- 2002 Holden Vx Commodore 1986 Holden Vl Berlina
View build HERE
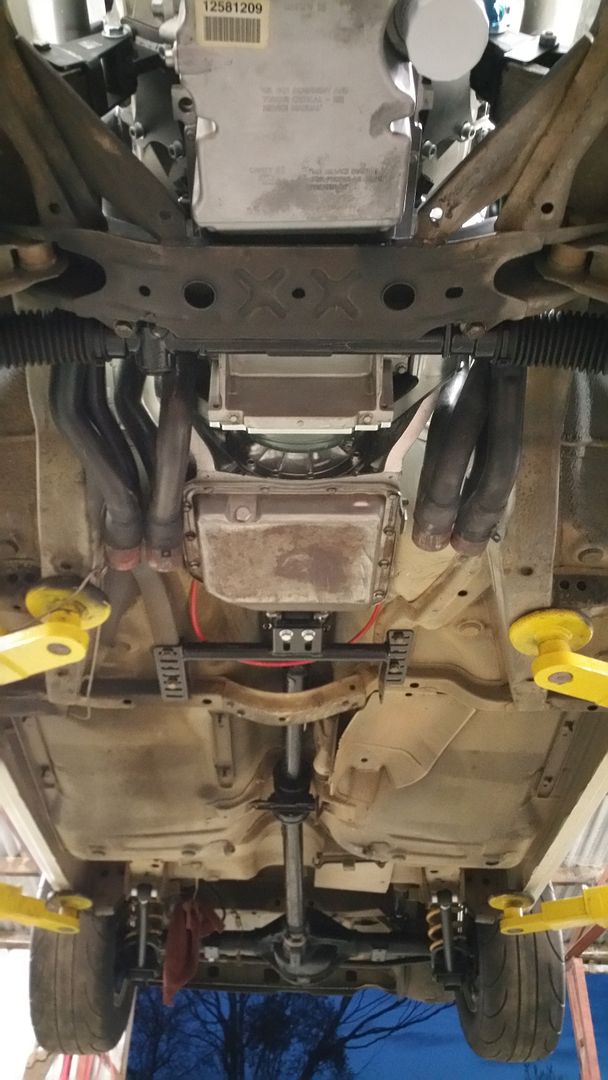
Posts: 206Everything is pretty much buttoned up and ready for braid and wiring!
 September 4, 2016 at 10:11 am #19429
Nice mate. So wheels fit good. You going to move shocker mount on diff or in tub? Remember tech soon as you move mount it can’t be engineered. So do it stealthy
what headers they?
September 4, 2016 at 2:02 pm #19434Nice work. This has came a long way the last few days getting all the big bits. Ha ha.
 September 5, 2016 at 10:08 pm #19458
MichaelParticipant- VY Calais 383ci GT42 turbo.
View build HERE
Posts: 208
Wilwoods are on. I’m upset i had to run an 8mm spacer to move the caliper in more.

Same problem I had mate. I’m hoping to get away with grinding a bit off the caliper though. I think my v-series are 2.25″ bs.
Otherwise I have a 8mm spacers laying around also. Maybe 4mm somewhere.
Also so you should run longer studs. That looks like Andra would not approve.
September 11, 2016 at 2:54 pm #19578
Bdj_007Participant- 2002 Holden Vx Commodore 1986 Holden Vl Berlina
View build HERE
Posts: 206Wilwoods are on. I’m upset i had to run an 8mm spacer to move the caliper in more.
Same problem I had mate. I’m hoping to get away with grinding a bit off the caliper though. I think my v-series are 2.25″ bs. Otherwise I have a 8mm spacers laying around also. Maybe 4mm somewhere. Also so you should run longer studs. That looks like Andra would not approve.
It wouldn’t have worked doing it that way on this. The caliper needs to be central with the rotor. if i did what you suggested it be more in favour of the outside pistons if you get what i mean.
Supposedly all these willwood kits are like that. They are just 1 universal fit. and you have to mod it to suit.
The threads are about 3mm from the end of the nut. Definitely better than factory
Nice mate. So wheels fit good. You going to move shocker mount on diff or in tub? Remember tech soon as you move mount it can’t be engineered. So do it stealthy what headers they?
Moved it on the diff man. pulled it over around 10mm and scraped some of the factory stoneguard & sealer off the inner of the tub and it fits like a charm
I believe they are pacemaker tri-y’s
Nice work. This has came a long way the last few days getting all the big bits. Ha ha.
Getting there man haha, hoping to start it up Grand final weekend.
September 11, 2016 at 2:59 pm #19579
Bdj_007Participant- 2002 Holden Vx Commodore 1986 Holden Vl Berlina
View build HERE
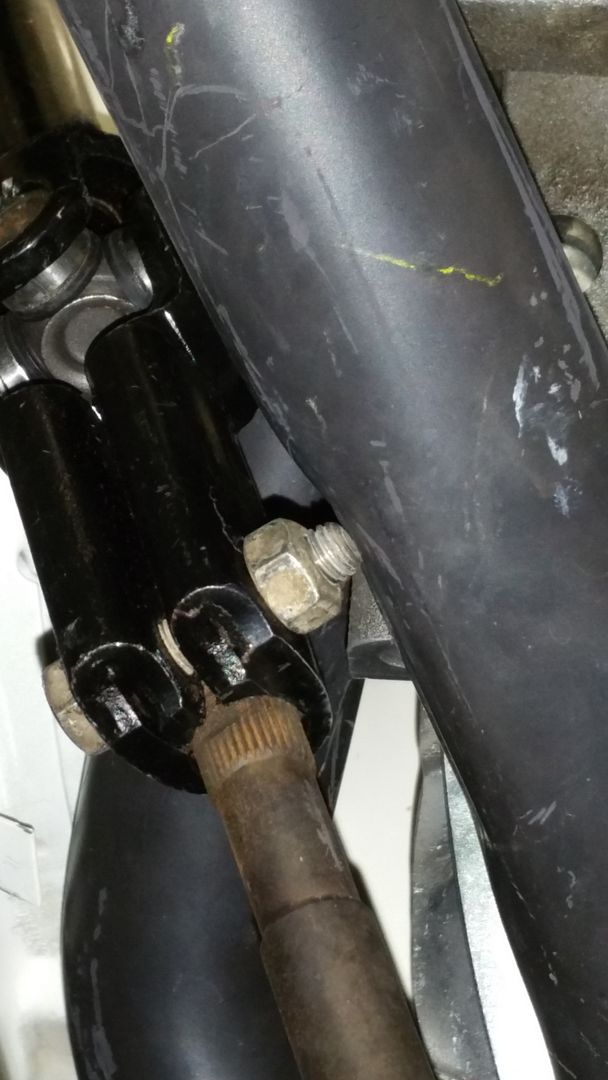
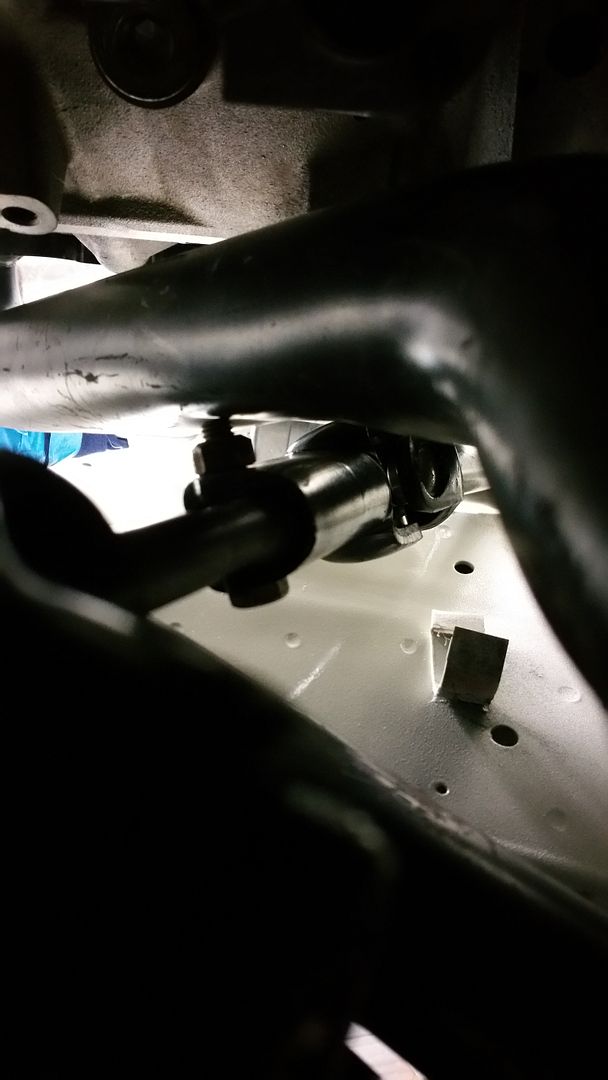
Posts: 206Ran into our first problem. Supposedly happens to all early girls with this conversion. The nut and shaft hit on the header.
It was fixed up pulling the motor up on the tuff mounts. shaving the bolt to the nut and hitting the header in to make it fit my millimeters.
apparently its just what you have to
 September 11, 2016 at 3:01 pm #19580
Bdj_007Participant- 2002 Holden Vx Commodore 1986 Holden Vl Berlina
View build HERE
Posts: 206forgot to put another pic up.
the internals of the diff
 September 11, 2016 at 3:05 pm #19581
Bdj_007Participant- 2002 Holden Vx Commodore 1986 Holden Vl Berlina
View build HERE
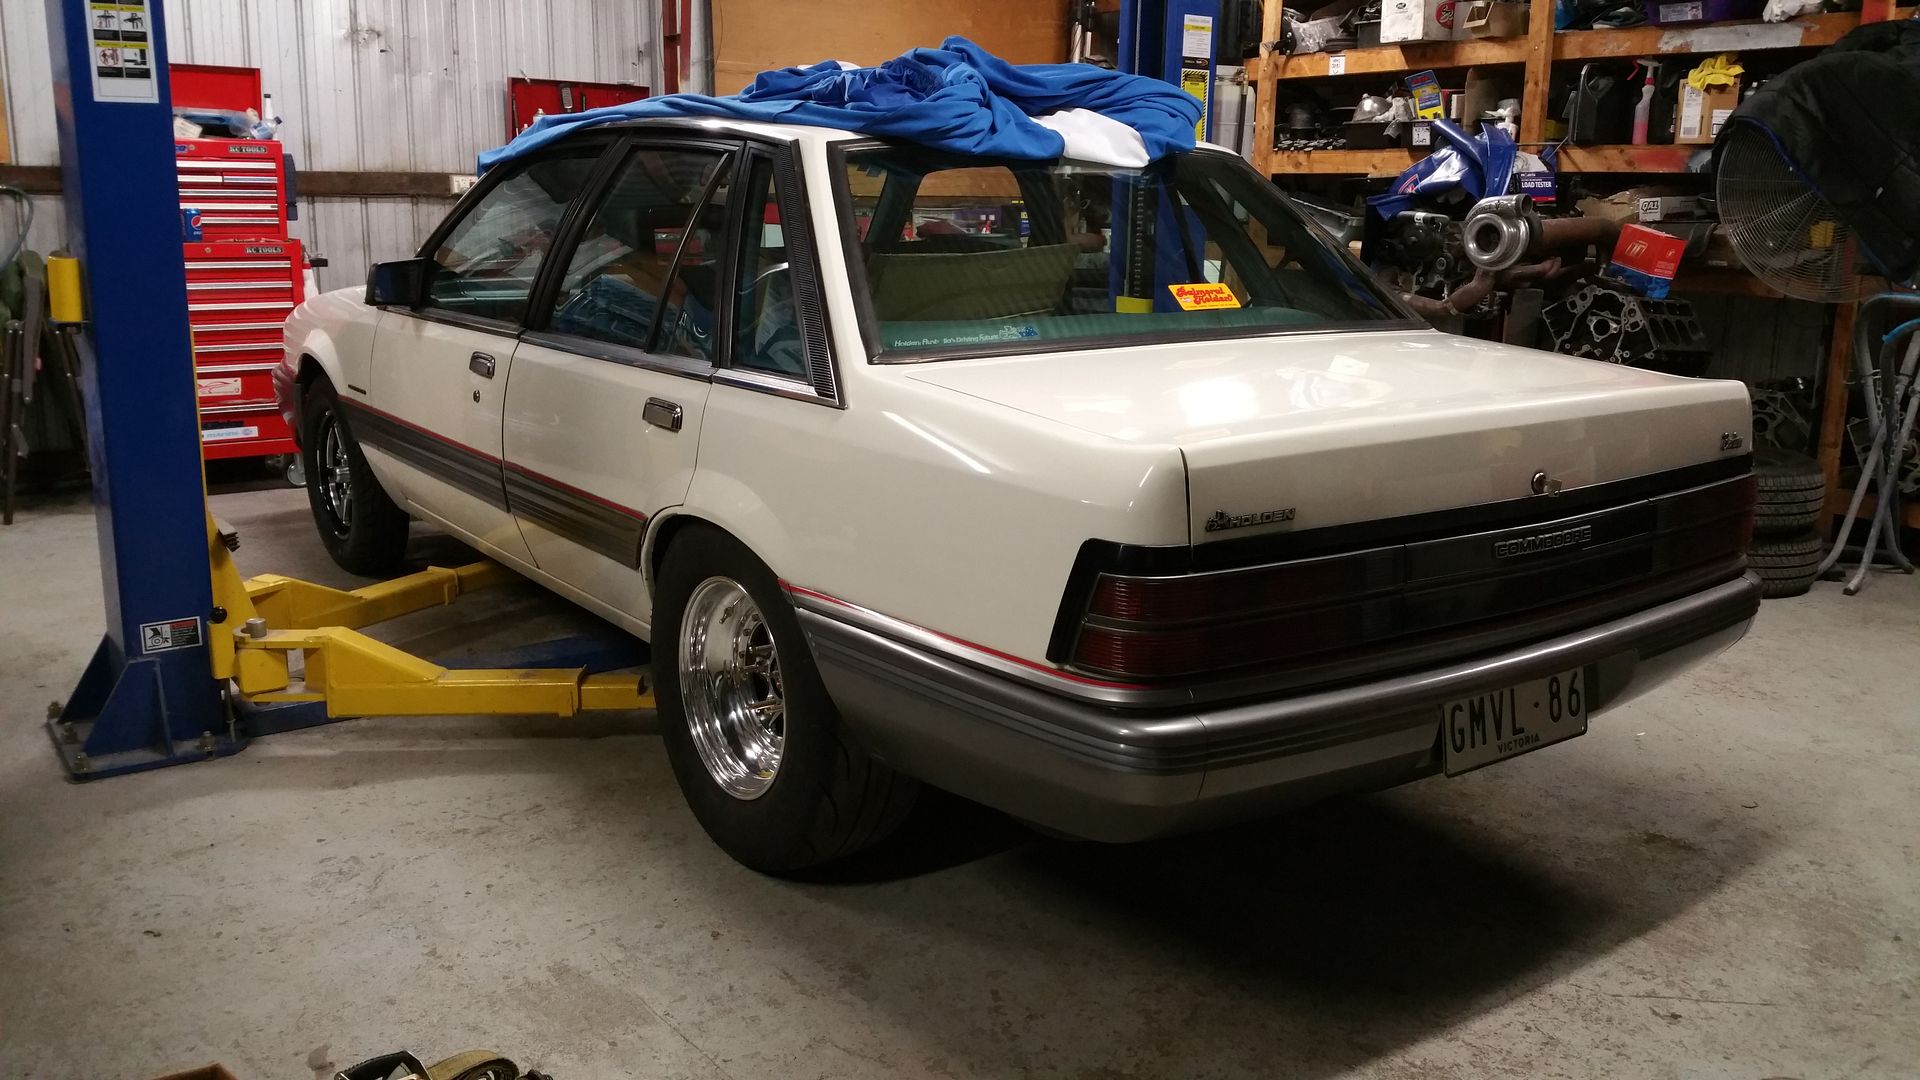
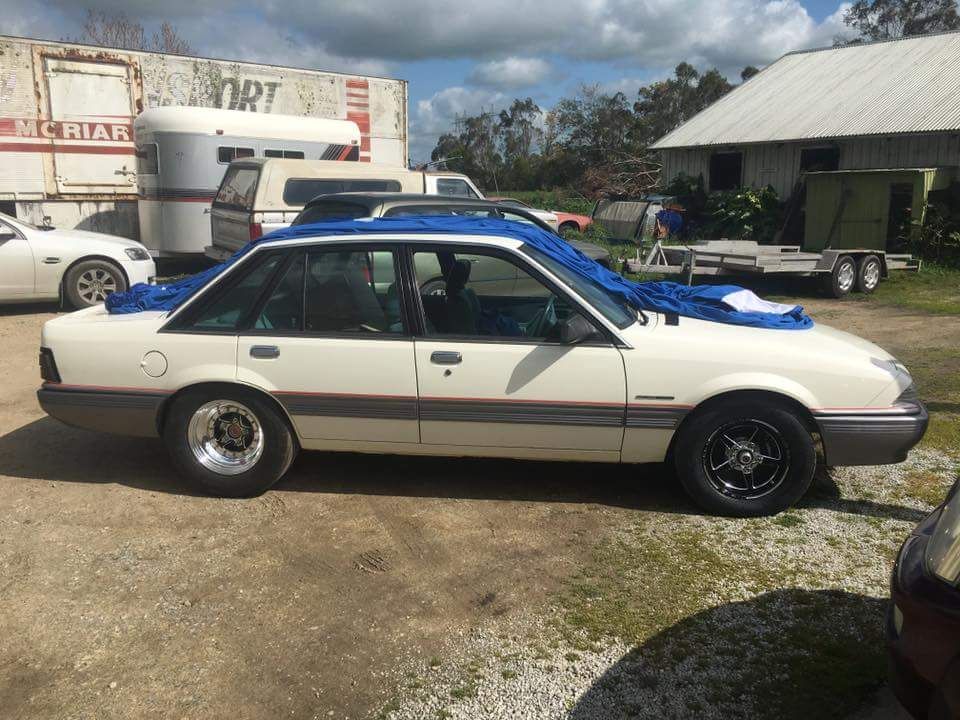
Posts: 206Looks phat back on the ground again

 September 11, 2016 at 3:53 pm #19583
Looking smick.
What lower trailing arms you use
September 11, 2016 at 4:11 pm #19584
Bdj_007Participant- 2002 Holden Vx Commodore 1986 Holden Vl Berlina
View build HERE
Posts: 206Looking smick. What lower trailing arms you use
Pro 9 Adjustable
http://www.pro9.com.au/?PCID=23503&PSO=259&PSID=Pro9-Com6000A&PSV=Primary&CDO=
September 11, 2016 at 4:16 pm #19585Nice. Do they sit lower then standard
September 11, 2016 at 4:29 pm #19587
VRSenator065Participant- Adelaide SA
- VR Senator LSx454 1960 Kombi (project) 1921 Nash Hot Rod (future project)
View build HERE
Posts: 5 777Looks great. Exhaust clearance around the steering knuckle is tight no matter what. Looks like you got it nicely sorted though. What headers are they?
September 11, 2016 at 4:44 pm #19590
Bdj_007Participant- 2002 Holden Vx Commodore 1986 Holden Vl Berlina
View build HERE
Posts: 206Nice. Do they sit lower then standard
Nah. Because of where the spring hanger is located, the springs need to be 2.5inch lower. So expect to get out the grinder haha.
They are great, because the give you full adjustment on where you want the diff to sit and helps with the pinion angle.
Adjustable pan hard rod does wonders as well.
Looks great. Exhaust clearance around the steering knuckle is tight no matter what. Looks like you got it nicely sorted though. What headers are they?
Pacemaker tri-y’s i believe
September 11, 2016 at 6:20 pm #19591So you actually gain clearance? From the ground?
September 11, 2016 at 7:49 pm #19593You’ll fret a little less about denting the extractors after watching this…
 September 11, 2016 at 8:05 pm #19595
Bdj_007Participant- 2002 Holden Vx Commodore 1986 Holden Vl Berlina
View build HERE
Posts: 206You’ll fret a little less about denting the extractors after watching this…
<iframe src=”https://www.youtube.com/embed/azPKIjxmmdU?feature=oembed” frameborder=”0″ allowfullscreen=””></iframe>Haha my mate Cam showed me that. Couldn’t believe after what they did to those pipes it was only like 1hp difference
So you actually gain clearance? From the ground?
Same as standard. They really help when trying to fit a big tyre.
With standard control arms i wouldnt have had a hope getting those 255’s under.
September 11, 2016 at 8:22 pm #19596Wickid. Good to know. I’ve got boxed arms which have been shaved. But always liked the look of these, plus the option to adjust it.
September 11, 2016 at 9:02 pm #19599
Bdj_007Participant- 2002 Holden Vx Commodore 1986 Holden Vl Berlina
View build HERE
Posts: 206Wickid. Good to know. I’ve got boxed arms which have been shaved. But always liked the look of these, plus the option to adjust it.
Ahh wicked. Should still work a treat man.
September 11, 2016 at 9:21 pm #19601
VRSenator065Participant- Adelaide SA
- VR Senator LSx454 1960 Kombi (project) 1921 Nash Hot Rod (future project)
View build HERE
Posts: 5 777Don’t reckon they are paccies, they are flattened there to give more clearance. Look a bit like CRE?
-
AuthorPosts


You must be logged in to reply to this topic.
