
Home›Forums›Members’ Builds and Rides›Non-Commodore Rides›The 'LOLVO'
This topic contains 53 replies, has 12 voices, and was last updated by ![]() VRSenator065 7 years, 2 months ago.
VRSenator065 7 years, 2 months ago.
-
AuthorPosts
-
May 8, 2015 at 6:17 pm #6505
SirNemesisParticipant- Geelong, VIC
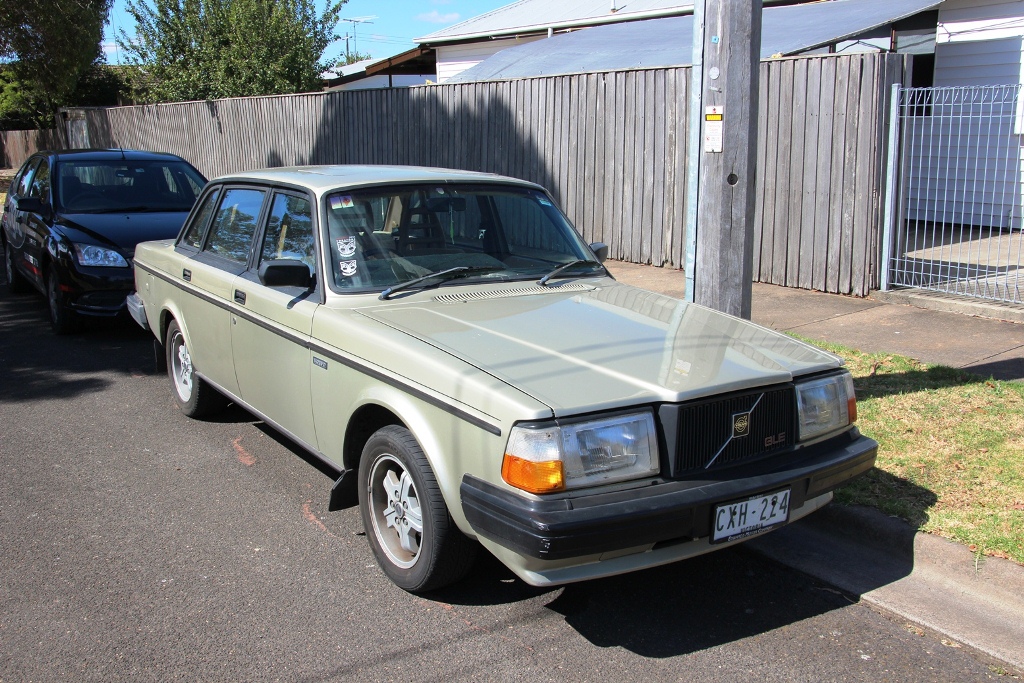
- 2002 WHII Statesman 1985 Volvo 240GLE
View build HERE
Posts: 25The LOLVO. Enjoy.
 May 8, 2015 at 6:32 pm #6506
SirNemesisParticipant- Geelong, VIC
- 2002 WHII Statesman 1985 Volvo 240GLE
View build HERE
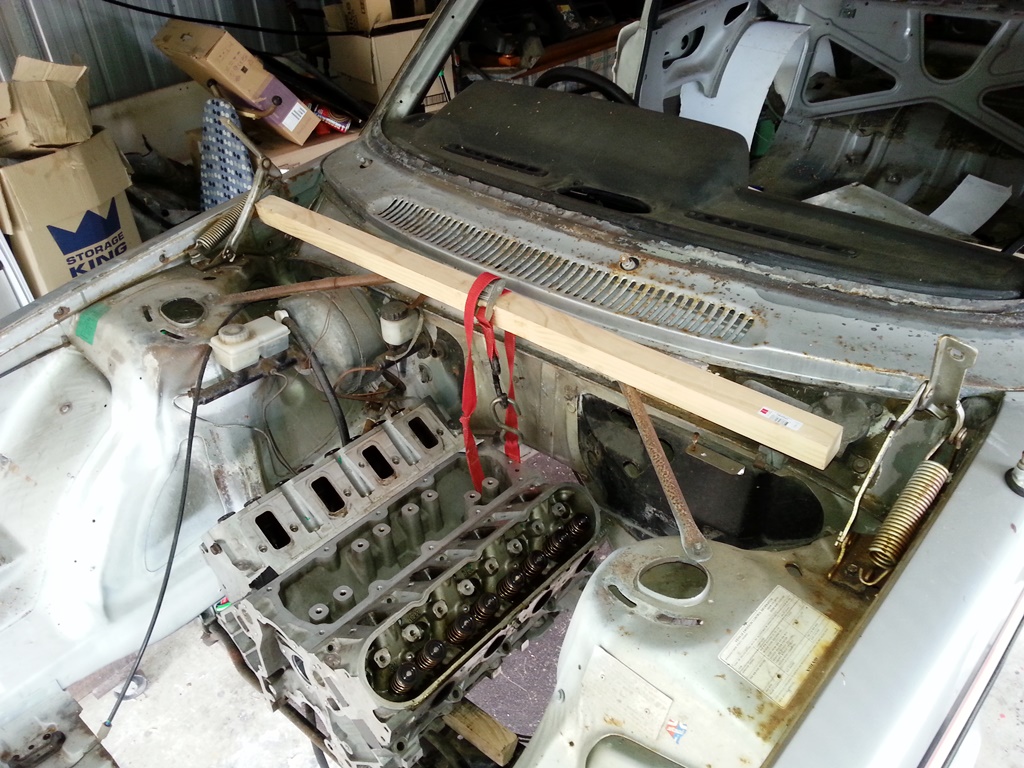
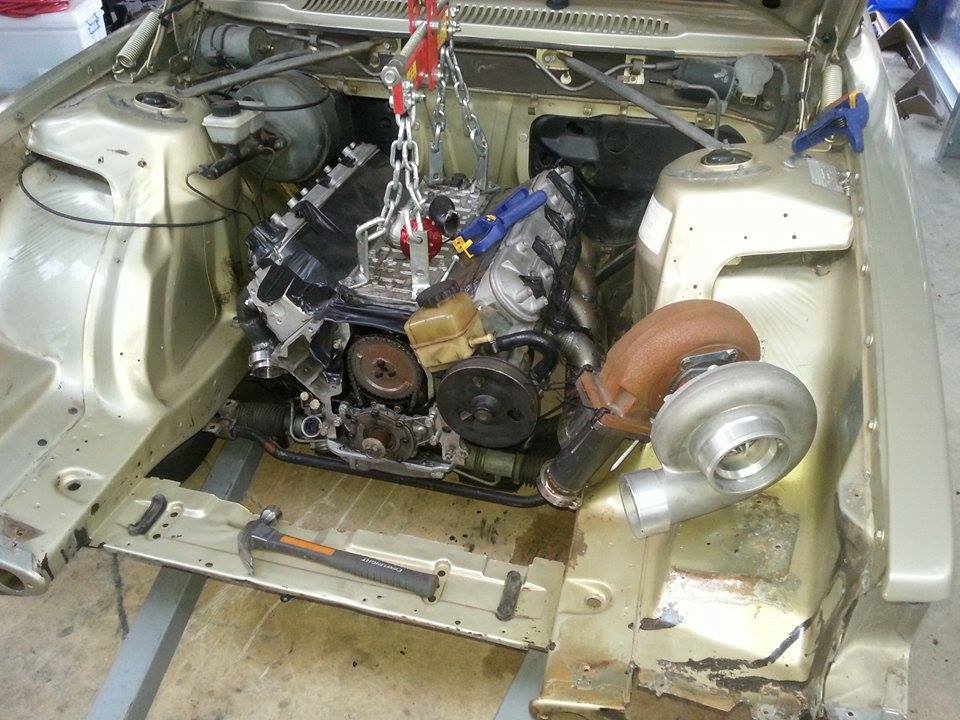
Posts: 25Modification time!
My mate had a Volvo shell so we did some engine mock-up to see how it’ll fit. He’s made some mounts to suit but I might just use engine plates instead.
I bought a WHII to strip for parts with the intention of keeping the engine+gearbox+loom, but after I’d done that I decided to go T400 instead, and got a realllyyy good price on a stuffed L76 engine. So, sold the WHII stuff off and covered all my costs.
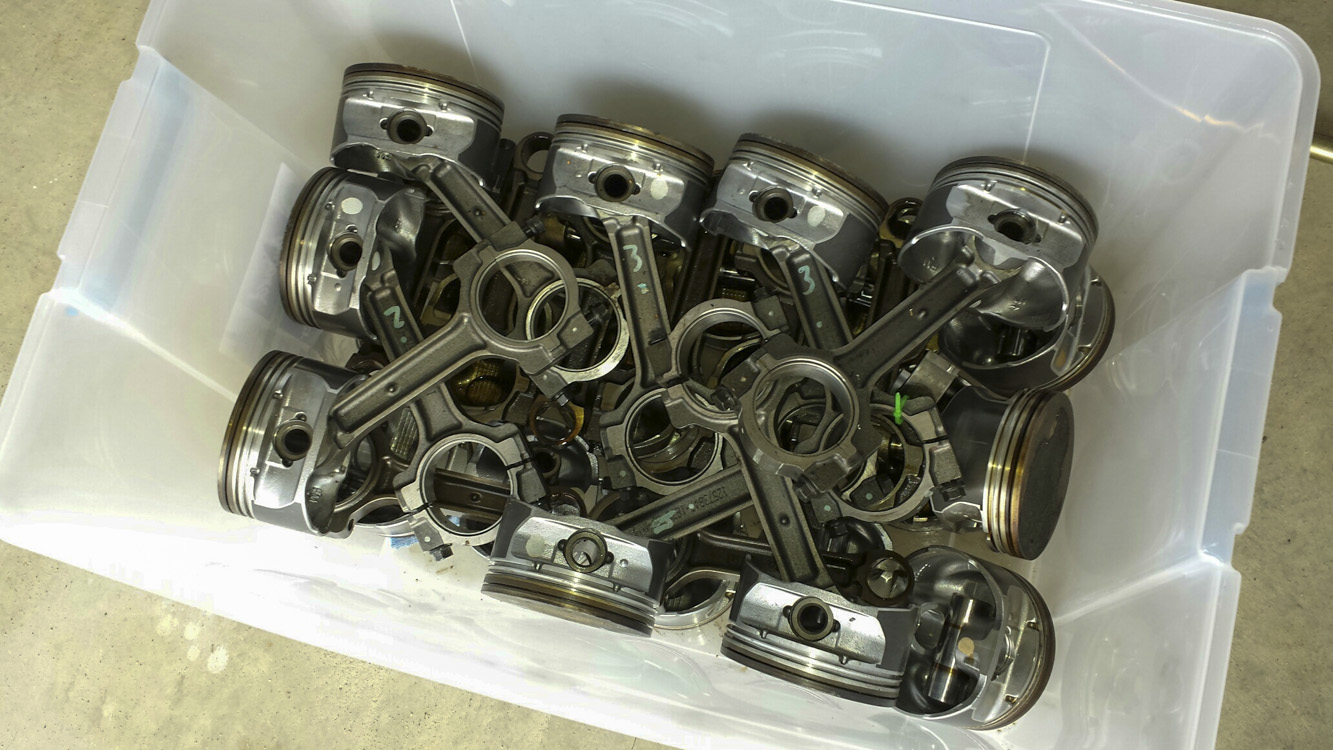
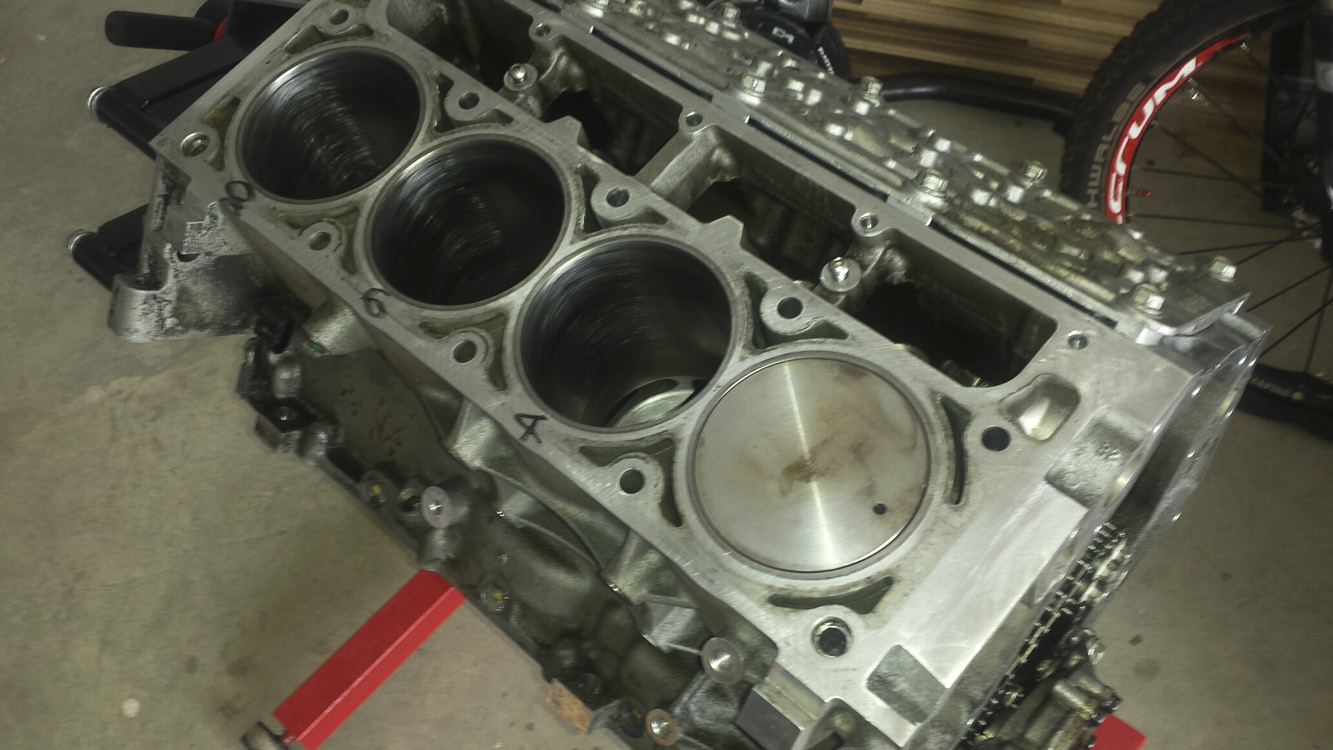
The L76 I bought wasn’t in the best condition.
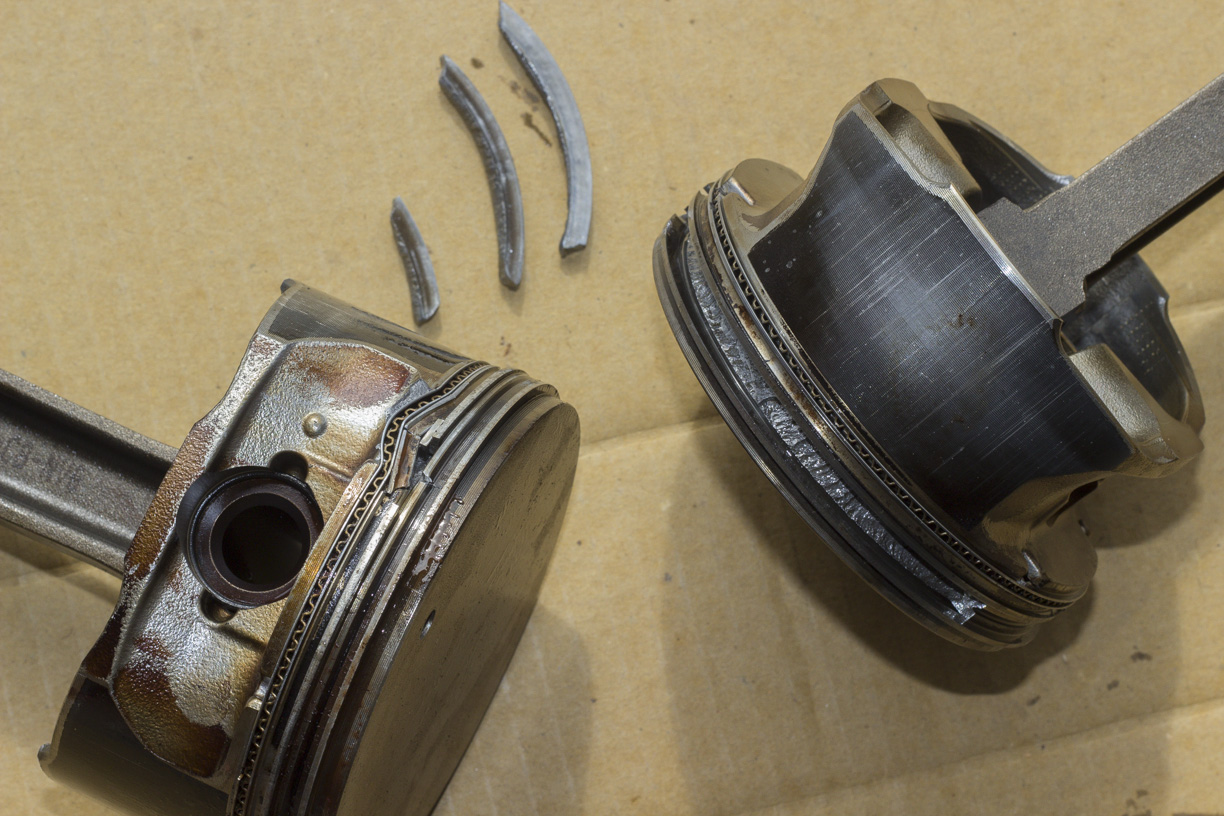
4 knackered pistons and 3 bent rods as a result of a little too much boost and a little too much timing… Block looks pretty good, could probably do with a 5thou oversize but then I’d need to buy new pistons and pay for machine work. Really don’t want to have to do that and I managed to pick up a near-new (removed from a crate engine after 500km) pistons and rods to suit the standard 4.000″ bore.
I pulled out the crank and took it down to the local machine shop to have the 58x reluctor swapped for a 24x reluctor. I’m not very good with E38 tuning and already have an abundance of LS1 looms and computers laying around, so I’d much rather wire and tune the car to suit. Swapping to a 24x reluctor saves me having to **** around with converter boxes, which have given me the shits previously…
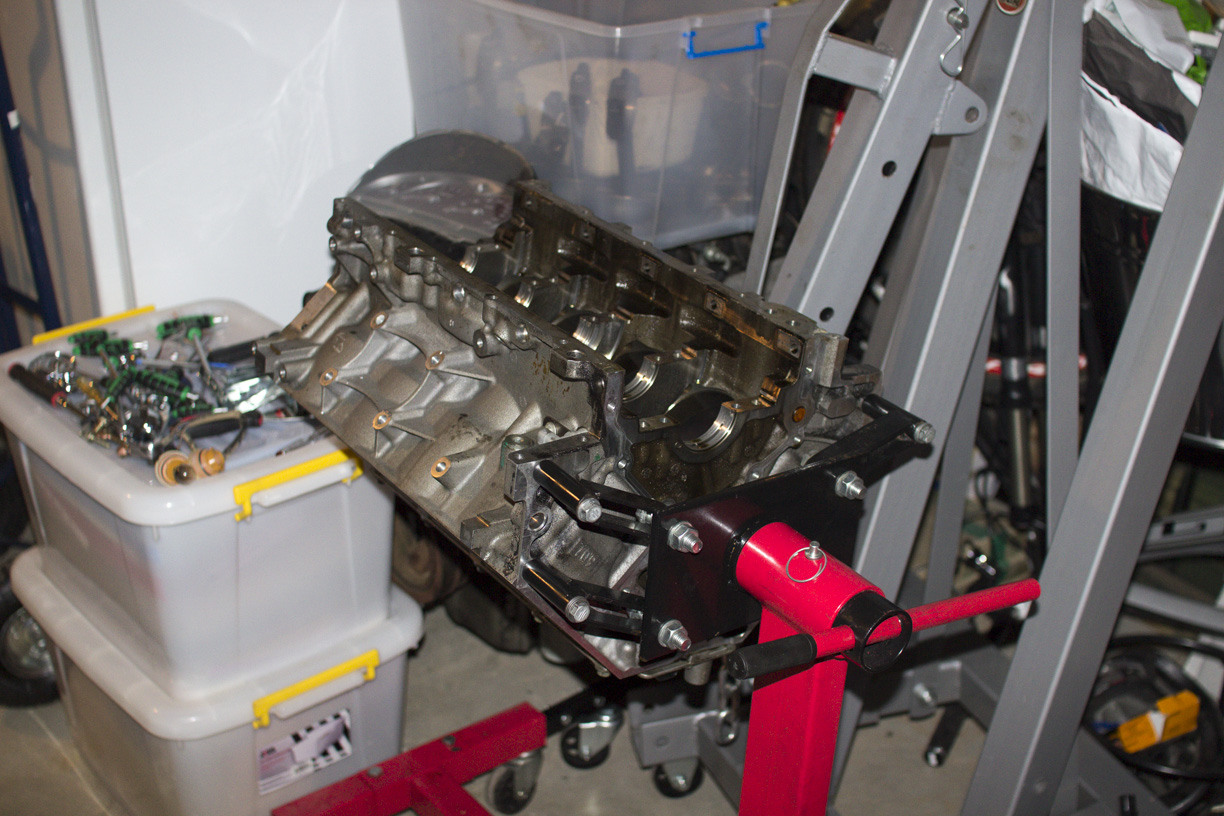
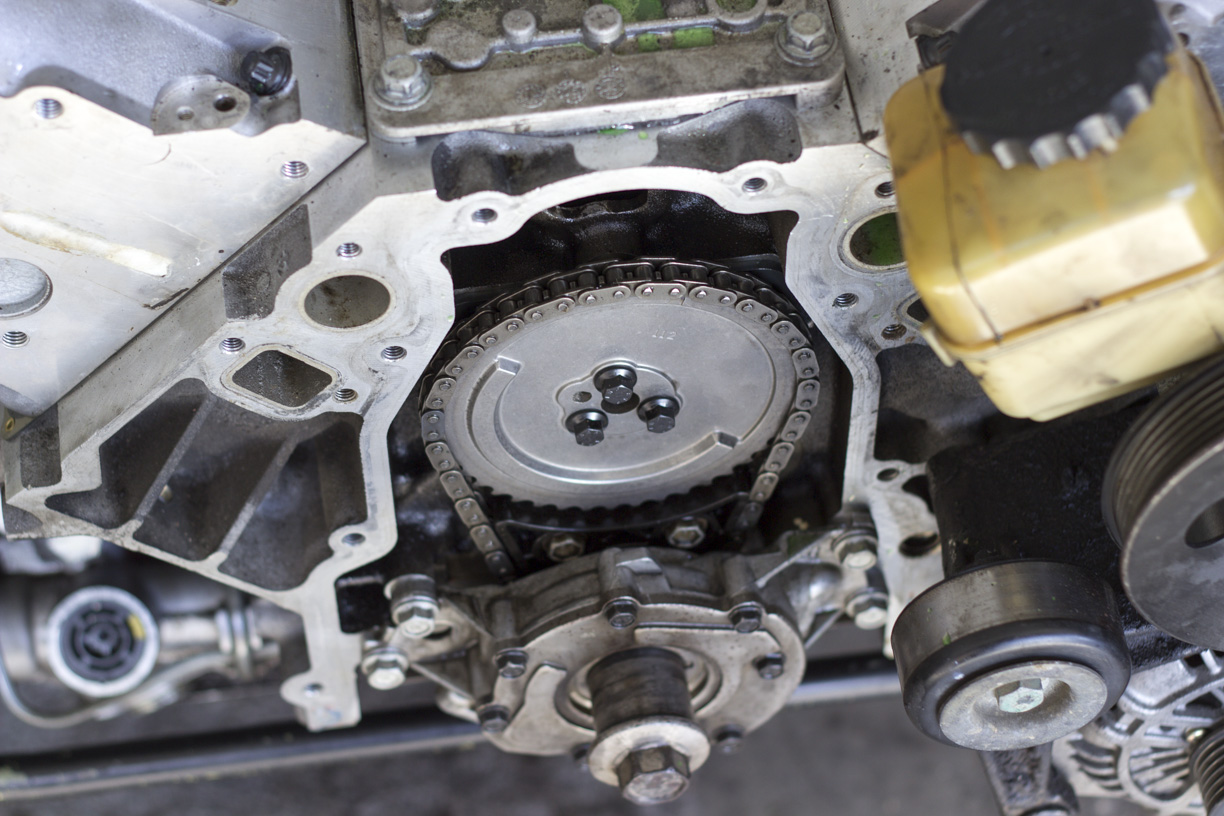
Using a 24x reluctor now so changed the crank sensor from a grey to black.
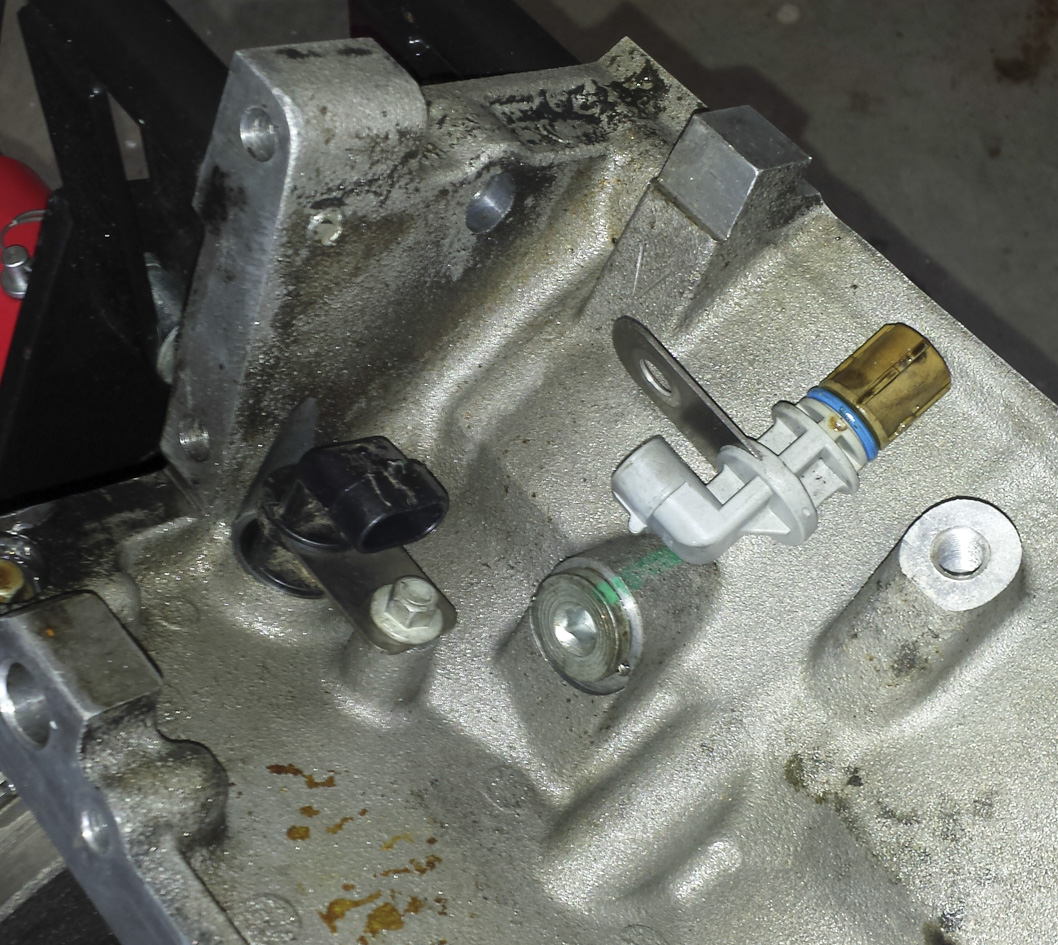
The previous owner was good enough to plug the holes in the top of the block to keep good oil pressure with the L76 DoD system. He also removed the redundant DoD hardware from underneath the valley.
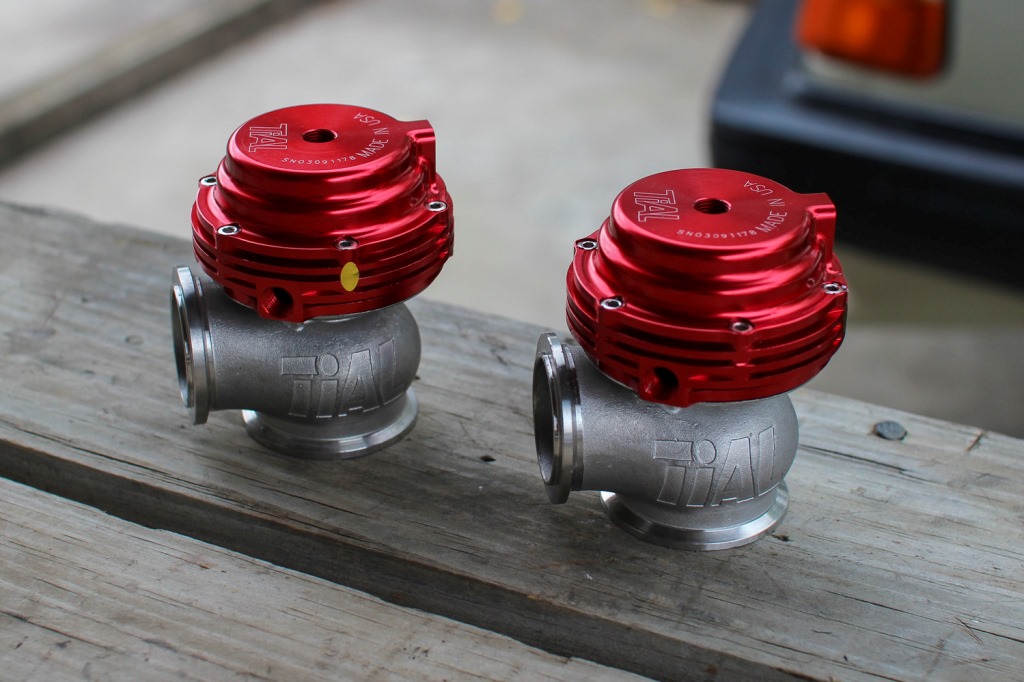
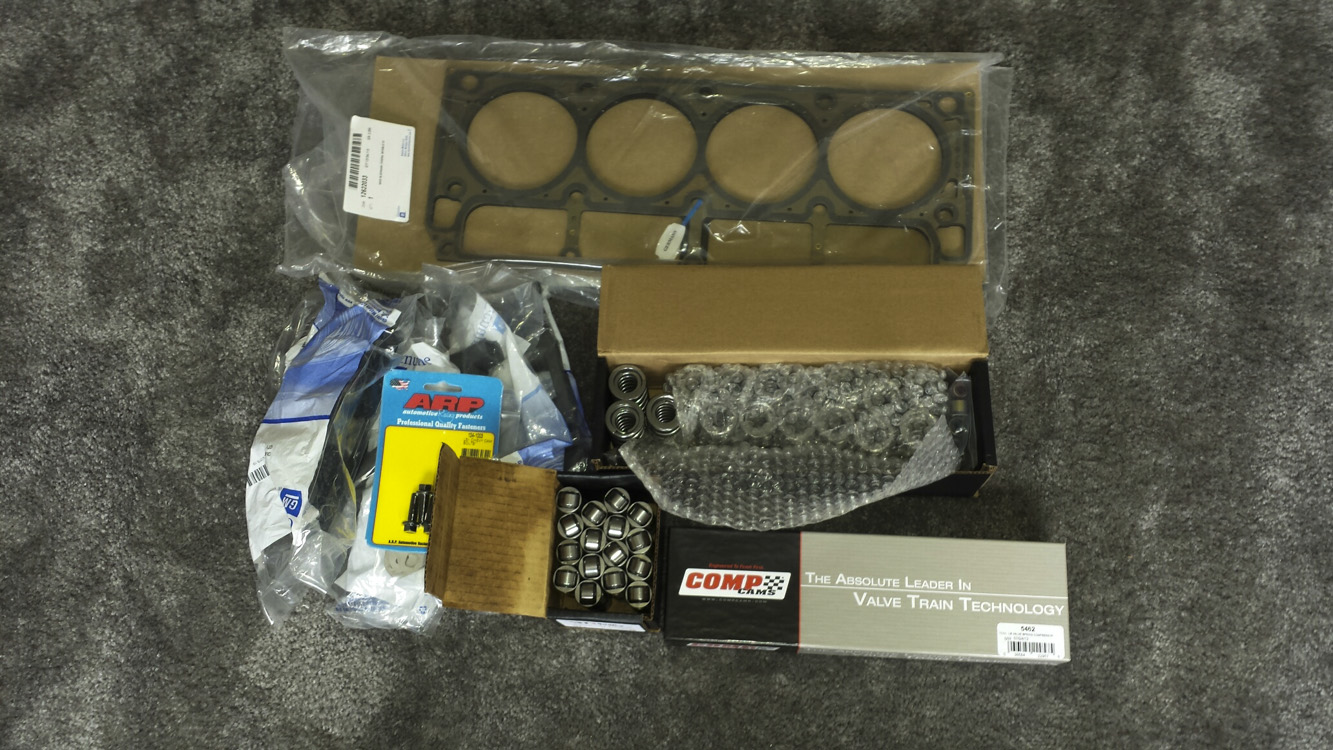
Also bought some bits and pieces from eBay…
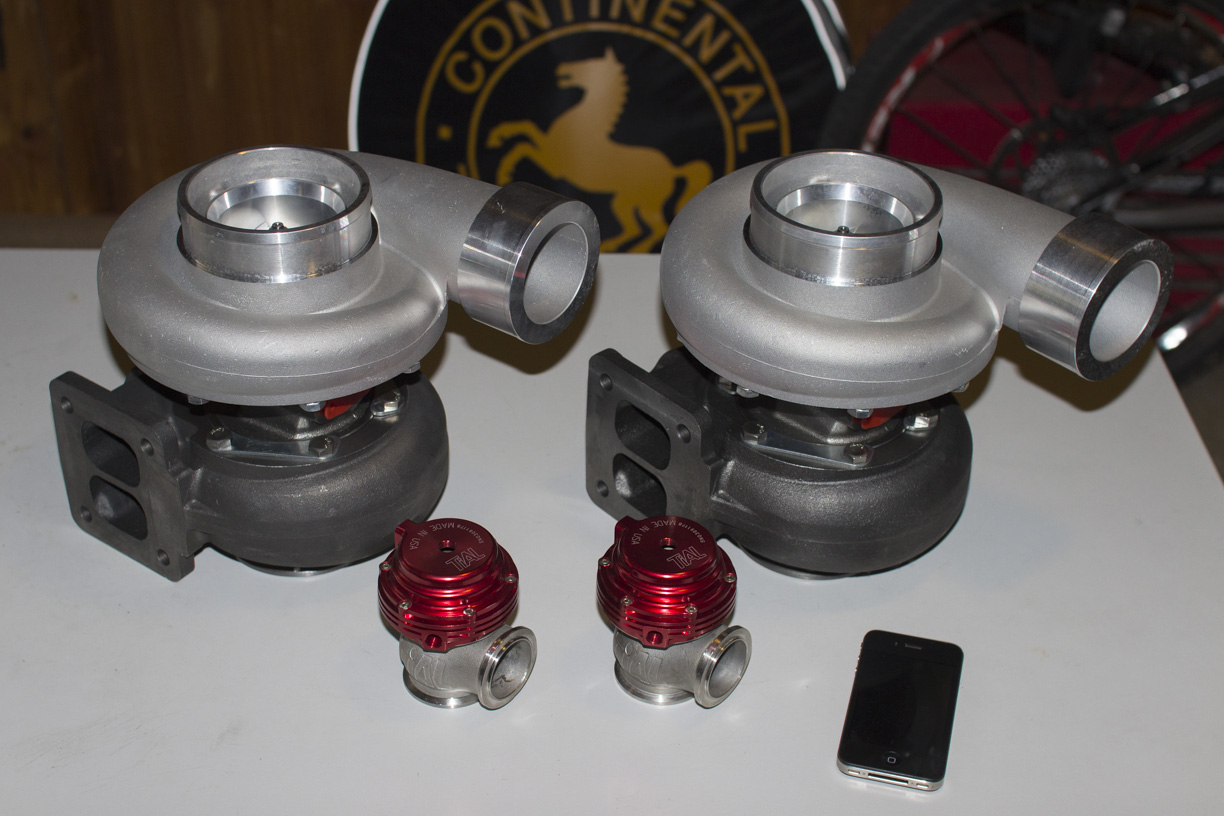
I’ve decided that using both GT45’s might be a bit too big, so I’ve sold one and will just use one by itself now.
Also picked up one of these really cheap. Looks like it should fit. If it does I’ll use it.
I also took some advice and bought some new bearings and rings. All up it cost me $220 for the lot, not too bad.
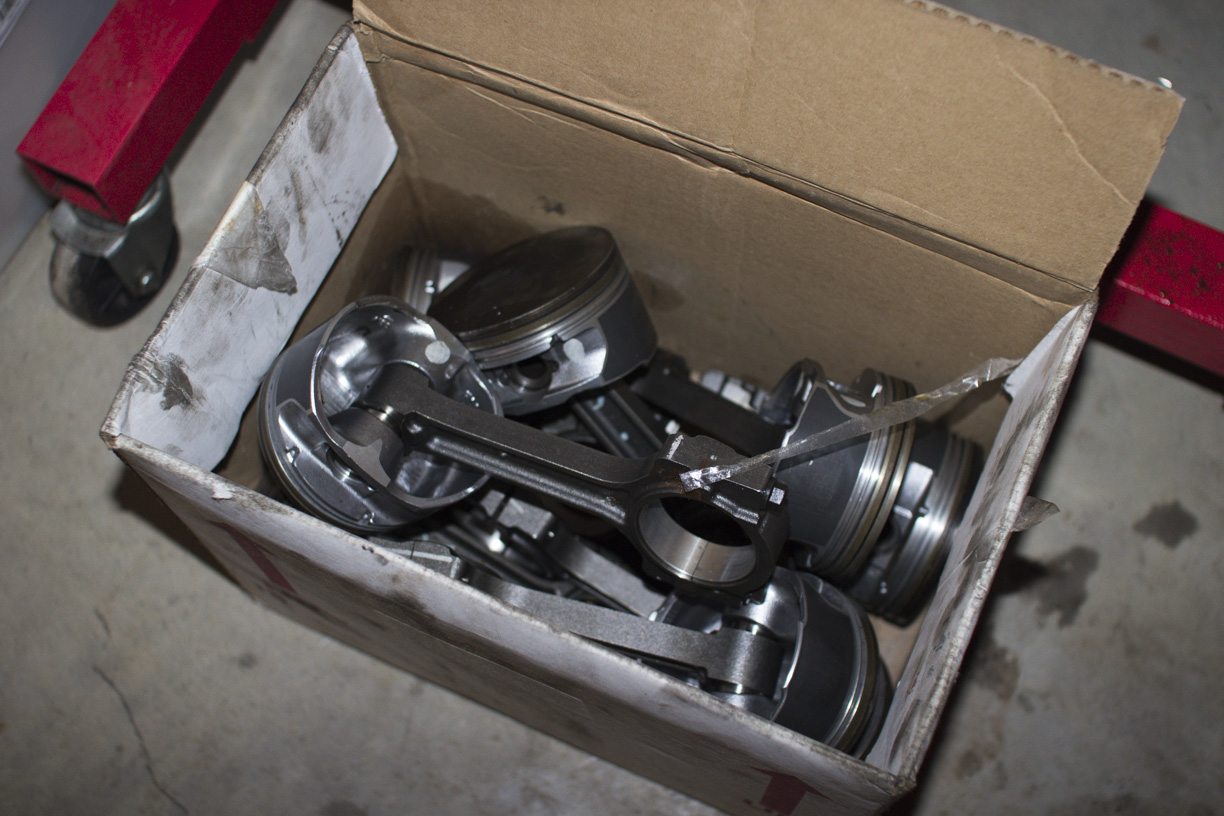
Got plenty of spare pistons and rods now…
The rest of the bits from Brian Tooley arrived too

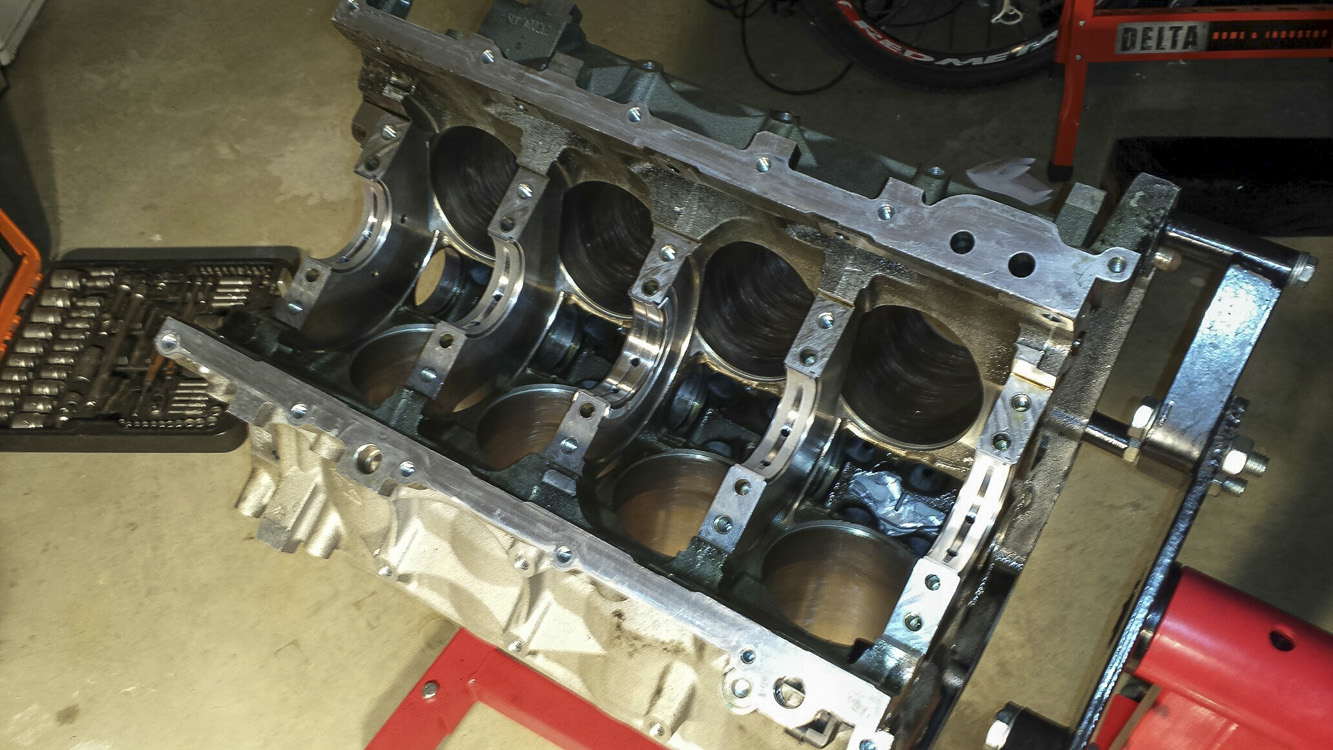
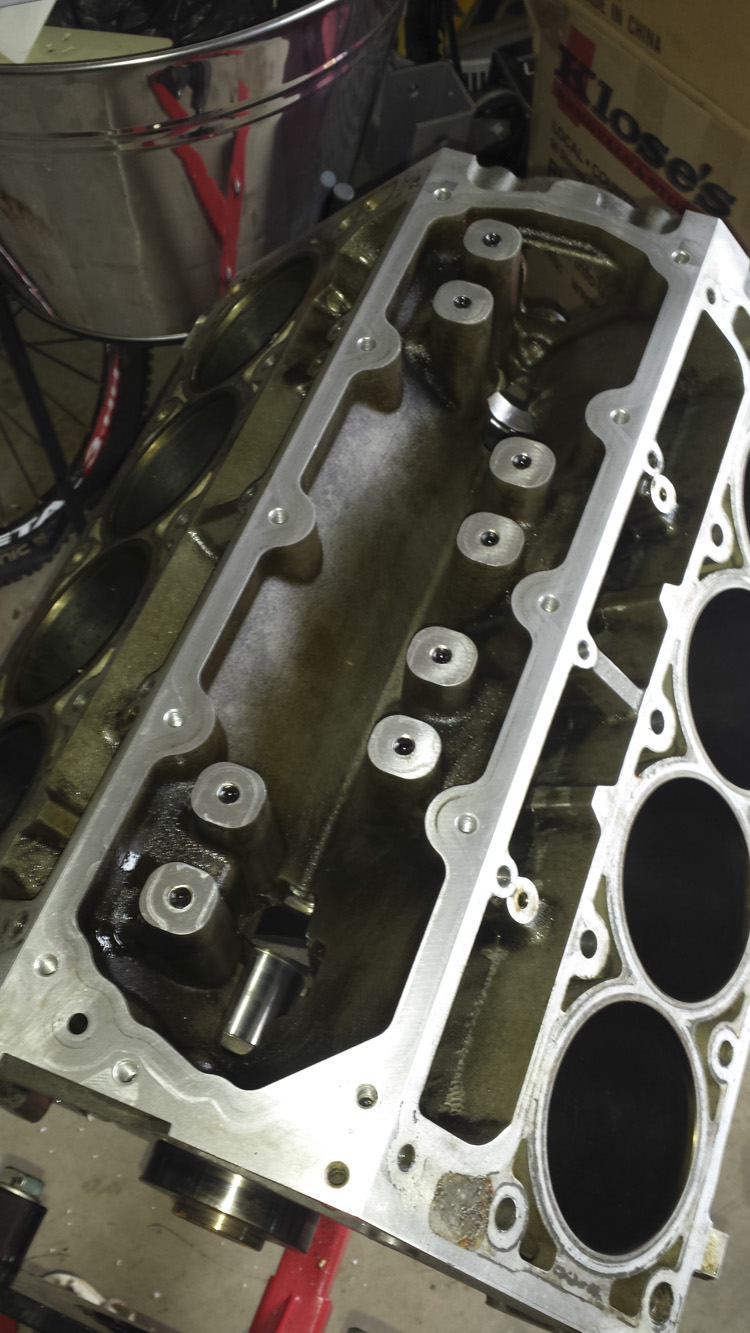
Bearings in. eBay honing tool also does a pretty mint job of scratching up the bores. Perfect!
Sloppy eBay ARP-copy studs looks alright and about 1/8th of ARP’s cost. I used genuine ARP lube to install them of course, wouldn’t want to take any shortcuts…
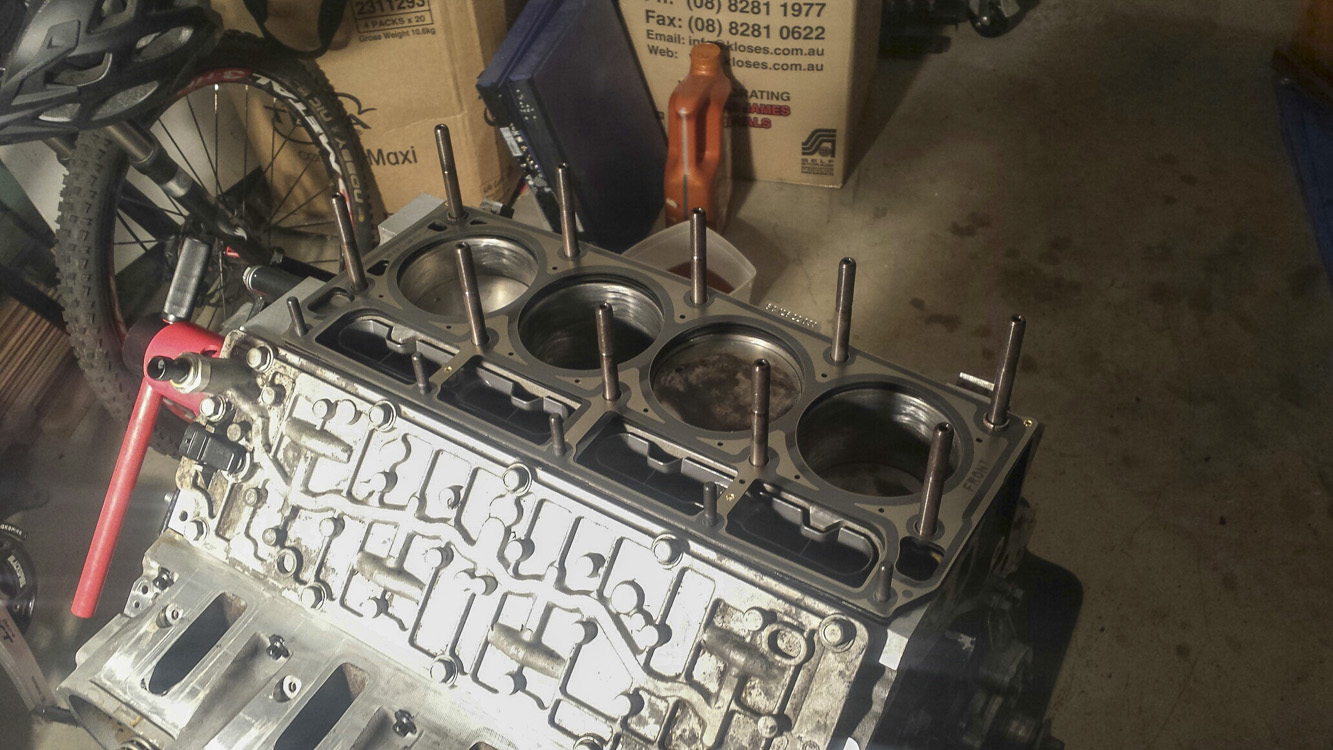
Looking pretty smick now!
 May 8, 2015 at 6:33 pm #6507
SirNemesisParticipant- Geelong, VIC
- 2002 WHII Statesman 1985 Volvo 240GLE
View build HERE
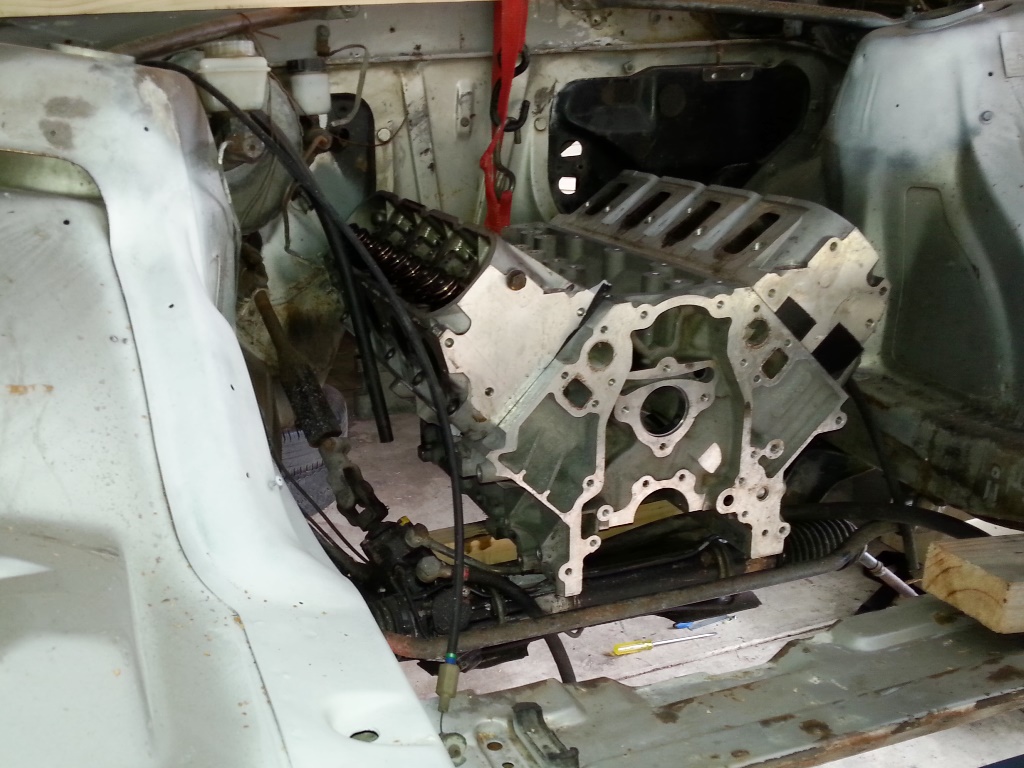
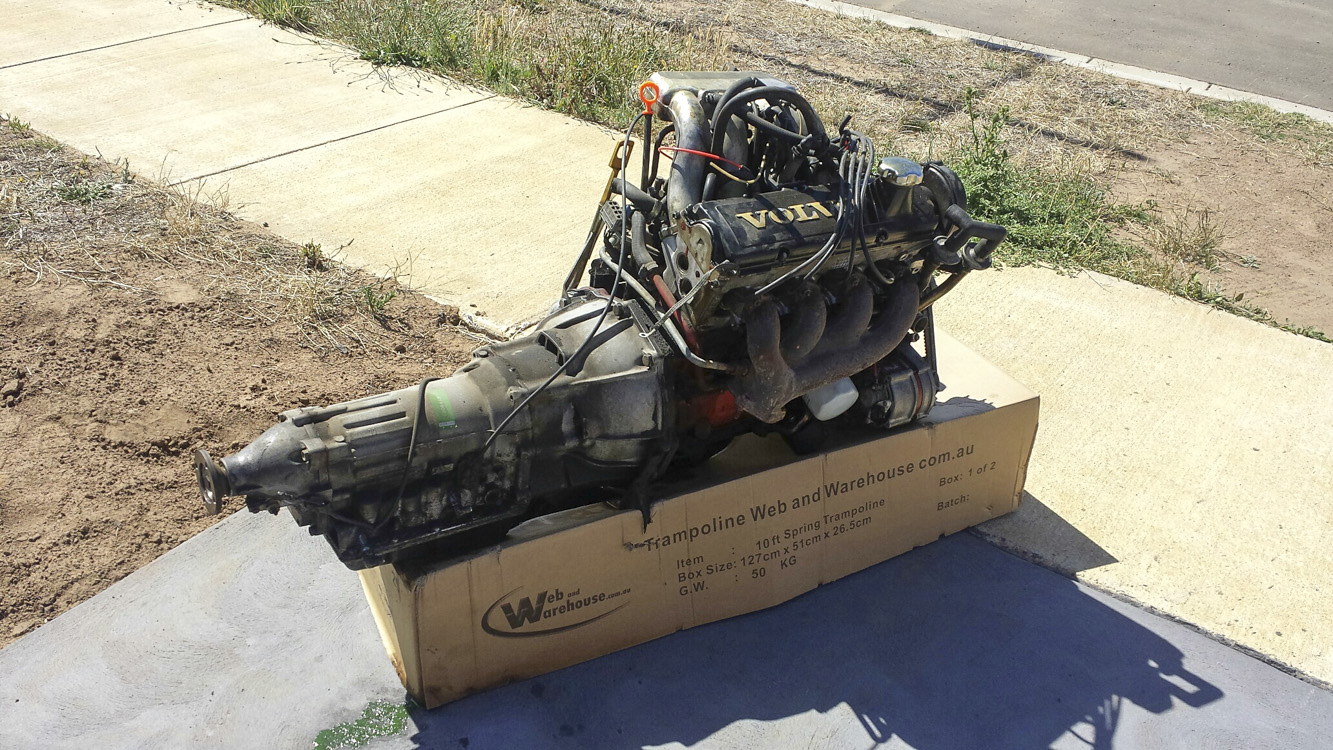
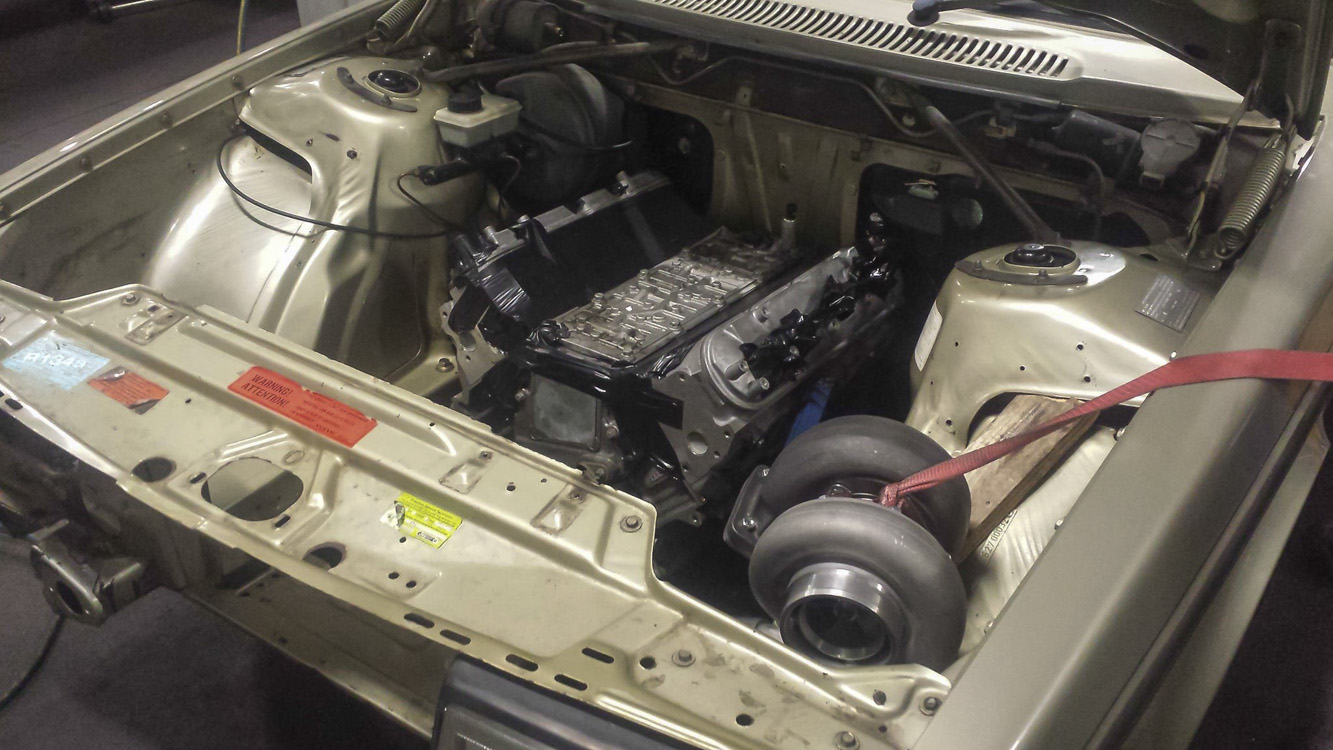
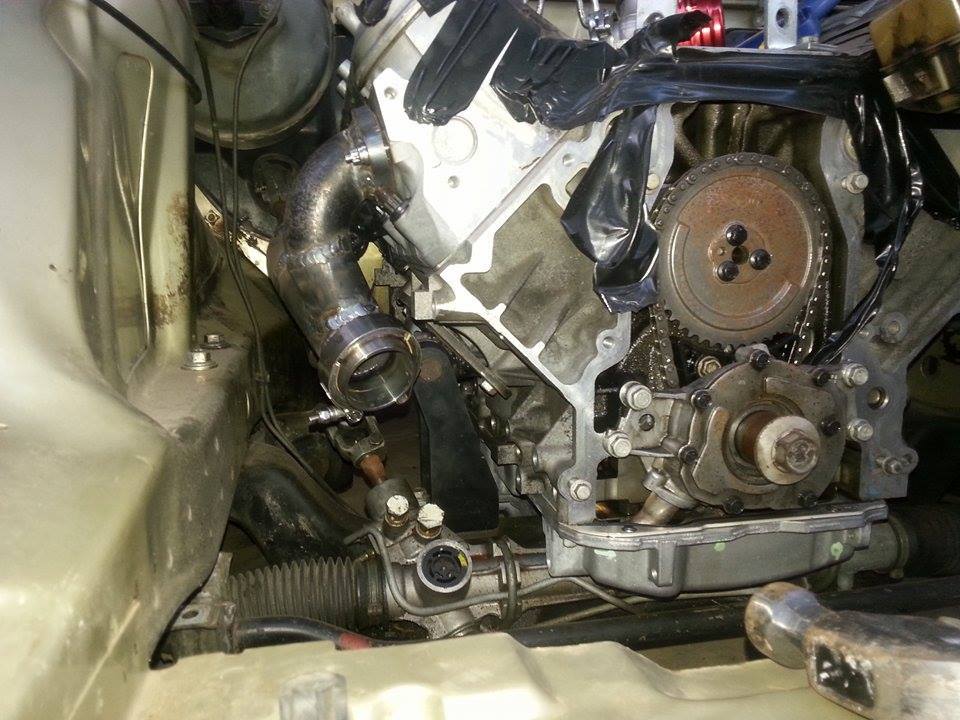
Posts: 25Out with the old.
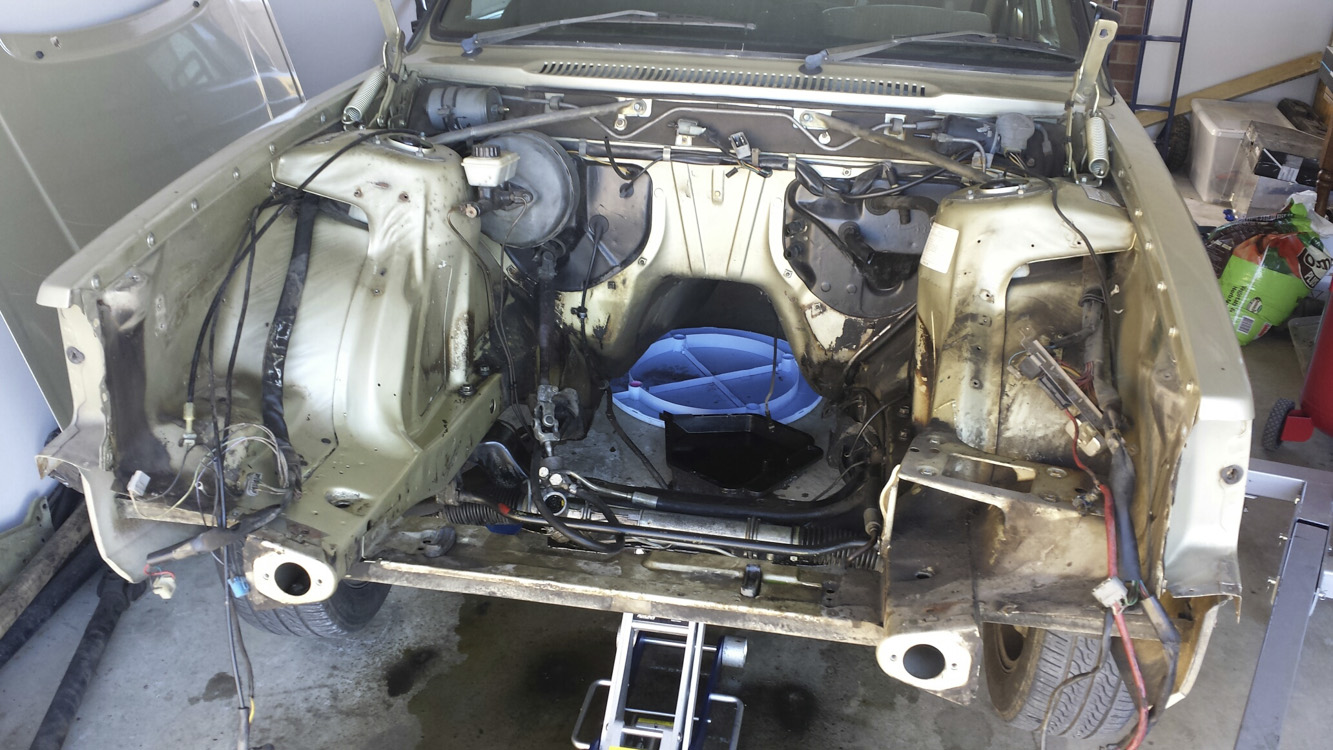
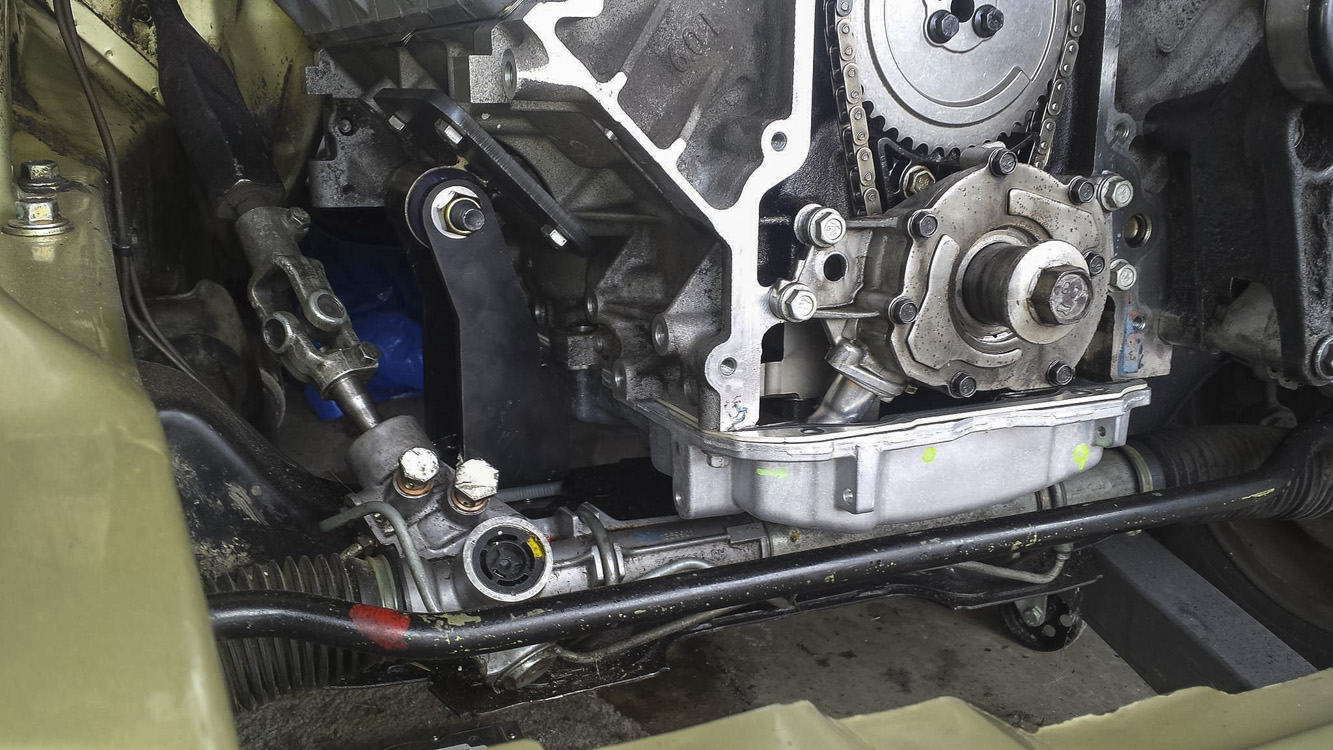
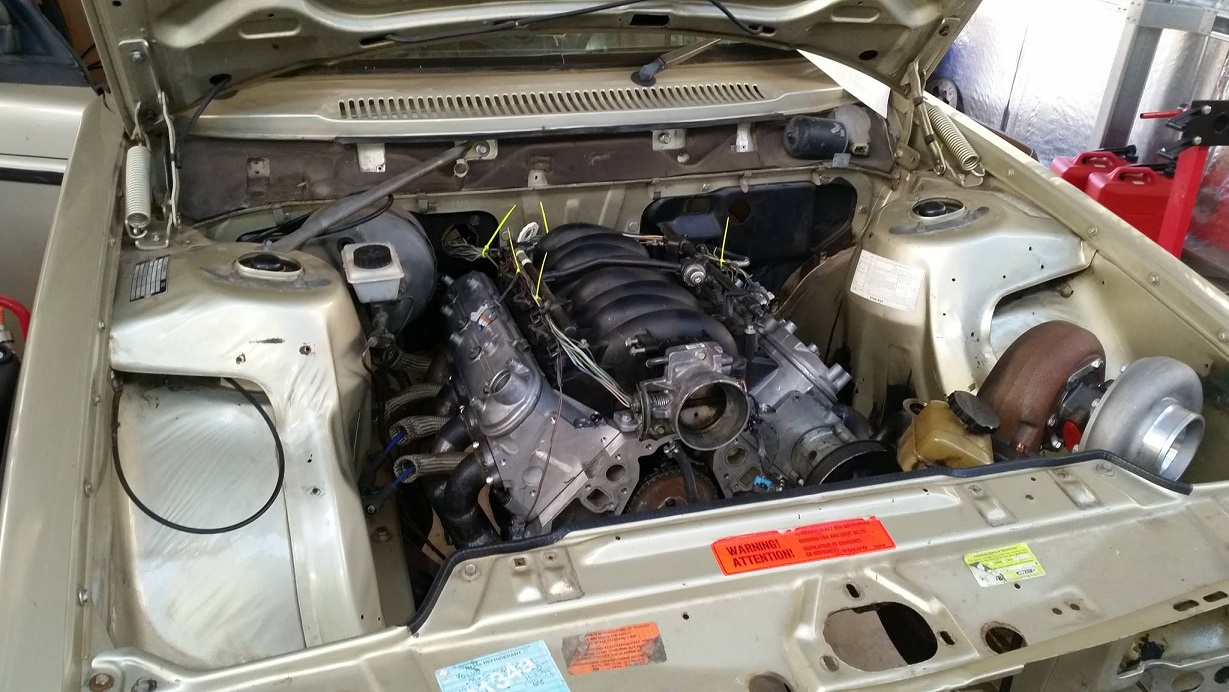
And in with the new.

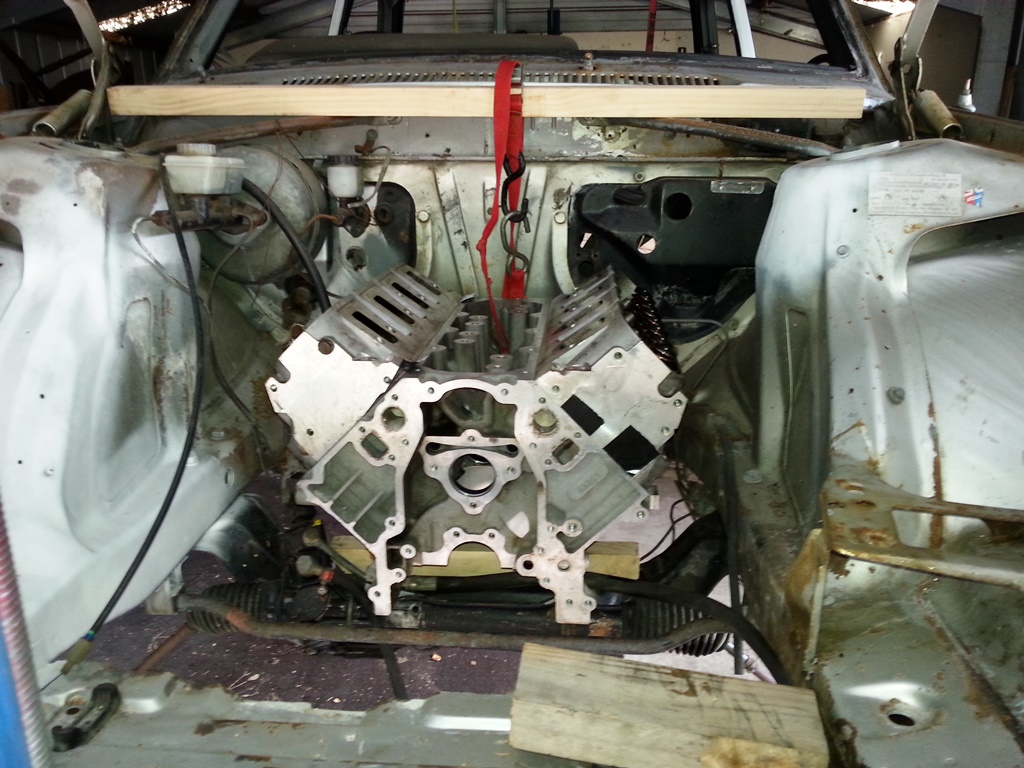
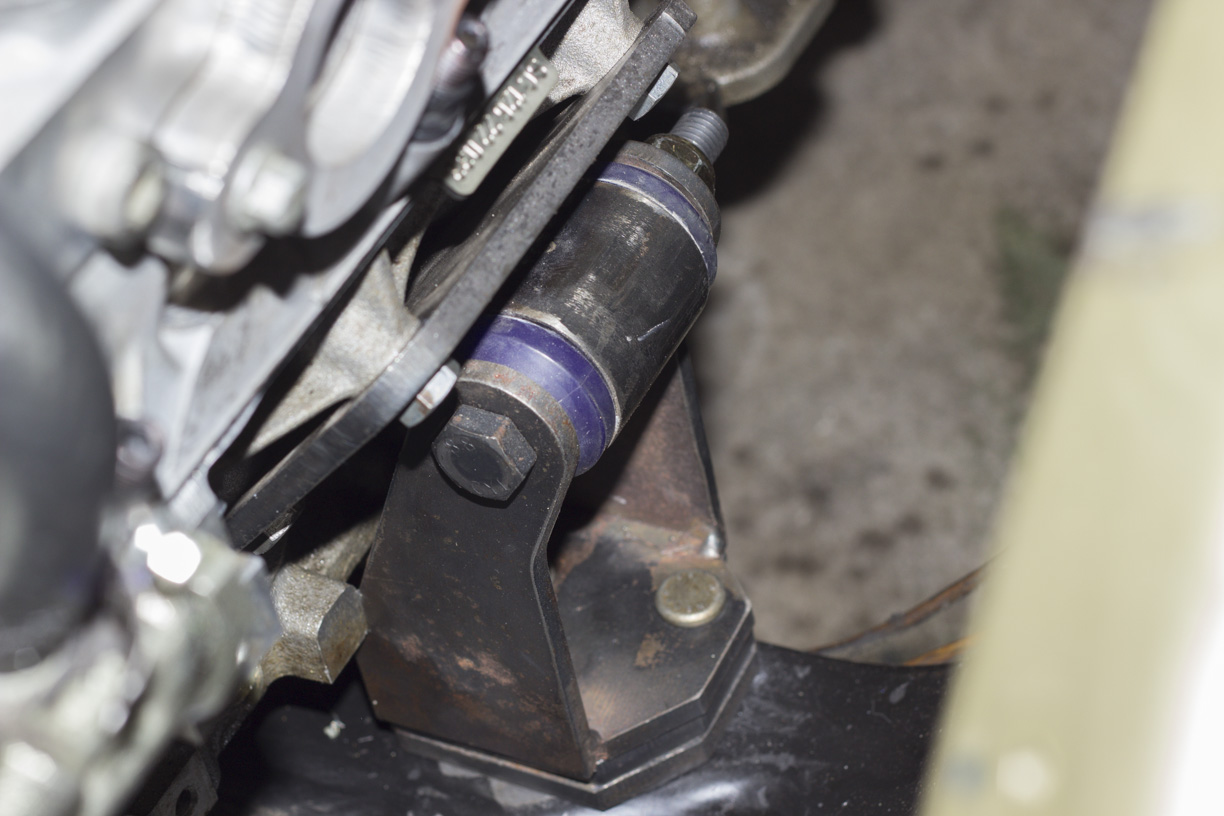
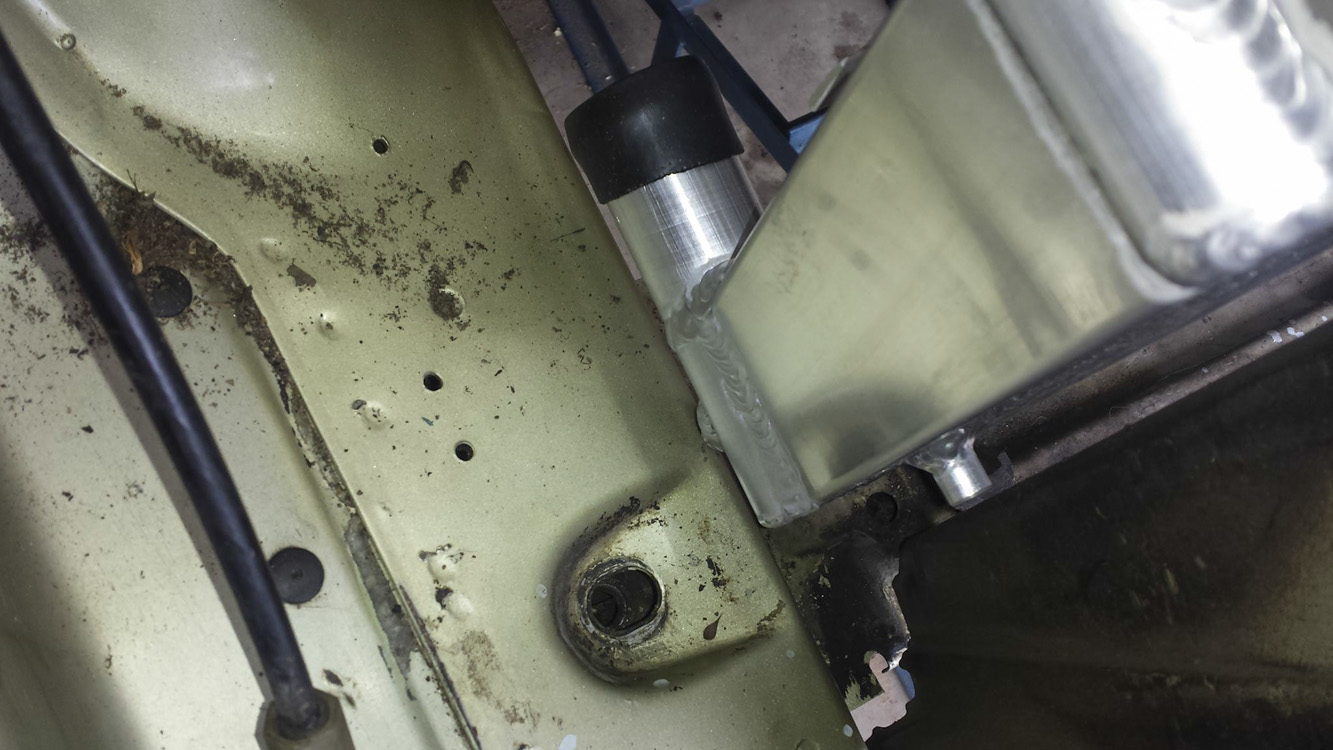
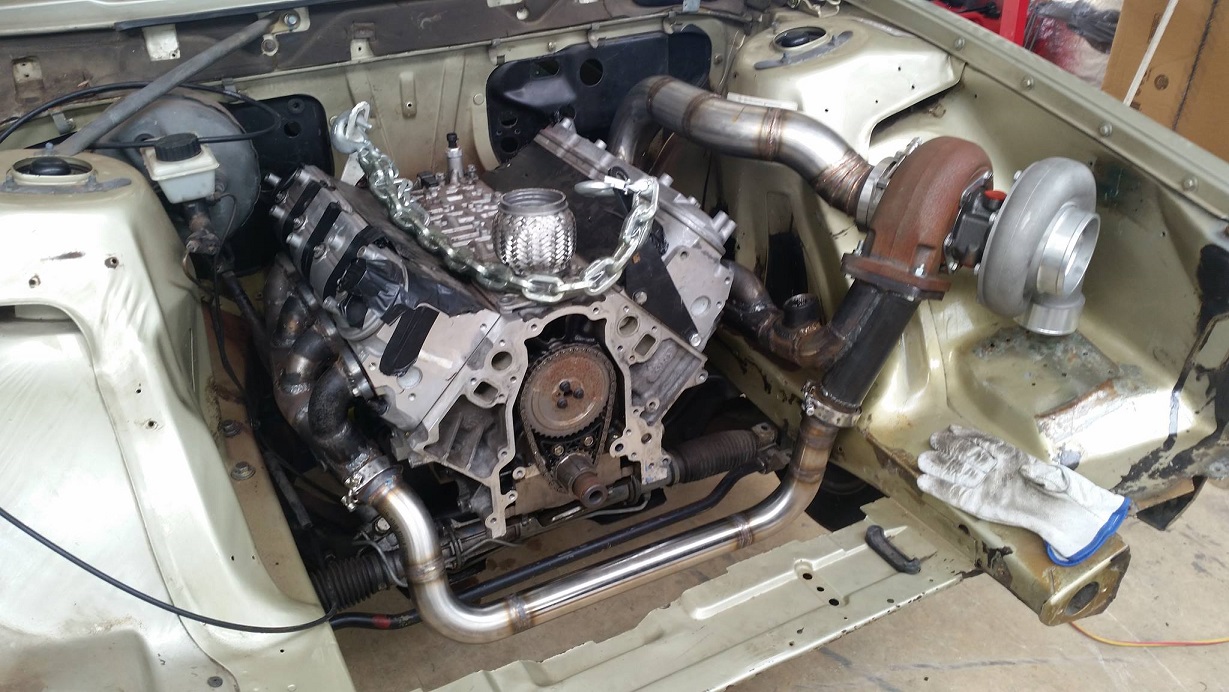
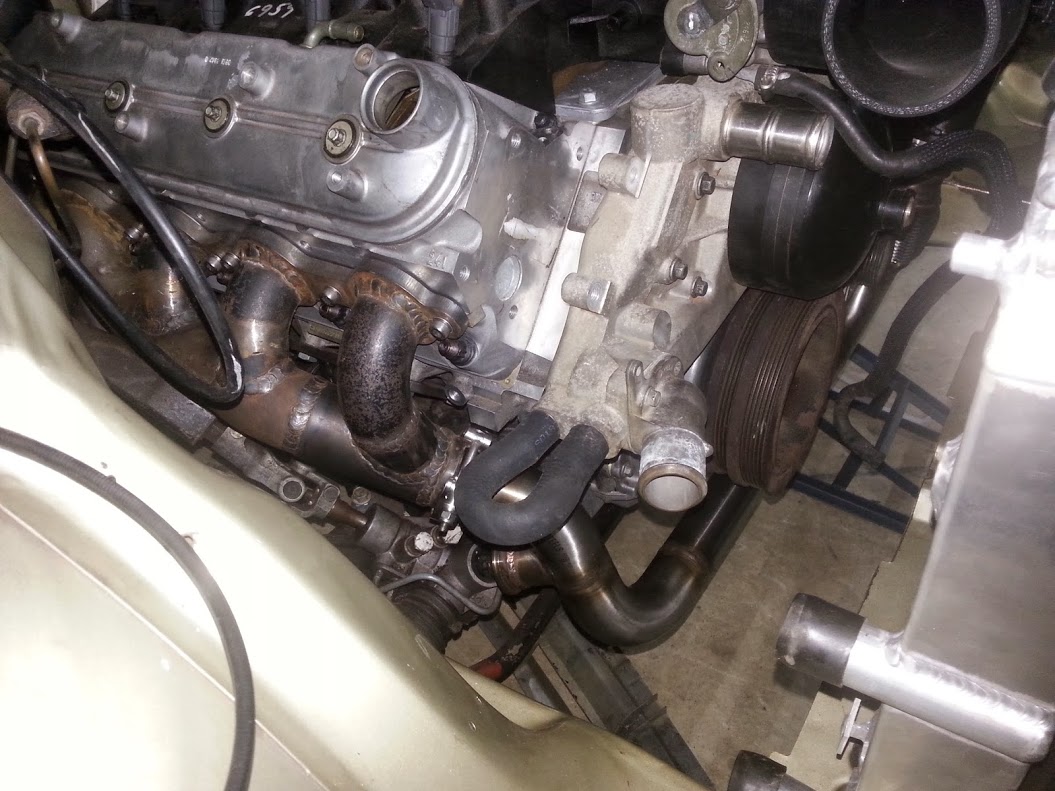
My mate made some prototype mounts that fit almost perfectly straight up. Little bit of hammering to get the studs lined up, but all good. Will need a little bit of spacing and adjustment but not bad for a blind test. TH400 clears the tunnel and lines up perfectly with the stock mount on the stock crossmember. Starter clears easily and pipes almost bolt up, those will need some minor adjustments.
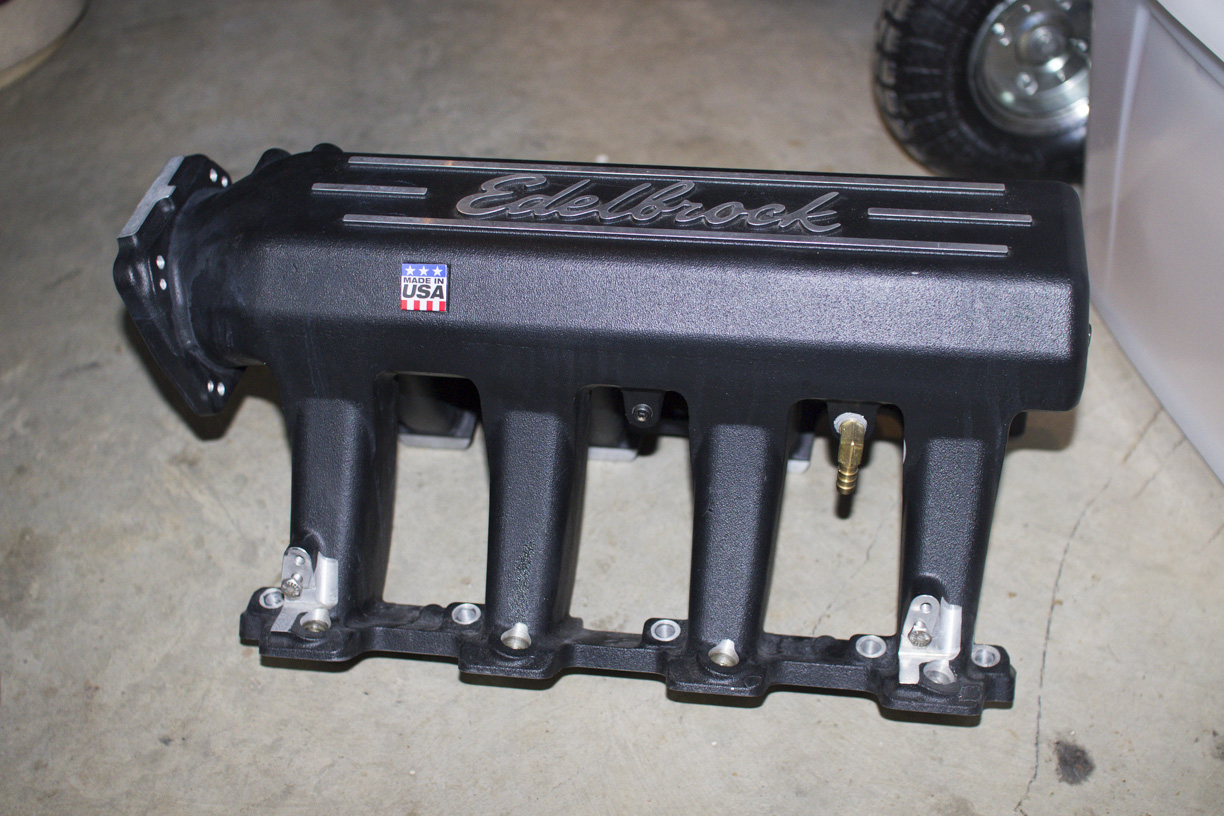
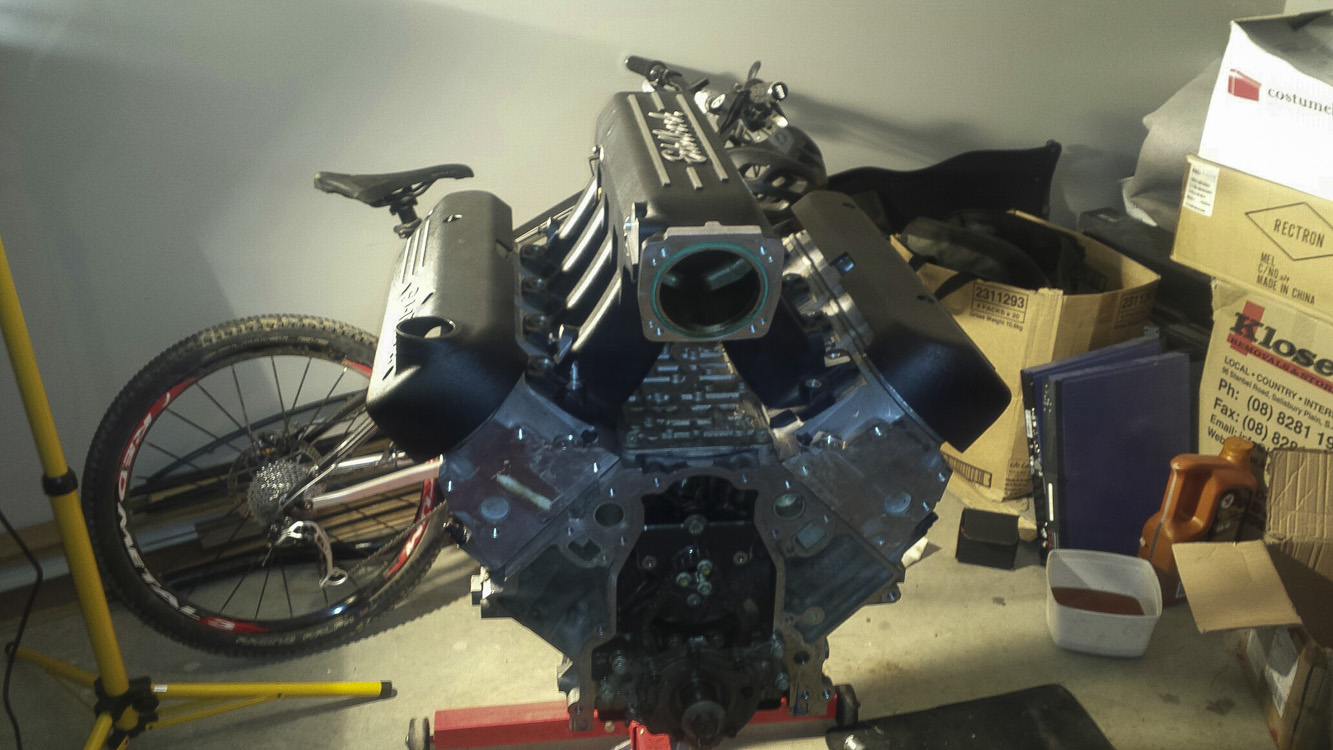
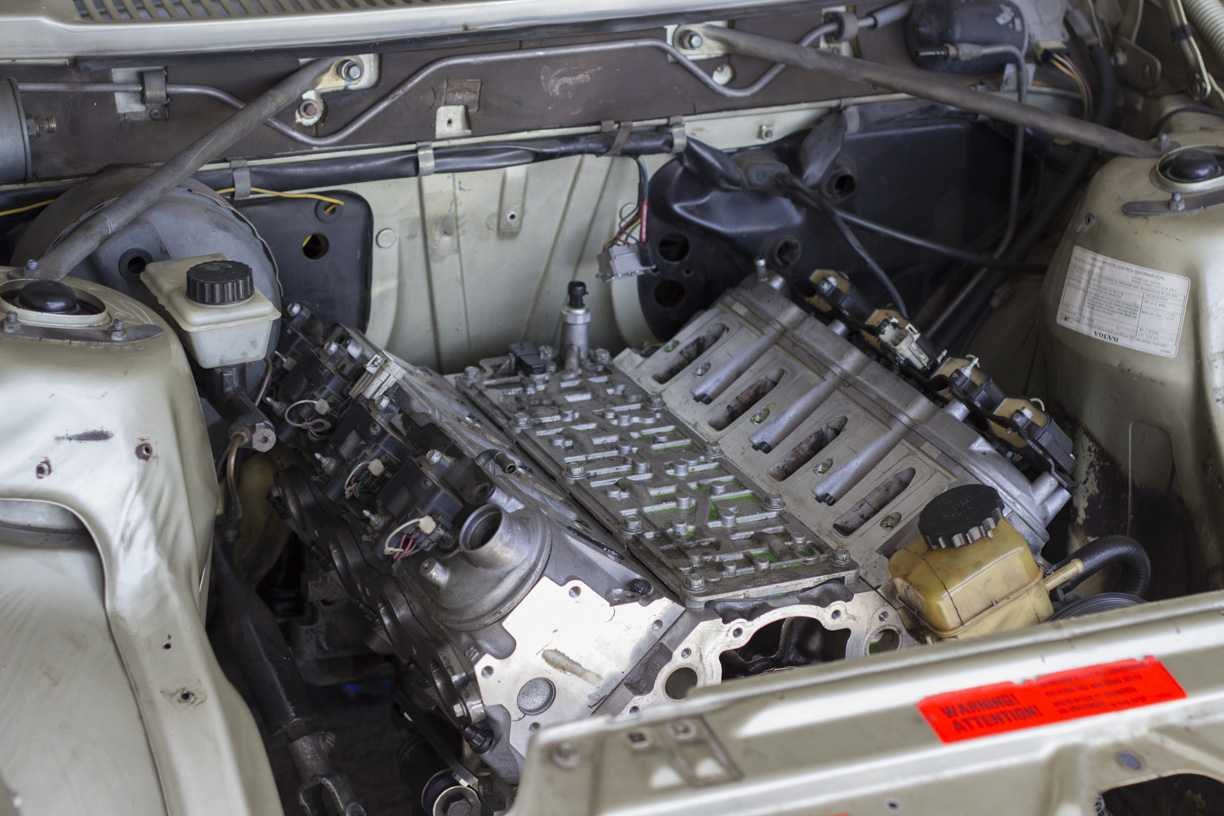
Edelbrock intake would fit, but very close. I think I’ll just use a stock one.
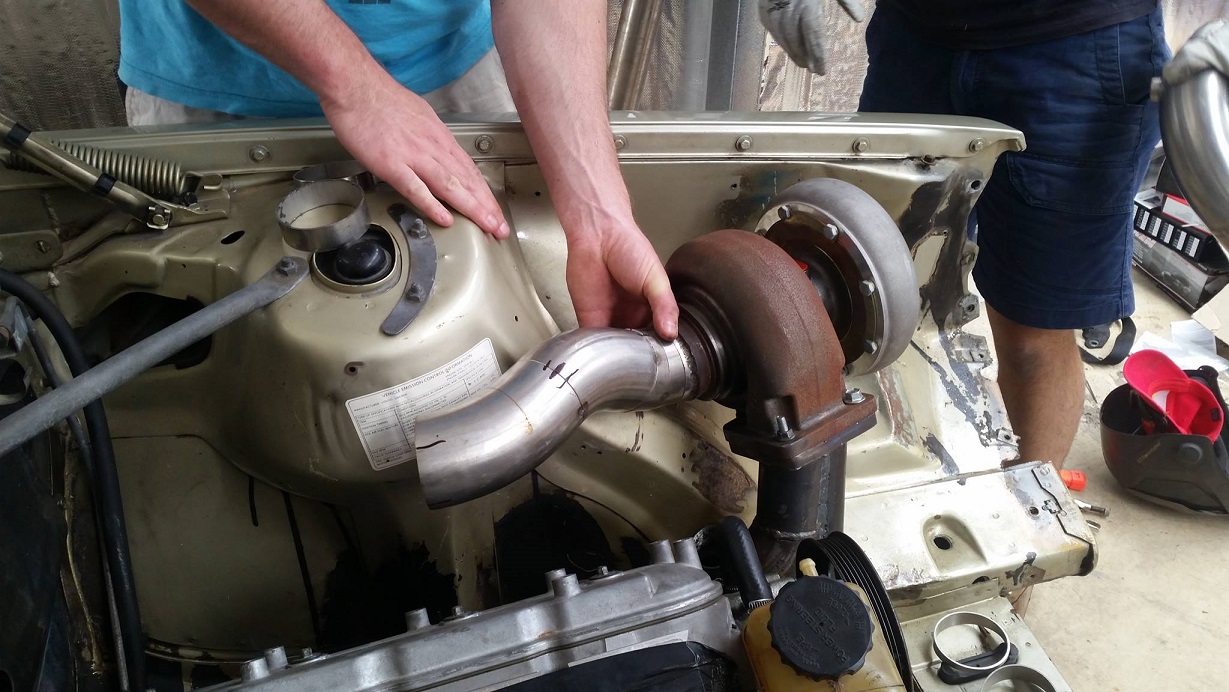
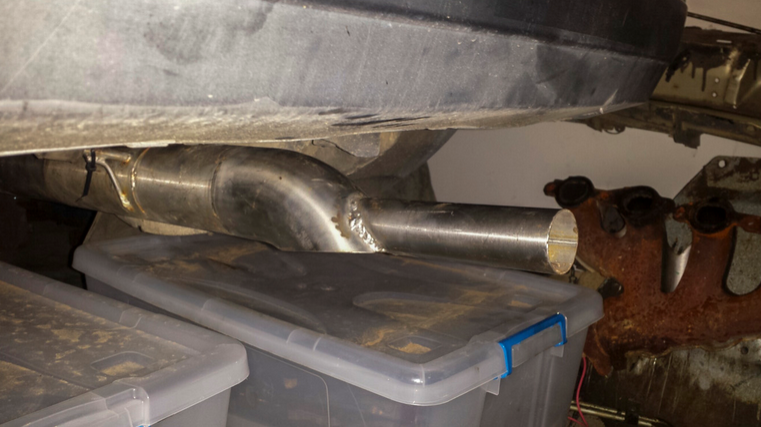
Andy also had a 3″ stainless exhaust that he made for his car and didn’t use. Fits up nicely, nice little stock tip on the end for sleeper appeal too.
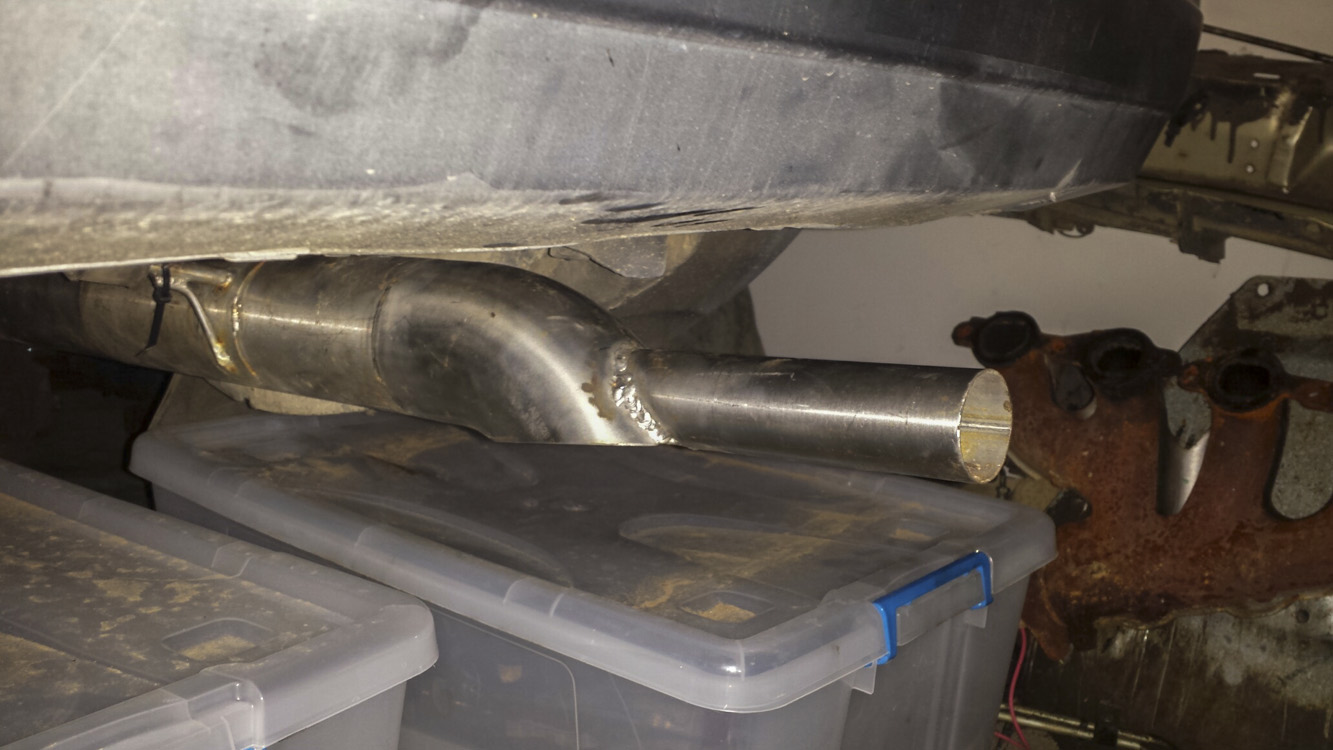
Will still need some adjustment as his was for Volvo engine and the turbo was on the other side.
May 8, 2015 at 6:34 pm #6508
SirNemesisParticipant- Geelong, VIC
- 2002 WHII Statesman 1985 Volvo 240GLE
View build HERE
Posts: 25Small update, ended up buying a cam from Tick Performance.
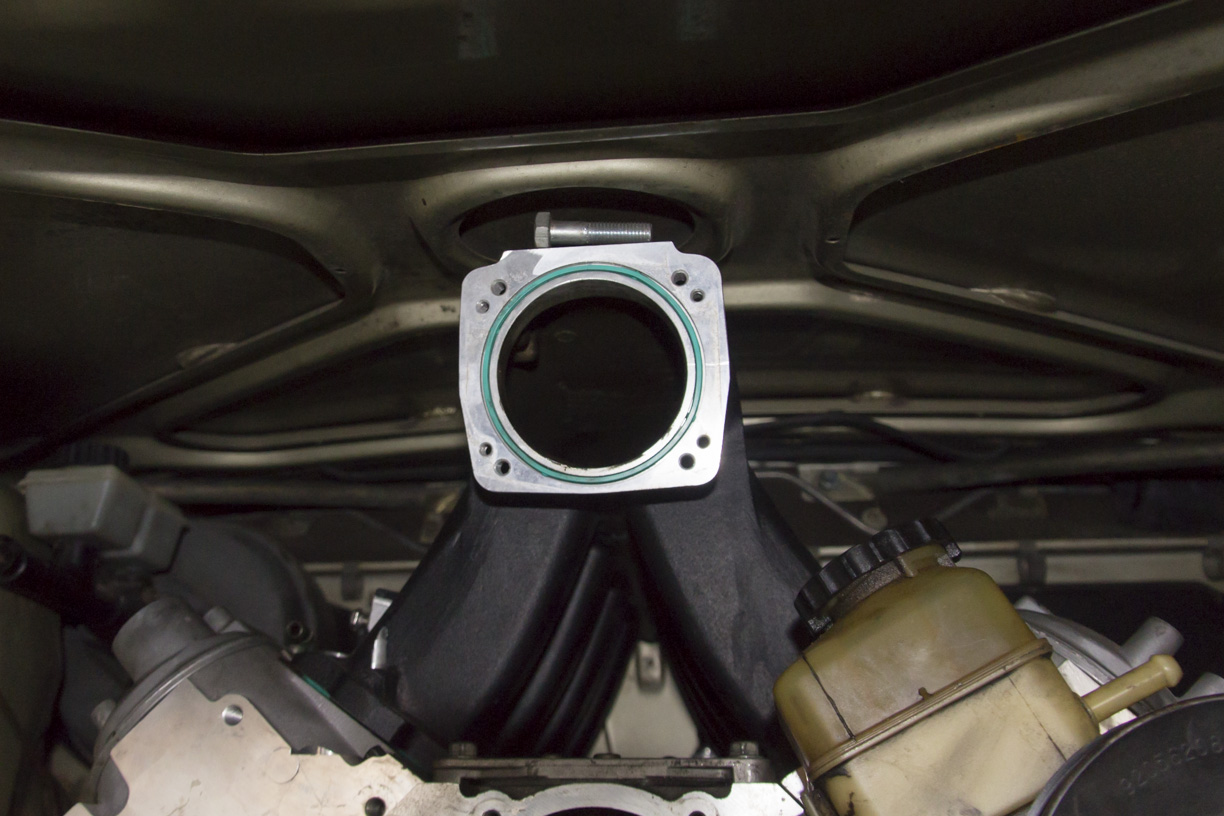
I put some coil packs on to check clearance. Will be a little tight around the booster. Might have to stack the coils and run a couple of odd leads, unless the L76/L98 coils fit (they sit up higher).
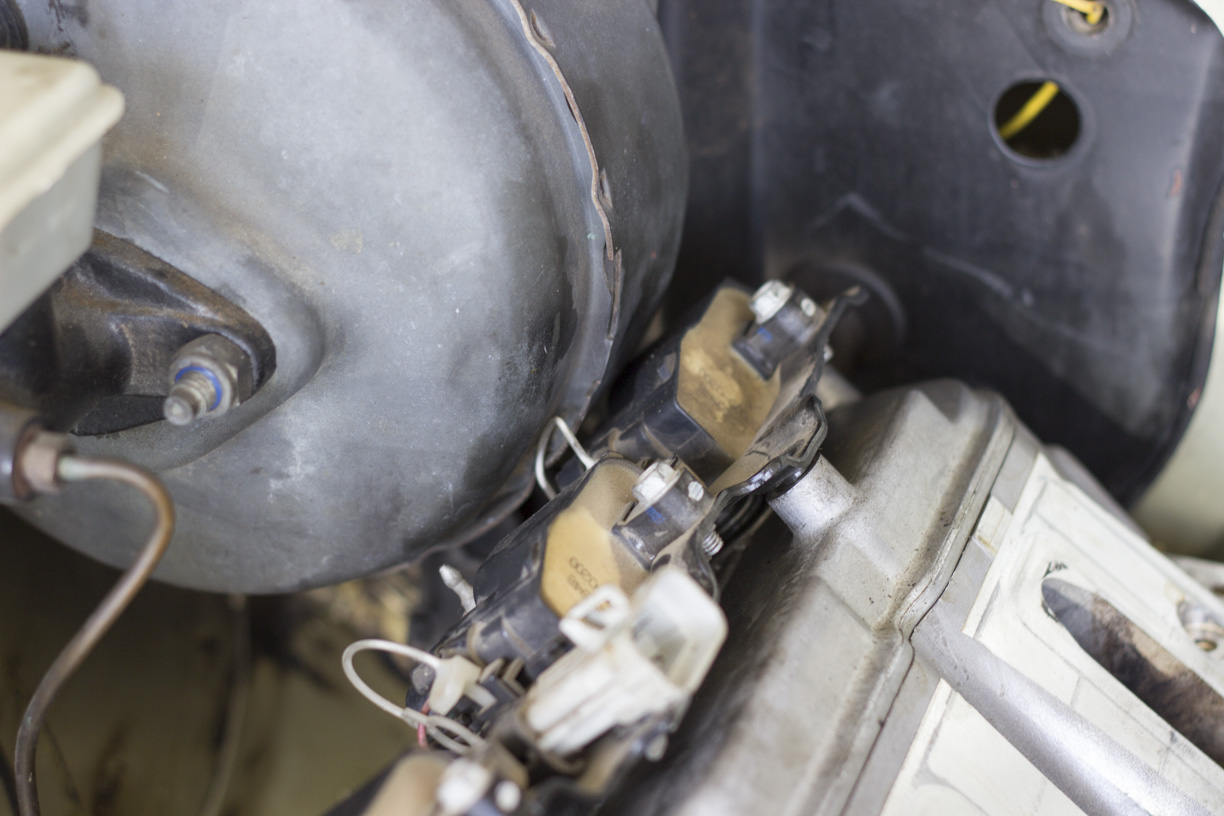
Also pulled out the heating/cooling stuff. Won’t be needing that and now I’ve got a spot for the battery, PCM, etc.
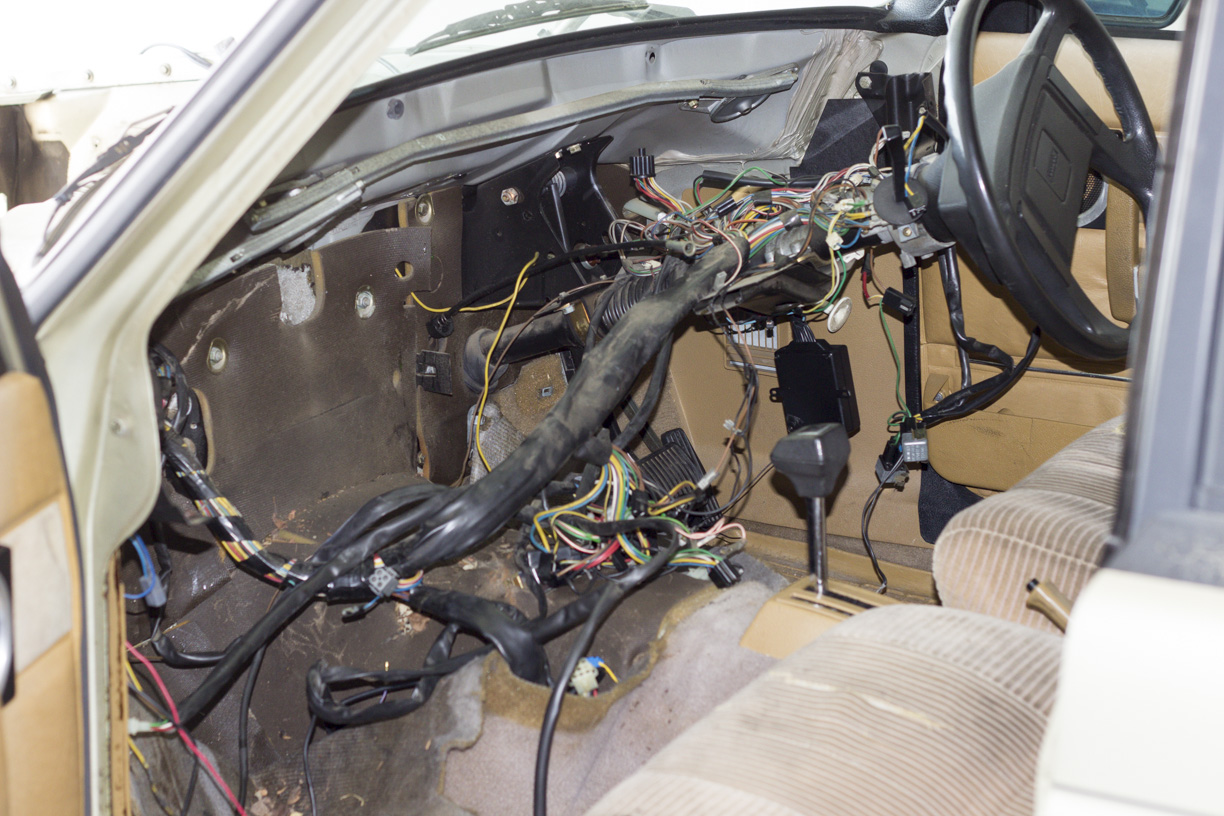
Will need to do a bit of rewiring now. Lots of crap in here I don’t need, and someone has also butchered this in the past installing and all-black-wiring alarm/immobiliser.
Fun times.
May 8, 2015 at 6:35 pm #6509
SirNemesisParticipant- Geelong, VIC
- 2002 WHII Statesman 1985 Volvo 240GLE
View build HERE
Posts: 25L76/L98/LS3 coils fit.

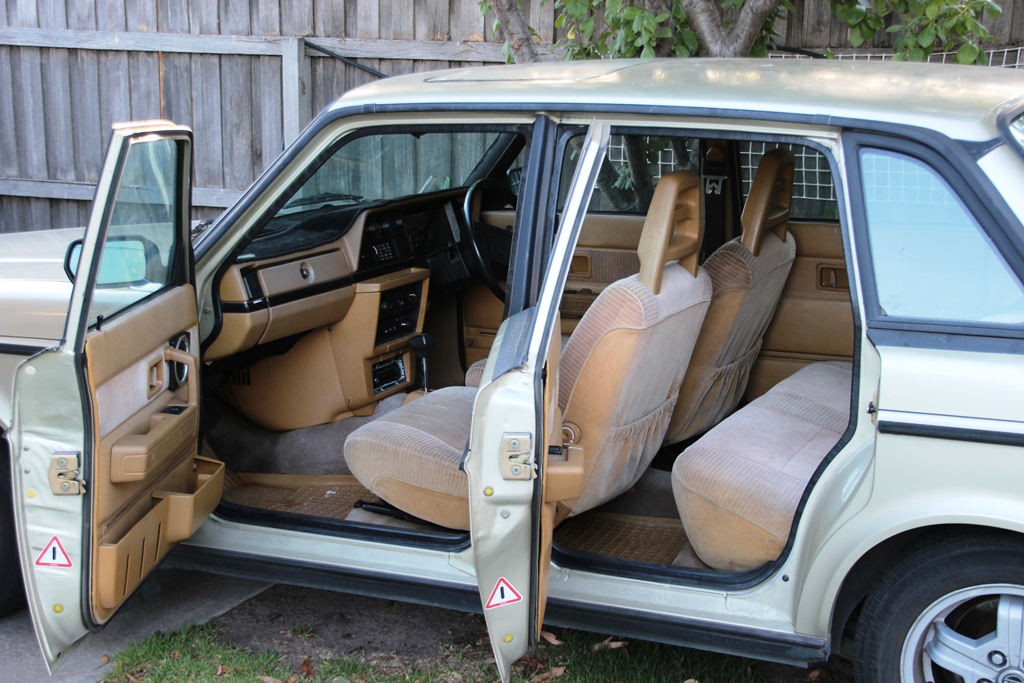
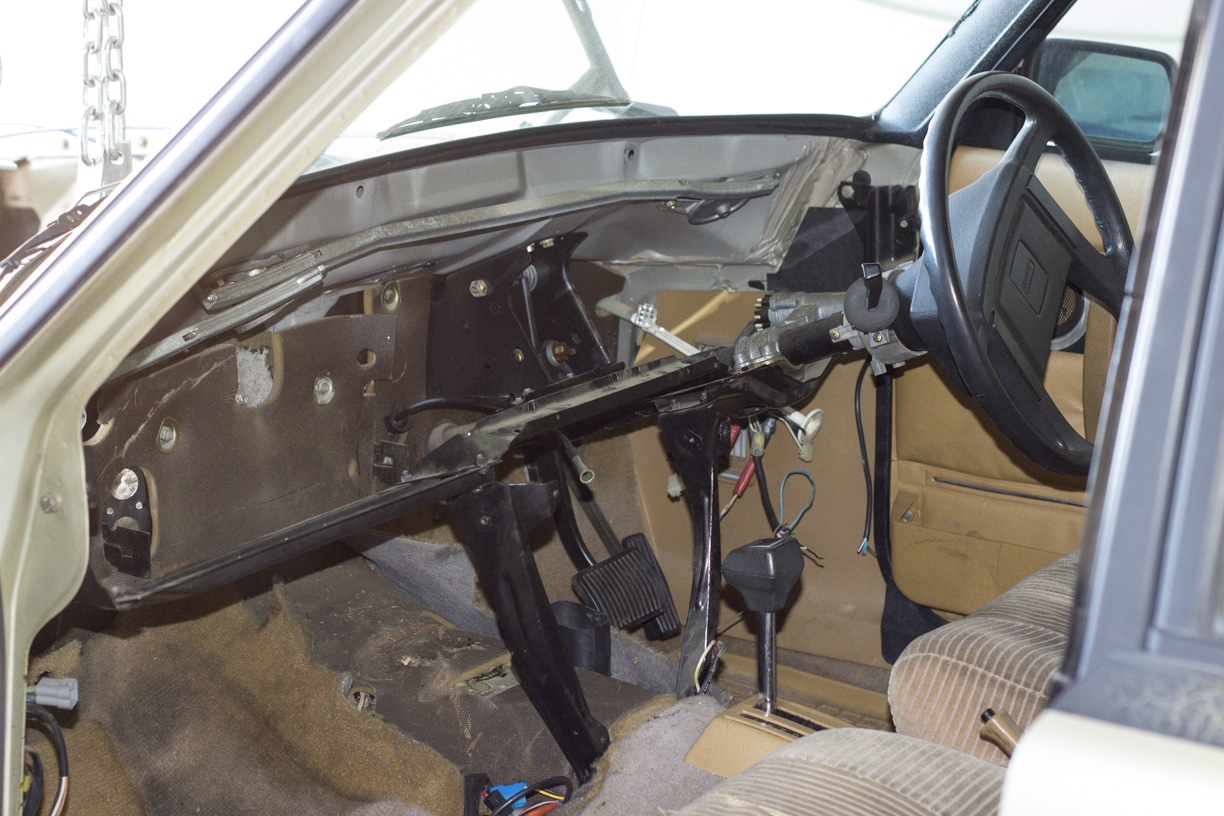
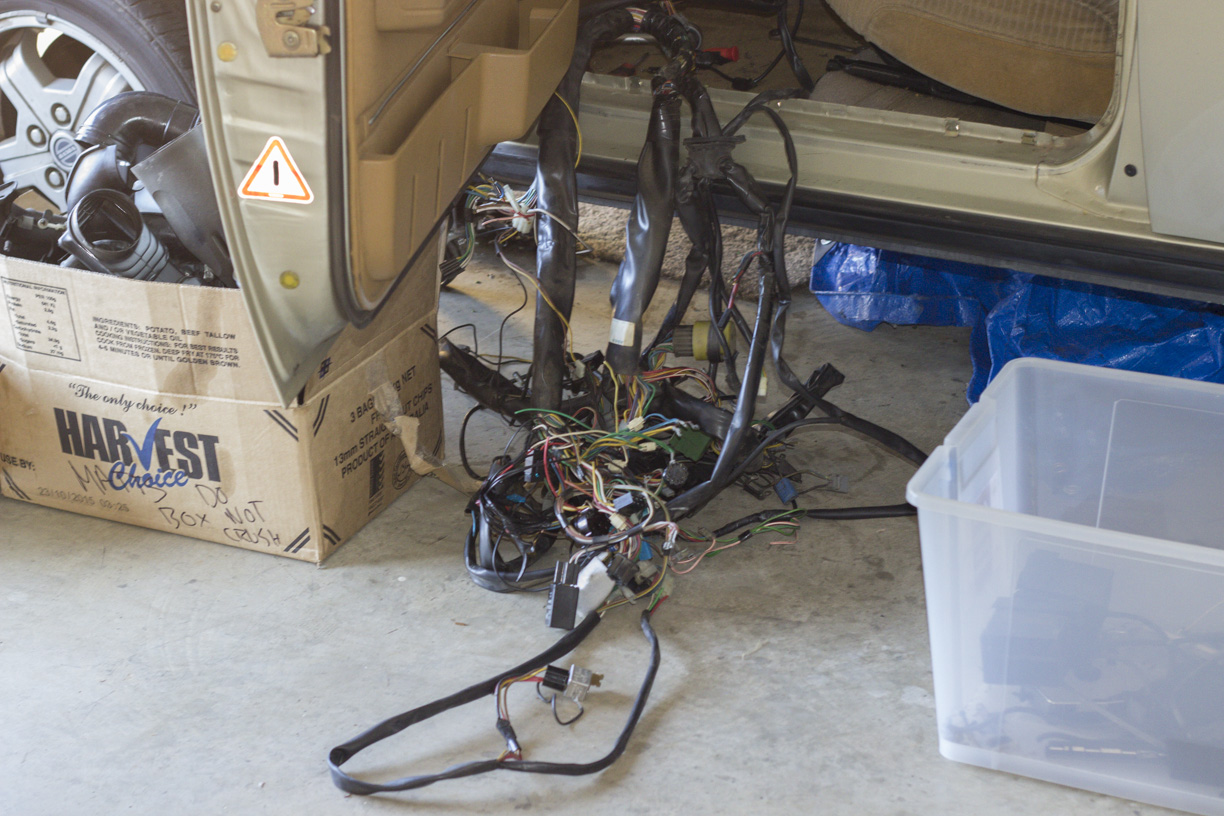
So I pulled most of the interior out to neaten up the wiring, thinking about knocking the sound deadening crap out while I’m in there to save a bit of weight, but at the same time I really can’t be fucked.
I managed to get the bonnet put back on last night to check clearance of the intake. Fits, got about 15-20mm clearance.
Need to get the mounts finished up by my mate, just waiting on the sump to arrive so we can check clearances on that as well.
 May 8, 2015 at 6:36 pm #6510
SirNemesisParticipant- Geelong, VIC
- 2002 WHII Statesman 1985 Volvo 240GLE
View build HERE
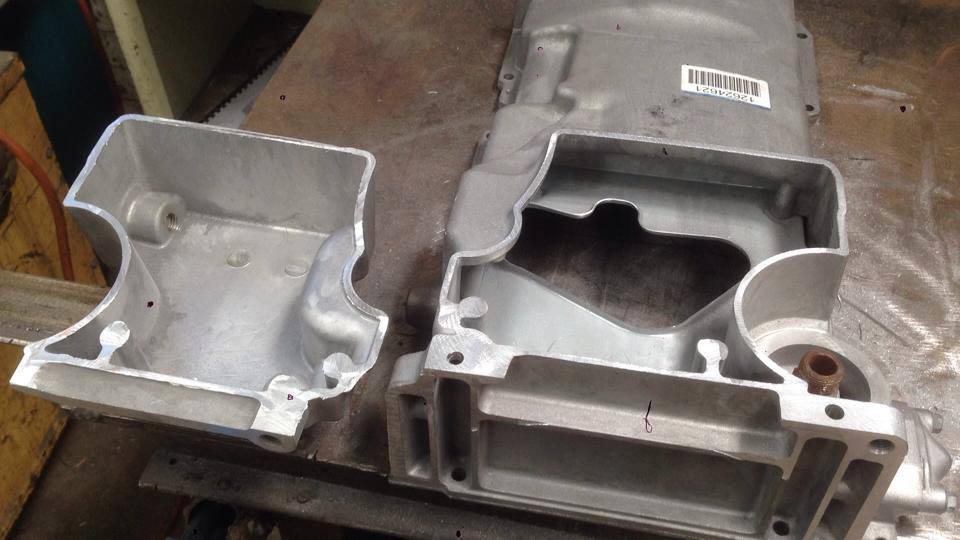
Posts: 25My sump kit arrived from Summit but wasn’t packed very well and was mostly destroyed by the time it got here. Summit are looking after me though and replacing it.
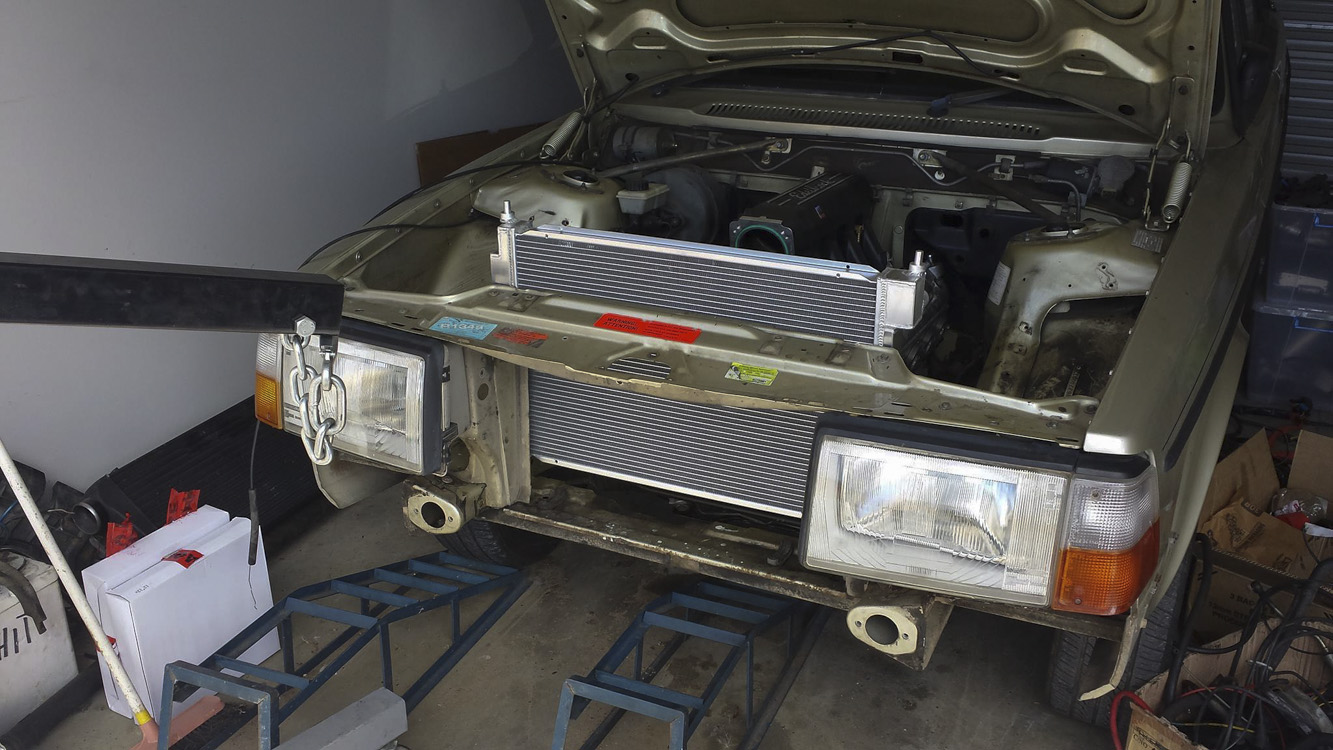
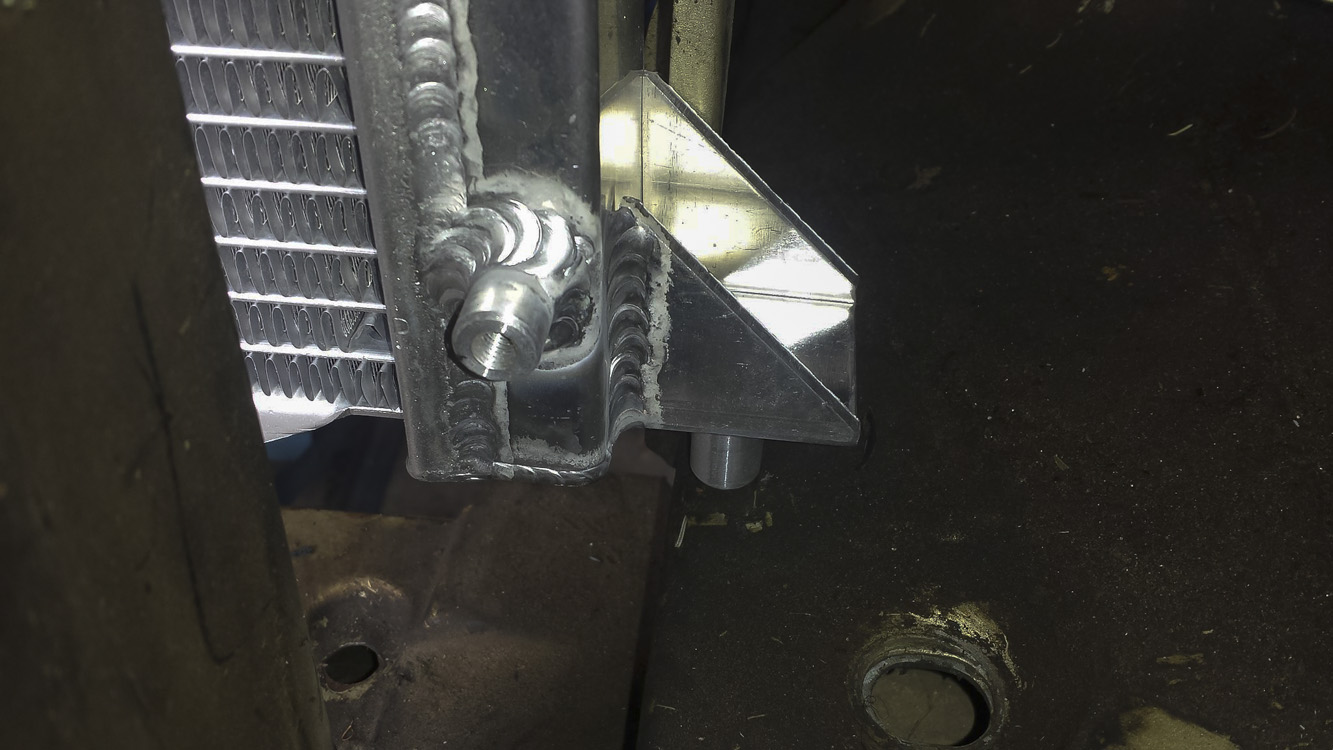
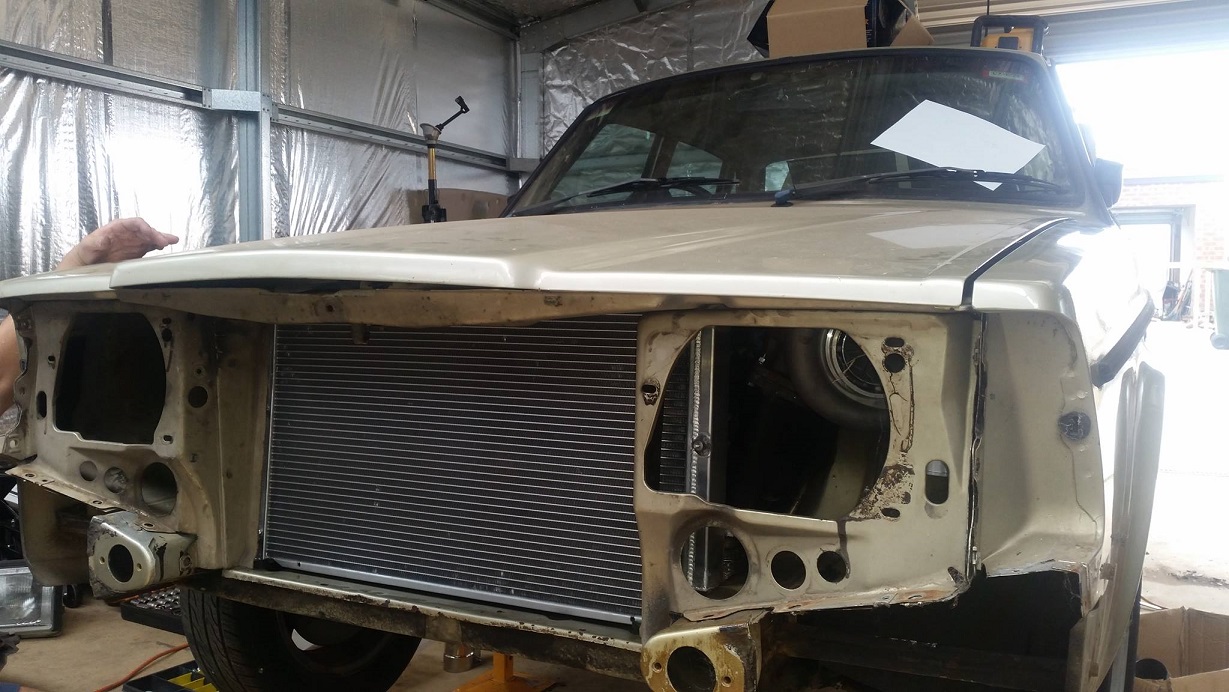
Also got a radiator which looked like it would fit well from internet measurements.
2004 BA Falcon radiator, alloy tank eBay knockoff. Pretty damn close, just a few tiny adjustments and it’ll be in.
The sump arrived and seems to fit. Need another 10mm added onto the engine mounts, or i’ll just use spacers. Will need to space down the swaybar too. It clears in this photo, but the engine is laying back.
Also cut off the battery tray for more room for the turbo. Hack job, but good enough for me.
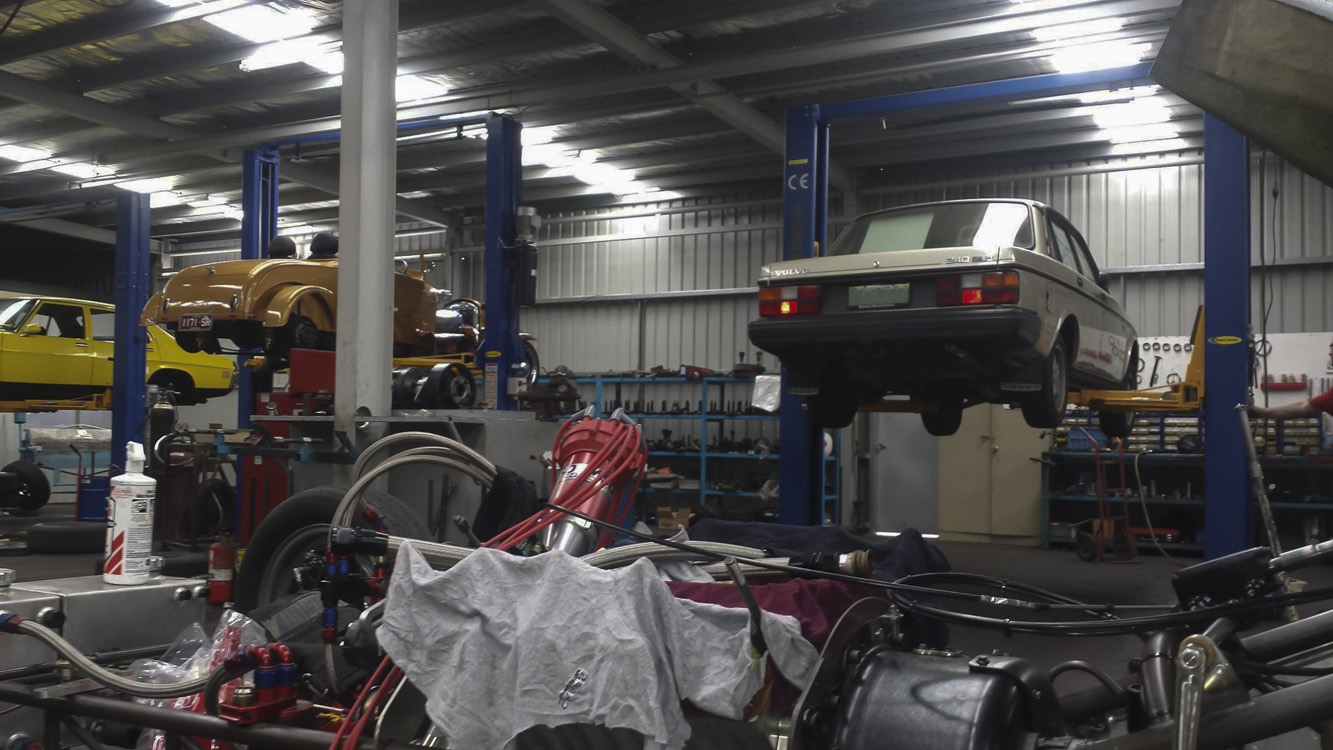
Moved the car to a mates workshop, just a bit easier to do things here with proper tools.
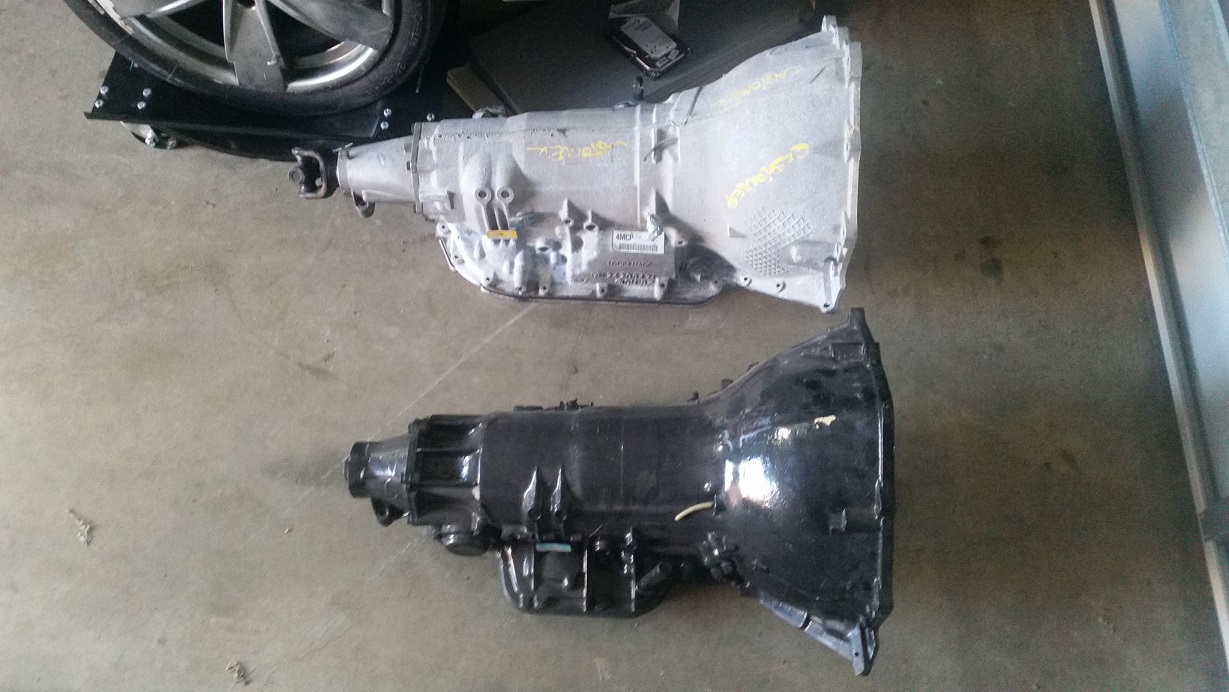
Got the transmission mount finished up, started working on the hotside.
Ended up finding a 4L80e for a good price, so will be using it instead of the TH400.
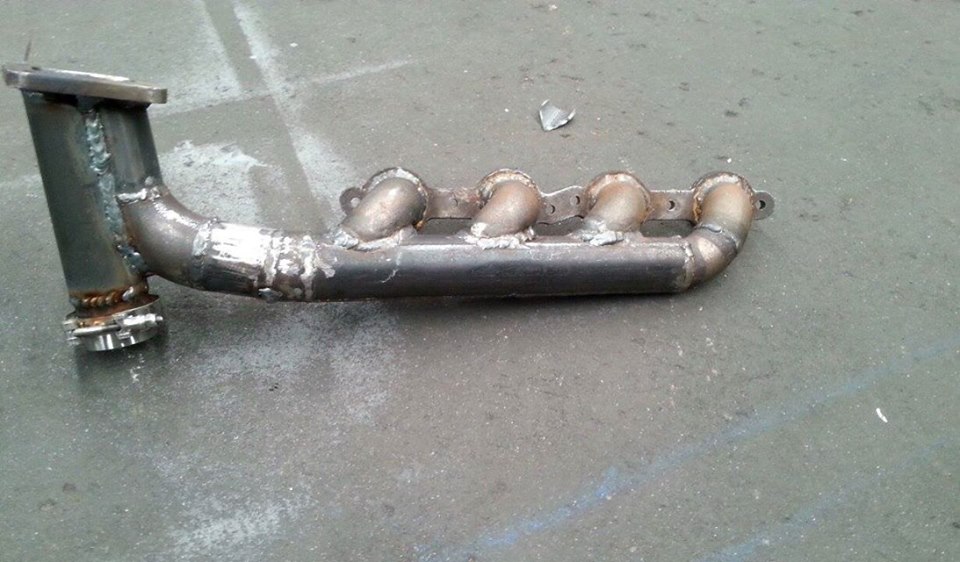
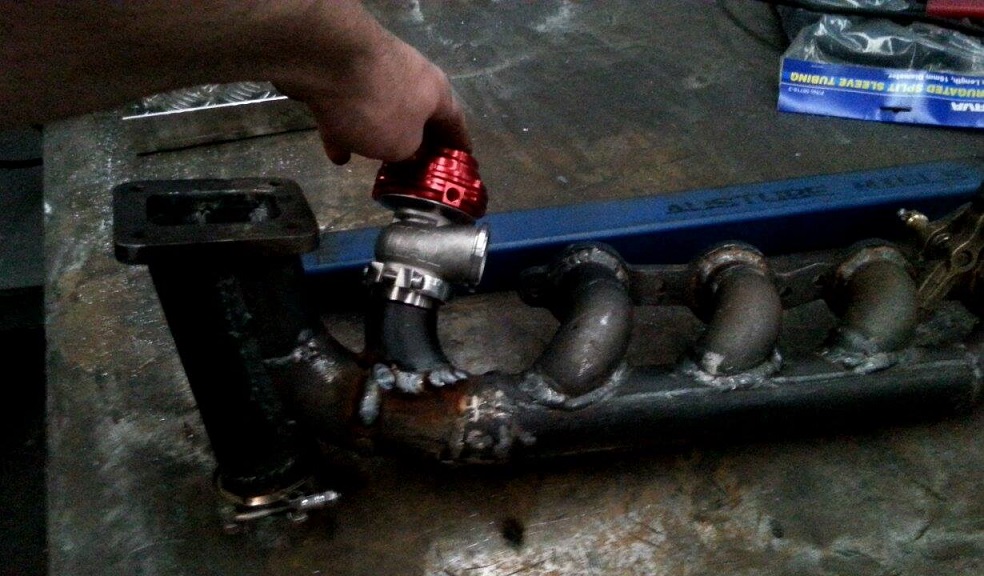
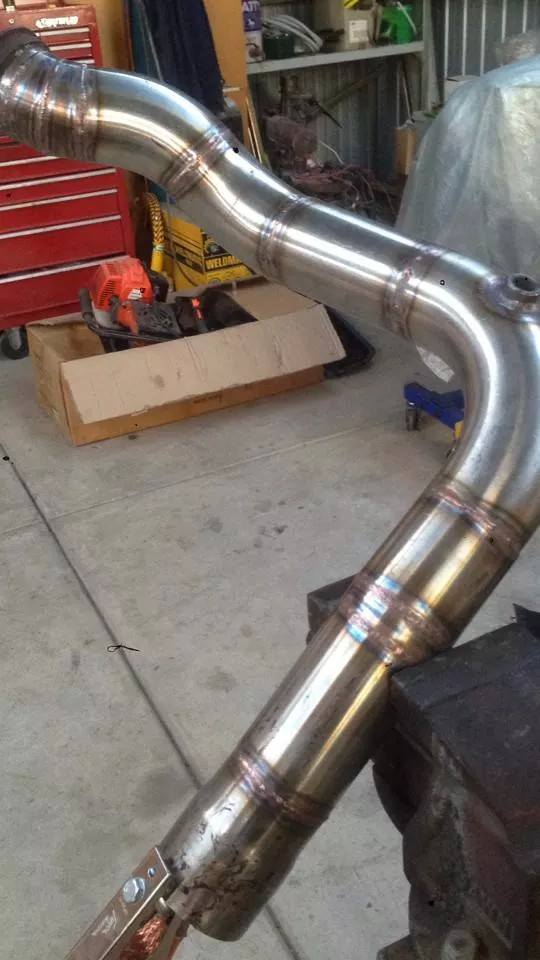
Manifolds are nearly finished too!
 May 8, 2015 at 6:37 pm #6511
SirNemesisParticipant- Geelong, VIC
- 2002 WHII Statesman 1985 Volvo 240GLE
View build HERE
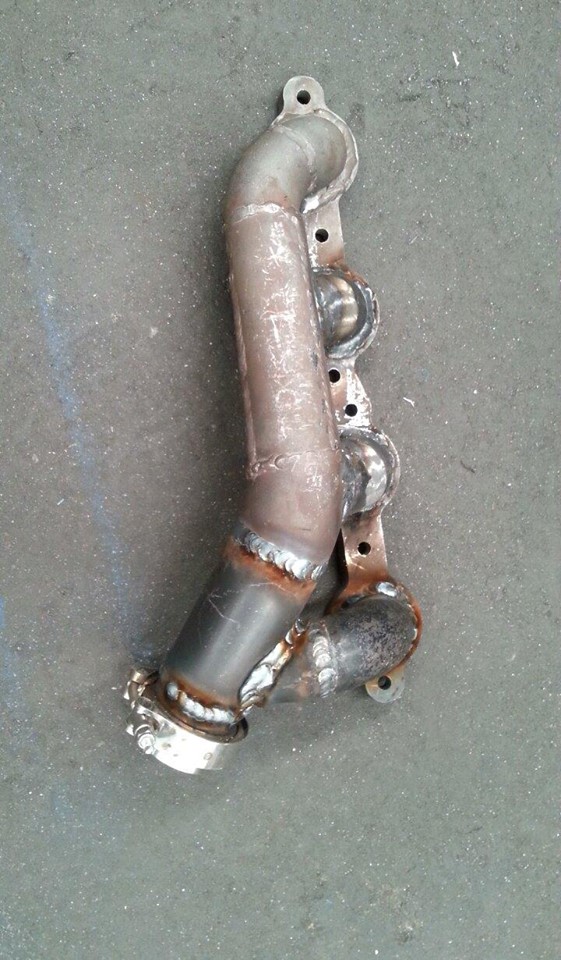
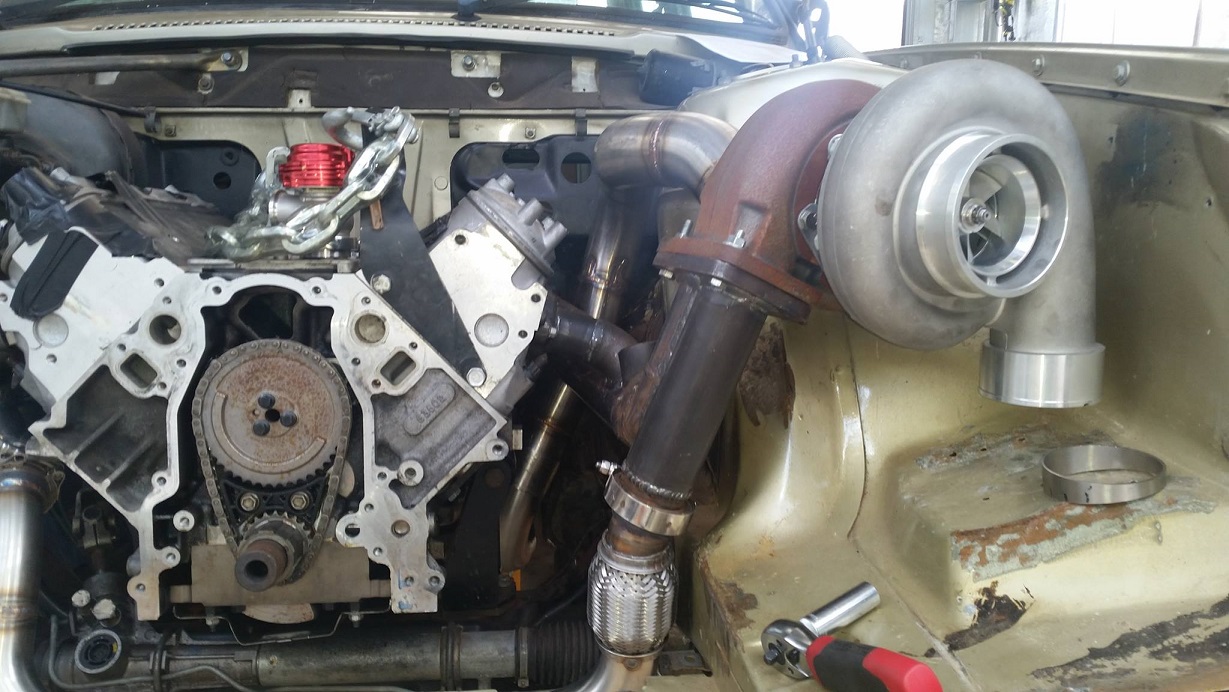
Posts: 25Needs a small adjustment on the passenger side. Bit too close to the rail.
Also bought this…
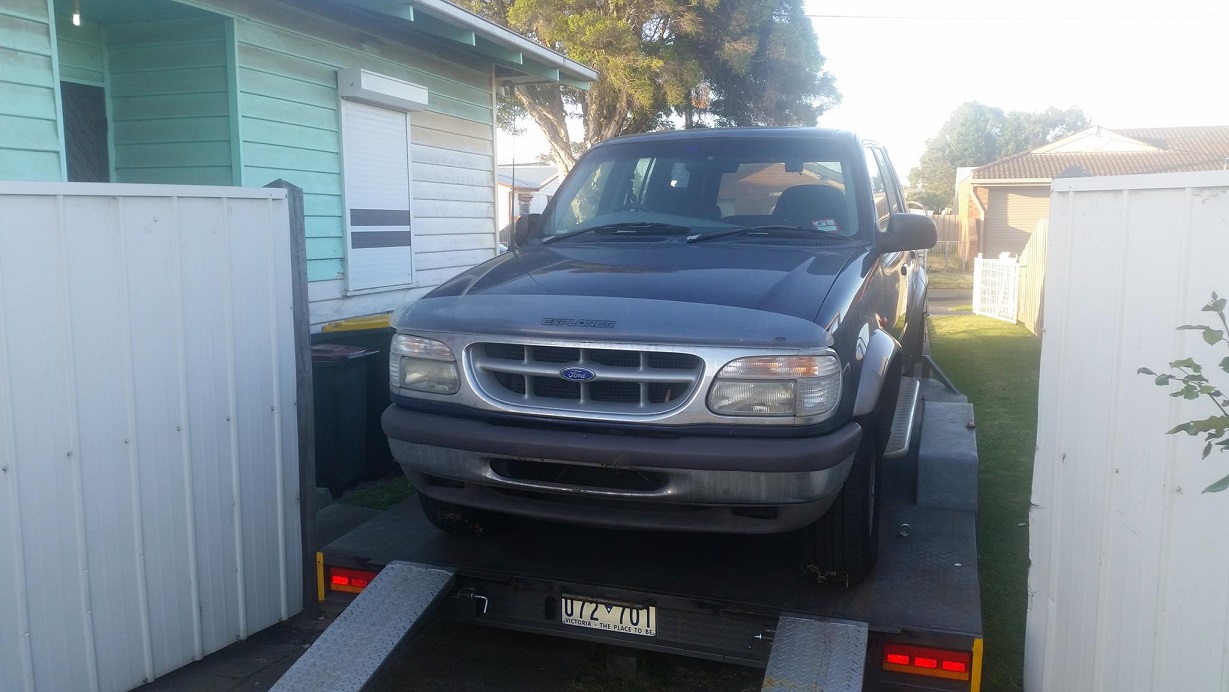
Removing 8.8″ diff and some other bits and pieces for franken-lolvo-stein transplant. The rest will go in the bin.
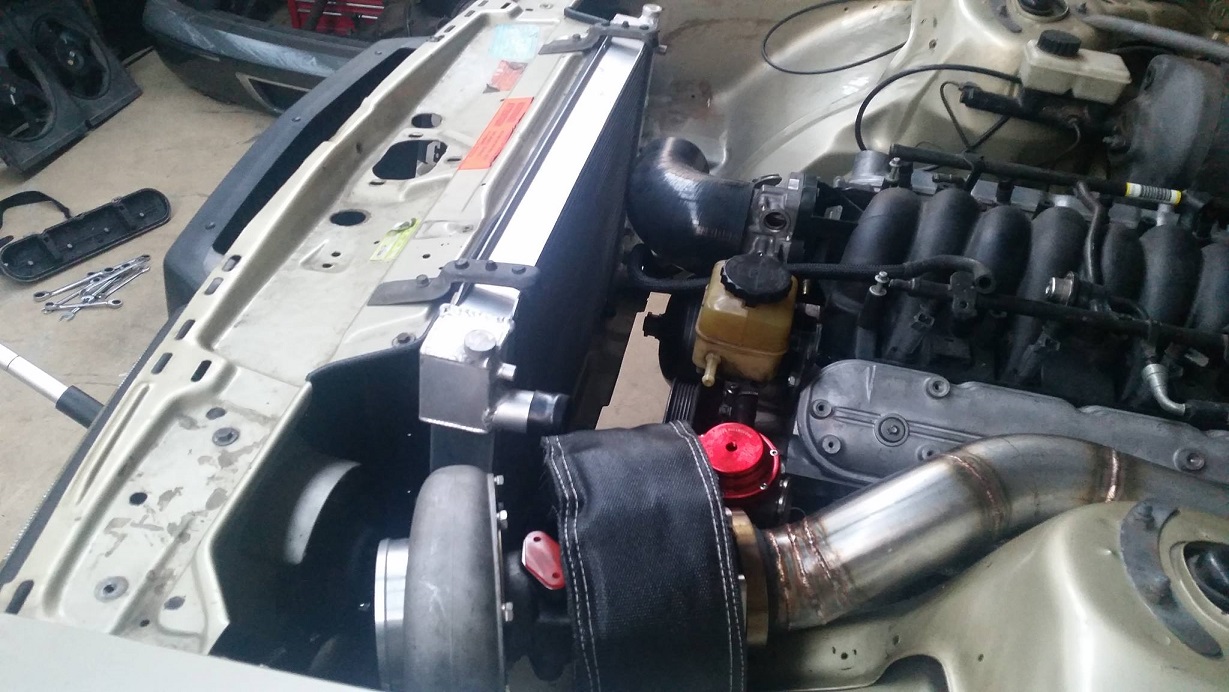
Exhaust clearance, there is heaps! Pretty easy to snake the dump (3″ here) around the shock tower and down the rear of the bay. Pretty good clearance everywhere and I haven’t even cut the ears off the 4L80e.
Also started working shortening the pan a little bit.
I liked this photo too.
Hotside pretty much done, just need to add some flex and wastegates.
Radiator and headlight fits.
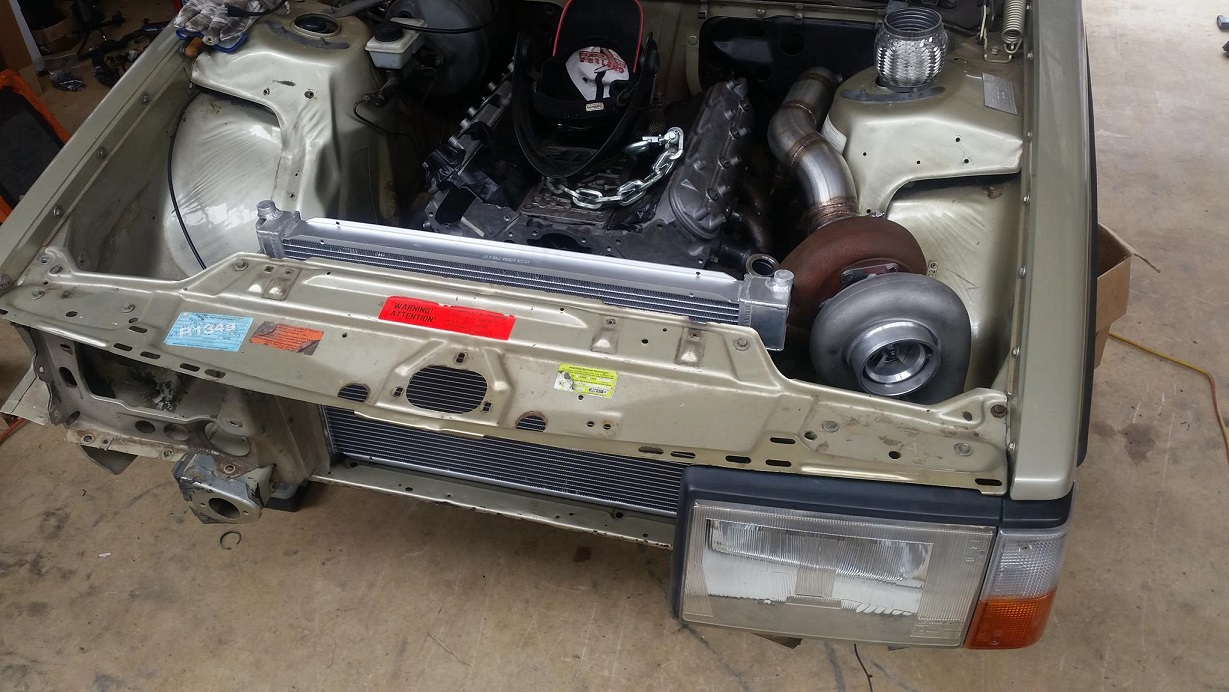
And the bonnet closes with about 15mm of clearance from the radiator. Perfect.

 May 8, 2015 at 6:38 pm #6512
SirNemesisParticipant- Geelong, VIC
- 2002 WHII Statesman 1985 Volvo 240GLE
View build HERE
Posts: 25Got this out of the Exploder. Rest is gone to scrap metal heaven.

Made a start on the wiring.
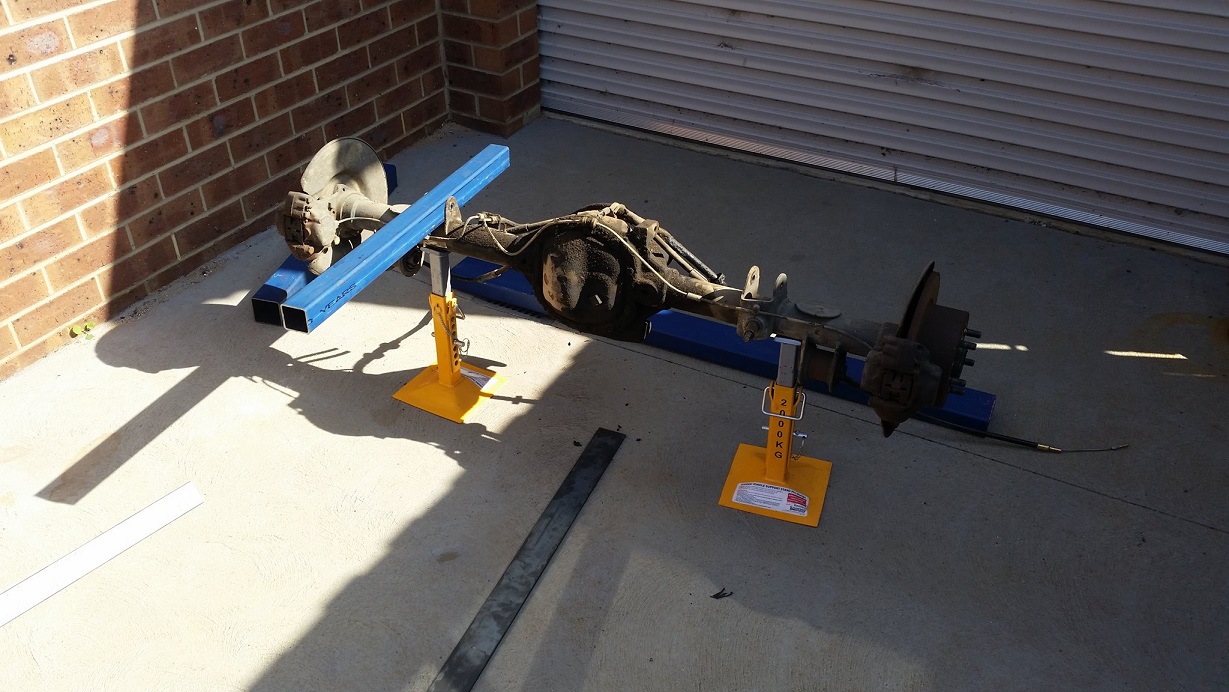
Got the diff out of the Volvo and started work making a jig.
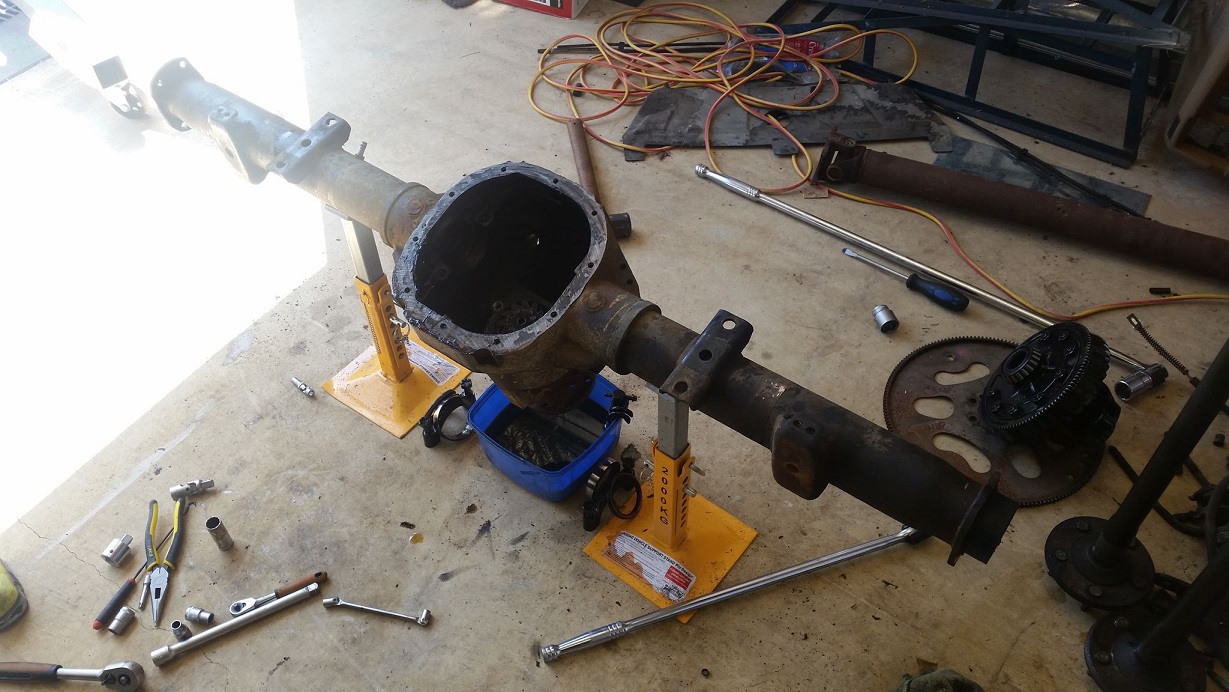
Also got the 8.8 stripped down.
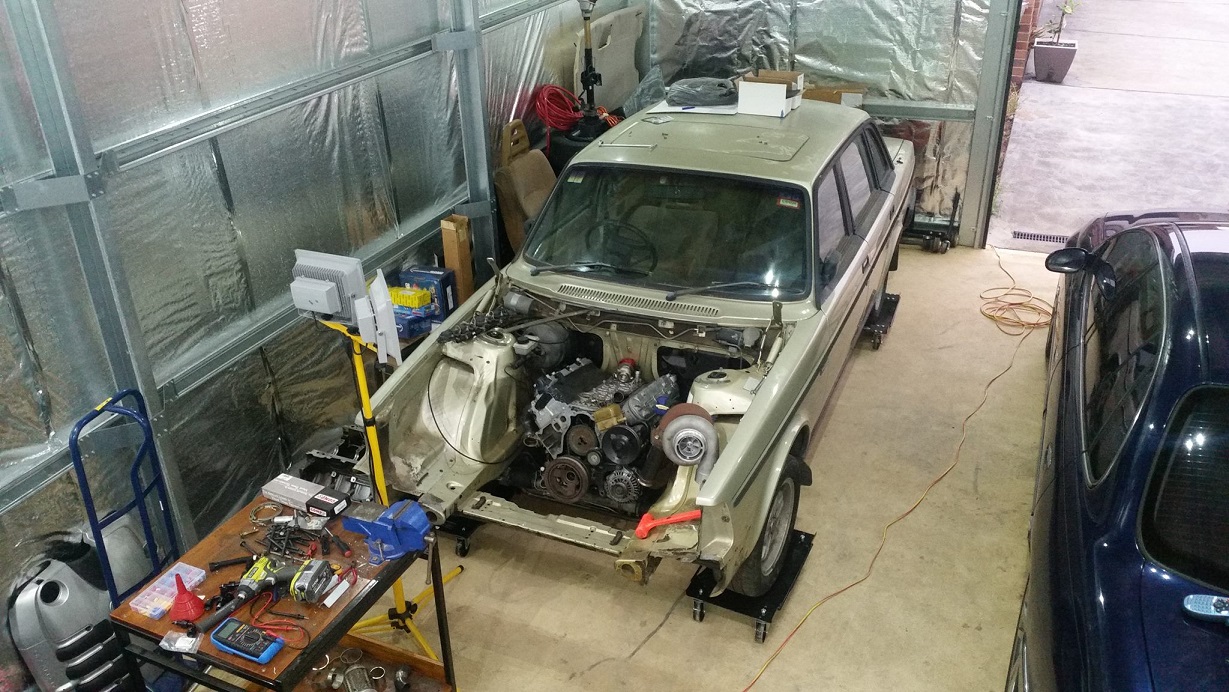
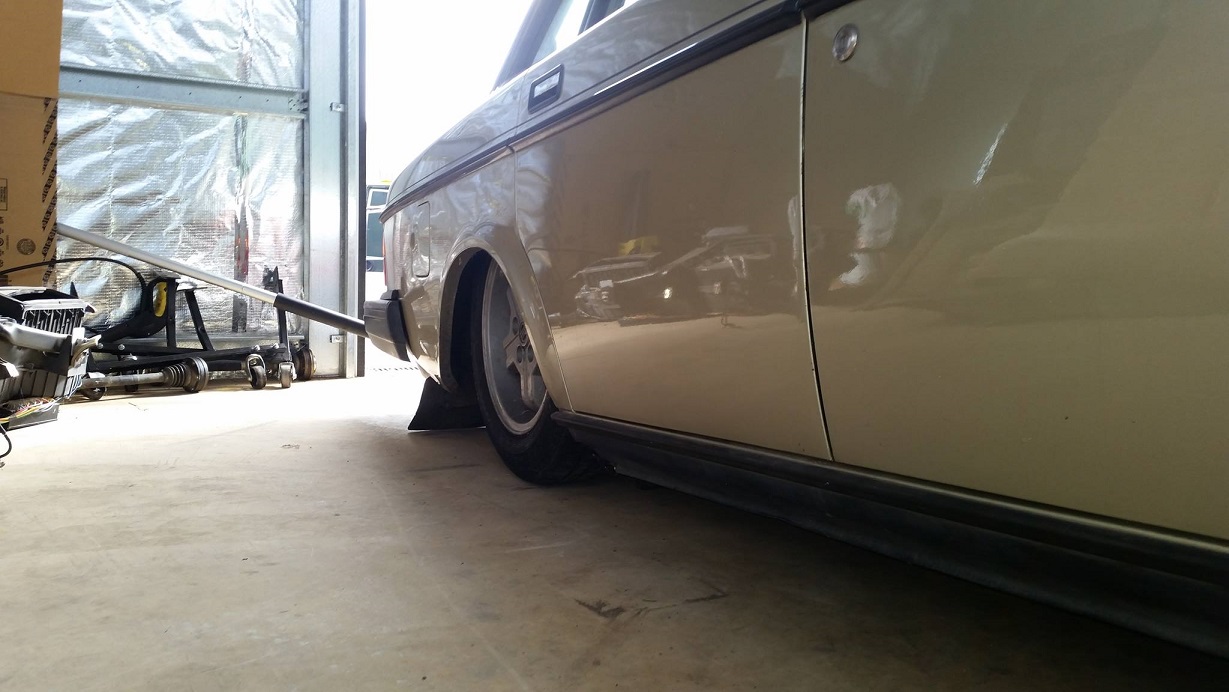
Ran out of stands so just dropped the Volvo down on the fuel tank. She’ll be right. Looks good at this height.
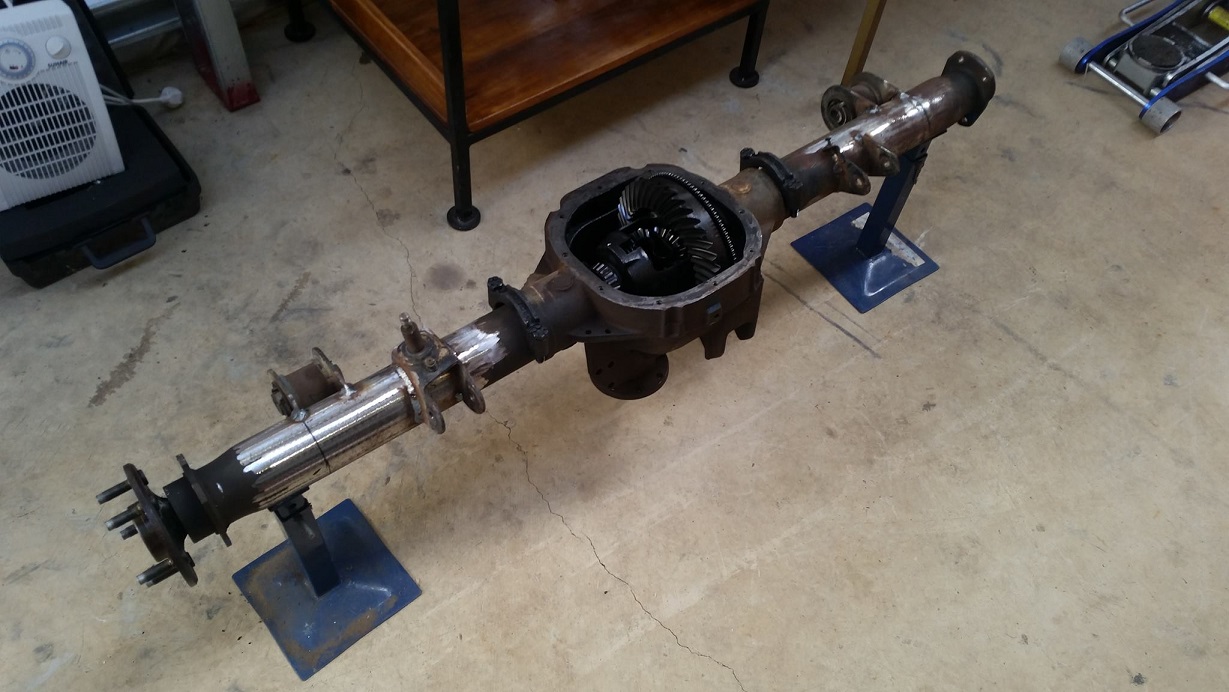
Stripped the 8.8″.
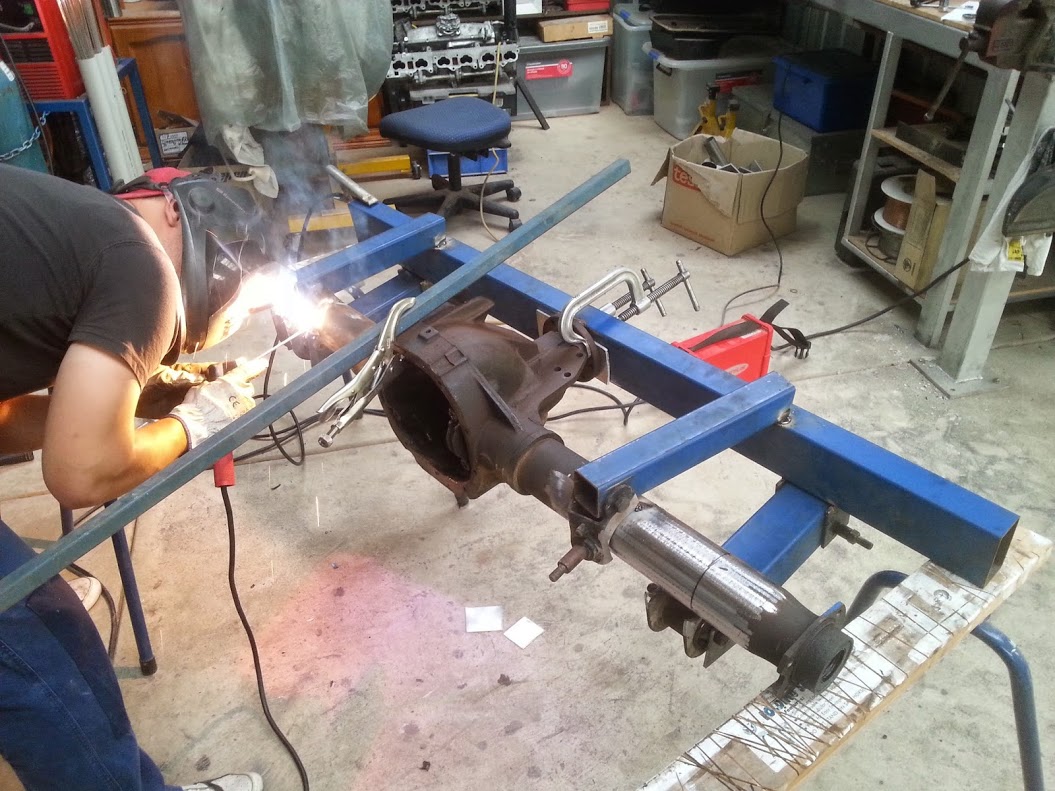
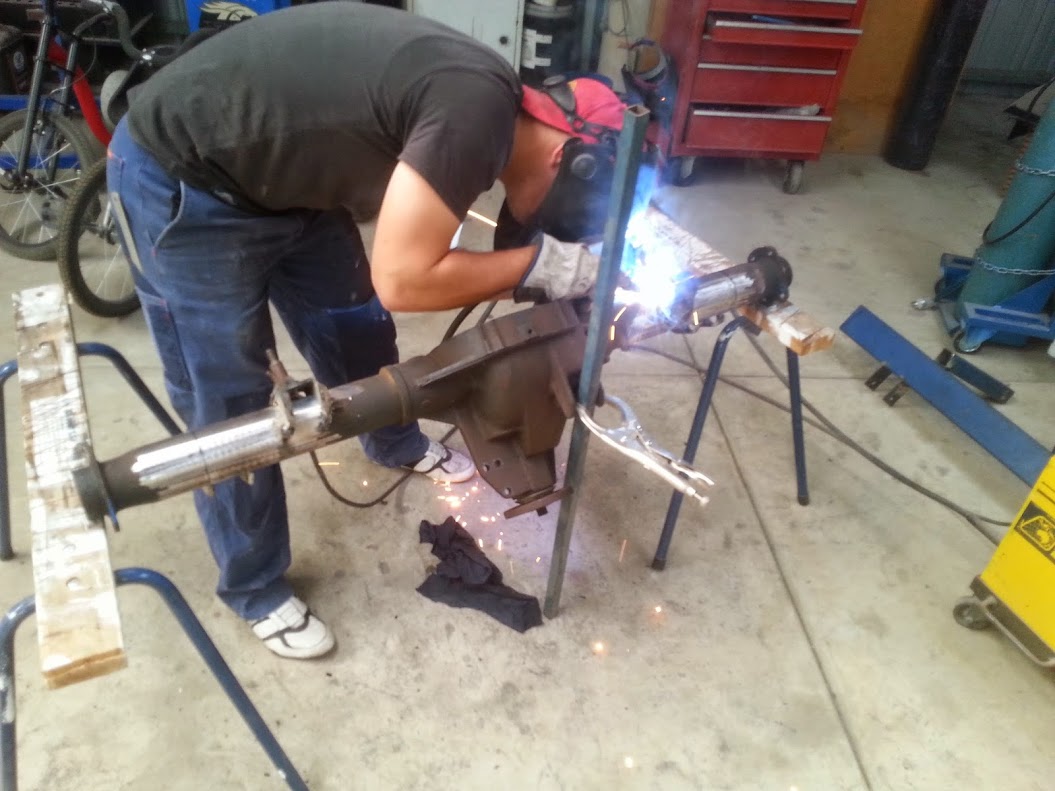
Mate made a jig from the old Volvo diff, then transferred the brackets across to the 8.8″. Also cut ~70mm out of the tube to make it fit the Volvo (with 2 short-side axles).
Looks good. Short side axle fits perfectly on both sides, but needed to order a pair of new ones due to bearing wear.
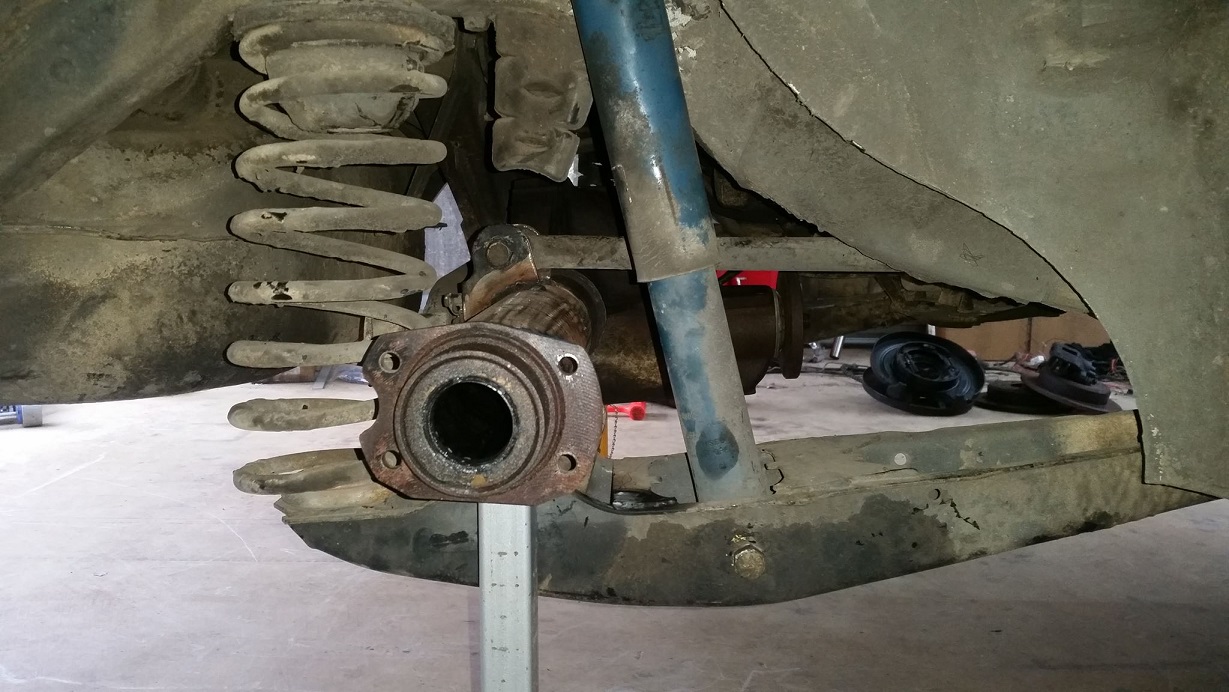
Test fit diff. Fits perfectly, will need to put adjusters on the torque rods to correct the input angle.
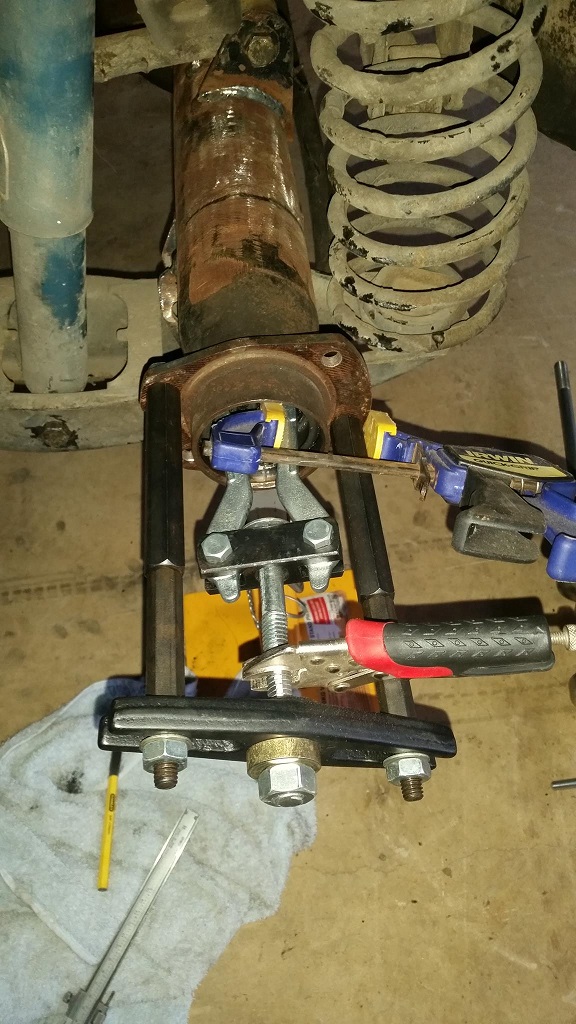
Removed the bearings with the wrong tool(s) for the job…
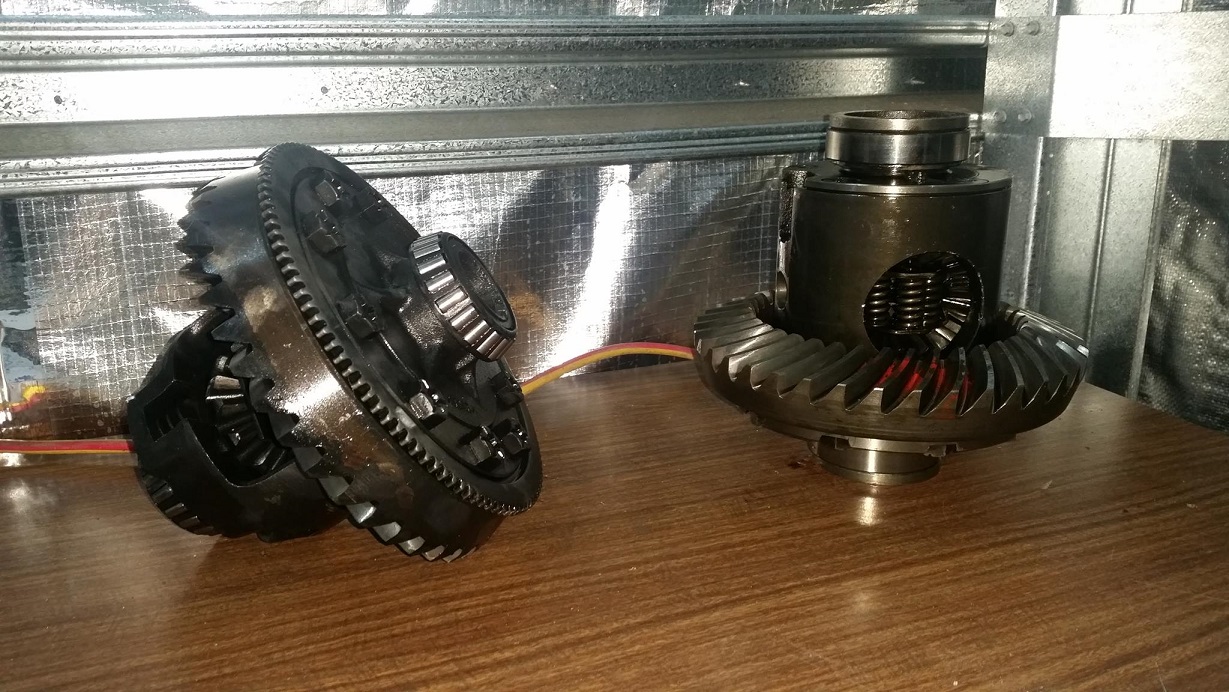
Standard vs. replacement LSD.
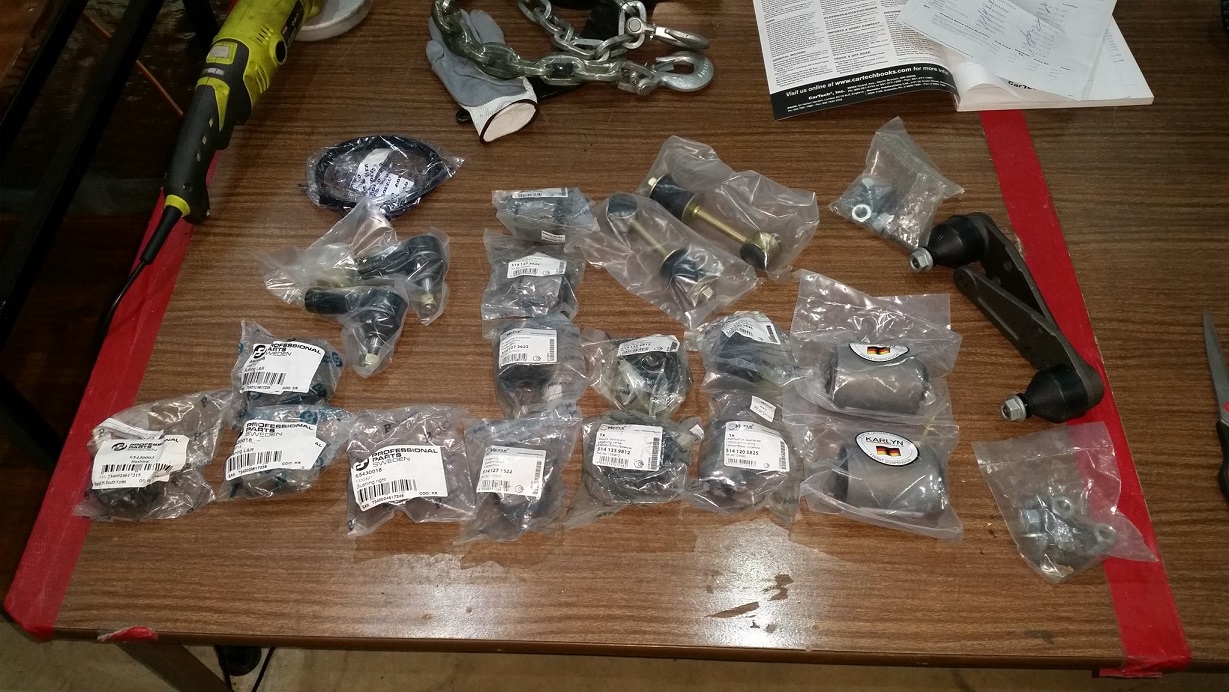
New suspension bushes and bits ready to go in.
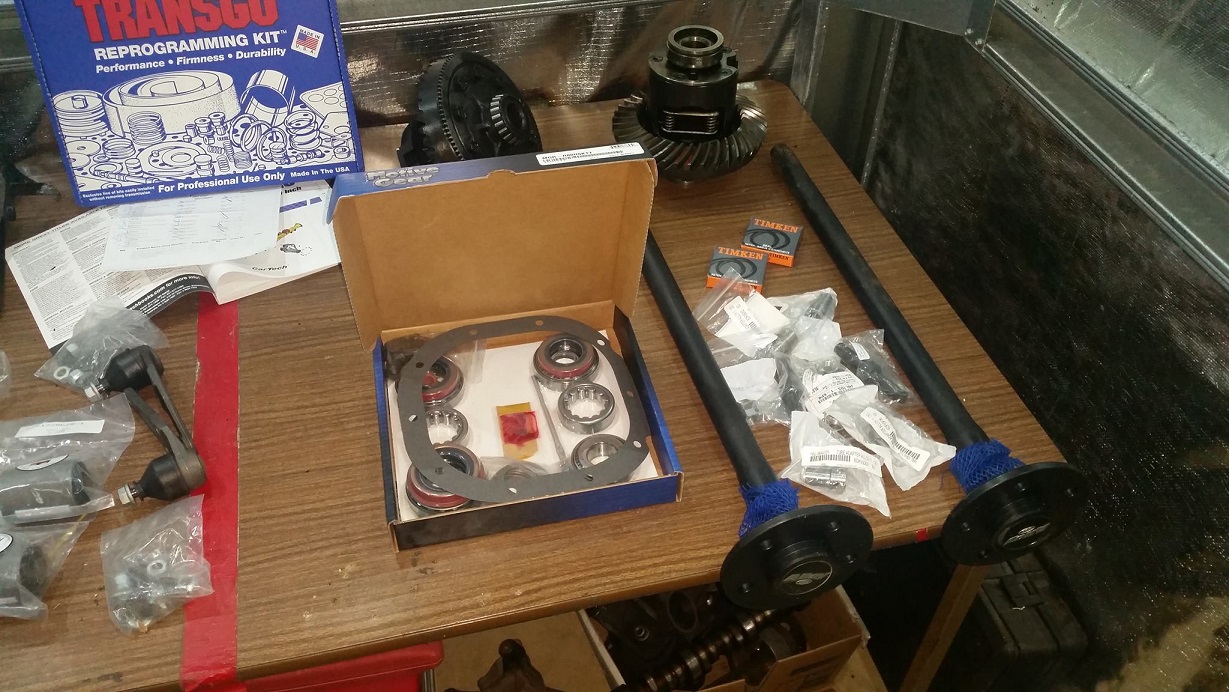
New axles and rebuild kit for the diff. Also Transgo HD-2 kit for the 4L80e.
Getting there…
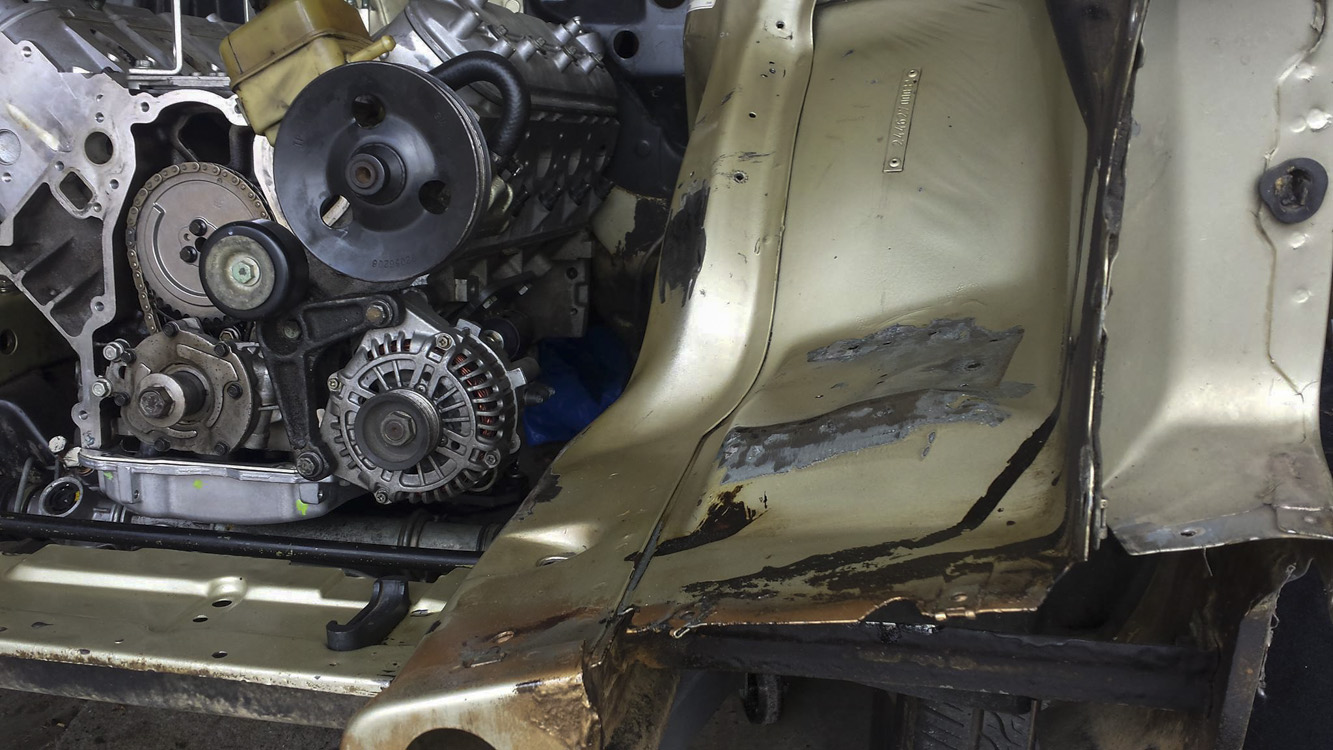
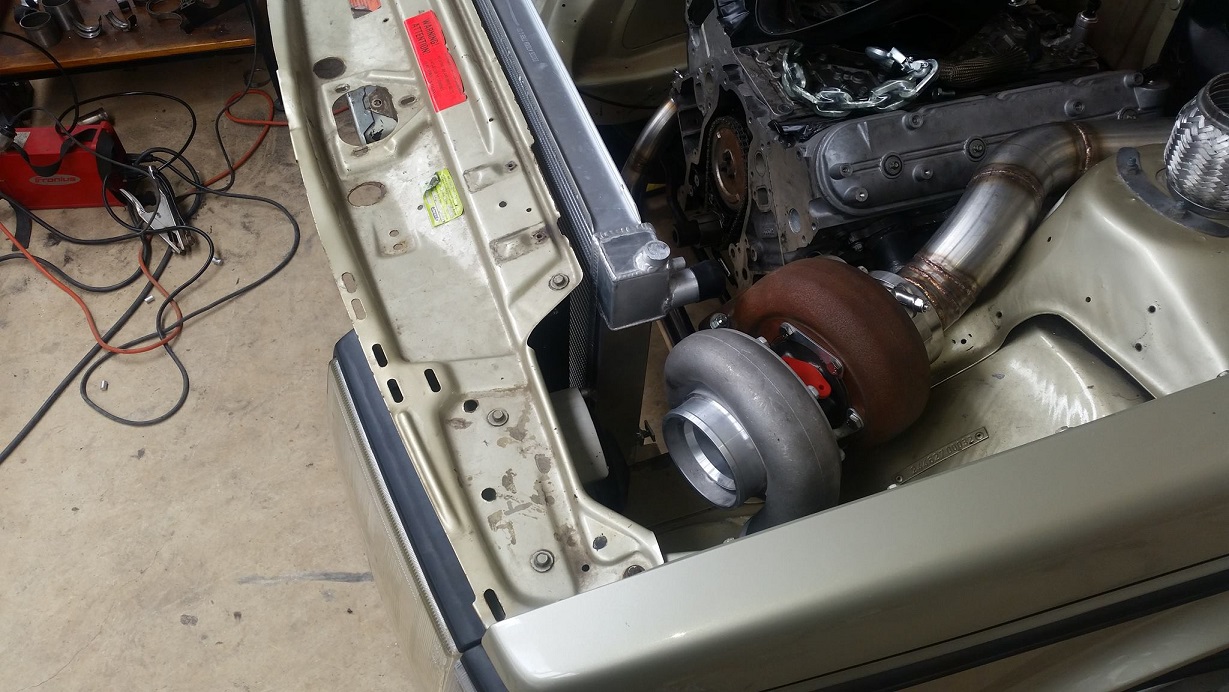
This is how the engine sits at the moment.
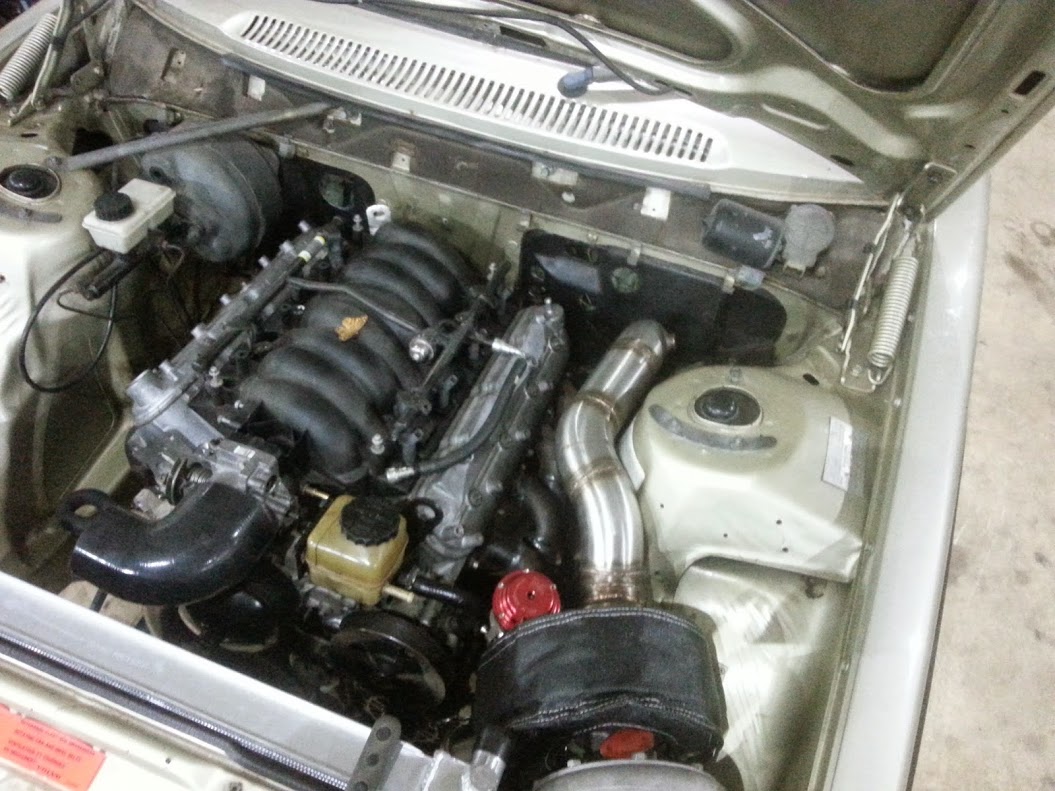
Fan clearance will be tight but the ones I’ve got should do the job.
May 8, 2015 at 6:39 pm #6513
SirNemesisParticipant- Geelong, VIC
- 2002 WHII Statesman 1985 Volvo 240GLE
View build HERE
Posts: 25Posts are now up-to-date. Will keep this thread updated as things progress :D
May 8, 2015 at 6:47 pm #6514Thanks for posting!
how to make a Volvo interesting :XD:
May 8, 2015 at 7:31 pm #6517you sir are crazy i like crazy :XD:
May 8, 2015 at 9:04 pm #6531
ajvx01Participant- adelaide
- VC 308 taxi bt1 wanna be!
View build HERE
Posts: 102
haha, so what’s the plan with this? Where do u actually and what do u want to use it for??
love the build..
May 8, 2015 at 9:20 pm #6532
VS 5.0Participant- Perth WA
- VE SSV Z Series M6
View build HERE
Posts: 118So much win in this thread !
May 8, 2015 at 9:42 pm #6535
pir4teParticipant- Mallala
- 640 HP hyper-cruising SS-V Flagonwagon
View build HERE
Posts: 154Brilliant
Naturally as-pirated, all-motor.
May 8, 2015 at 10:05 pm #6536Awesome stuff
please please get a 70+year old couple behind the wheel and pull up beside a new hsv/fpv any thing with a 19 year old behind the wheel who thinks he is cool and have the oldies look over and say, look at that piece of plastic would ya, and take of in a cloud of smoke
and post that vid on here
May 8, 2015 at 10:07 pm #6537
VS 5.0Participant- Perth WA
- VE SSV Z Series M6
View build HERE
Posts: 118^^^ And MUST have a bowls hat on the parcel shelf.
May 9, 2015 at 12:19 am #6542
VRSenator065Participant- Adelaide SA
- VR Senator LSx454 1960 Kombi (project) 1921 Nash Hot Rod (future project)
View build HERE
Posts: 5 777Coolest LS based build going, welcome to the forum cool as
 May 9, 2015 at 5:12 pm #6568
SirNemesisParticipant- Geelong, VIC
- 2002 WHII Statesman 1985 Volvo 240GLE
View build HERE
Posts: 25Thanks everyone
The car passed a RWC when I bought it so I’ve transferred it into my name and have been paying rego since, so it will keep its street rego and I’ll drive it on the street until I get caught. The idea is to keep it looking stock, not loud and behaving myself.
The goal I suppose has always been to prove that you can have fun and go very fast without spending a shitload of money. That said, I would really like to see a 10.xx second pass without spending over $5000 (including the car). So far my total has just ticked over the $2500 mark but I’ve still got some spending to do.
May 9, 2015 at 6:23 pm #6572
VRSenator065Participant- Adelaide SA
- VR Senator LSx454 1960 Kombi (project) 1921 Nash Hot Rod (future project)
View build HERE
Posts: 5 777This has to be the coolest idea I have seen in car building for a long long time. pure GOLD!!
 May 9, 2015 at 8:39 pm #6577
KAL SPLParticipant- Orange NSW
- L67 VS Calais FSM Niki VS GTS/R replica
View build HERE
Posts: 64Why have you gone back to original manifold or are the pics mixed up ?
-
AuthorPosts

You must be logged in to reply to this topic.
