
Home›Forums›Members’ Builds and Rides›VN – VP – VR – VS›VR Senator with LSx454
This topic has been reported for inappropriate content
This topic contains 2,102 replies, has 82 voices, and was last updated by ![]() VRSenator065 2 years, 11 months ago.
VRSenator065 2 years, 11 months ago.
-
AuthorPosts
-
November 4, 2015 at 2:34 pm #10934
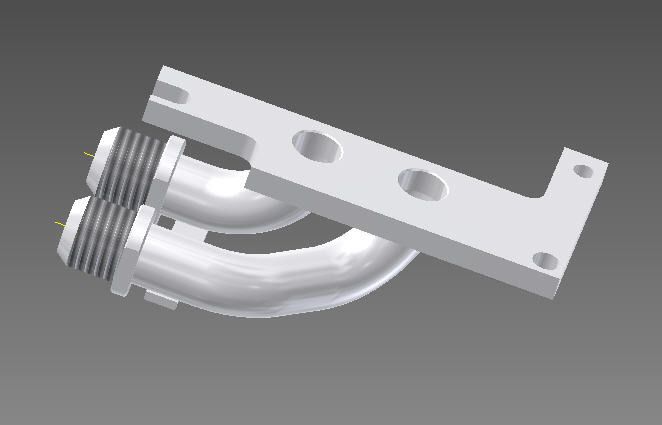
http://wbo2.com/lsu/position.htm
Have a read there re placement, has to be fitted in certain angle etc. To drain moisture etc
10-15 degree

The image shows the range of acceptable mounting positions. A vertical position can get too hot in confined spaces, so we recommend at least 15 degrees from the vertical. The horizontal position can cause condensation to drip onto the sensor, so we recommend at least 10 degrees from the horizontal. In all cases the sensor should be perpendicular to the gas flow, ie. the bung should sit square over the pipe – this ensures adequate but not an excessive amount of gas enters the sensor.
We recommend placing the sensor around 1 m (40″) from the closest exhaust valve. Where this cannot be achieved then spacing the sensor away from the direct exhaust by using a longer M18x1.5 bung, or a nut welded over a standard bung, is recommended.
° towards horizontal which prevents the collection of liquids between sensor housing and sensor element during the cold start phase. Proper bung placement and sensor installation are vital, otherwise sensor accuracy and lifespan can be affected.The image shows the range of acceptable mounting positions. A vertical position can get too hot in confined spaces, so we recommend at least 15 degrees from the vertical. The horizontal position can cause condensation to drip onto the sensor, so we recommend at least 10 degrees from the horizontal. In all cases the sensor should be perpendicular to the gas flow, ie. the bung should sit square over the pipe – this ensures adequate but not an excessive amount of gas enters the sensor.
-
This reply was modified 8 years, 5 months ago by
 sands vs.
-
This reply was modified 8 years, 5 months ago by sands vs.
-
This reply was modified 8 years, 5 months ago by sands vs.
-
This reply was modified 8 years, 5 months ago by sands vs.
-
This reply was modified 8 years, 5 months ago by sands vs.
-
This reply was modified 8 years, 5 months ago by sands vs.
-
This reply was modified 8 years, 5 months ago by sands vs.
November 4, 2015 at 4:08 pm #10942
VRSenator065Participant- Adelaide SA
- VR Senator LSx454 1960 Kombi (project) 1921 Nash Hot Rod (future project)
View build HERE
Posts: 5 777
Wow, that’s really cool info, cheers for that
 November 4, 2015 at 8:36 pm #10955
You have come this far so why half ass it now? Just stick it out and you will be able to sleep at night knowing that things are done right


 hahahaNovember 6, 2015 at 9:35 am #10971
VRSenator065Participant- Adelaide SA
- VR Senator LSx454 1960 Kombi (project) 1921 Nash Hot Rod (future project)
View build HERE
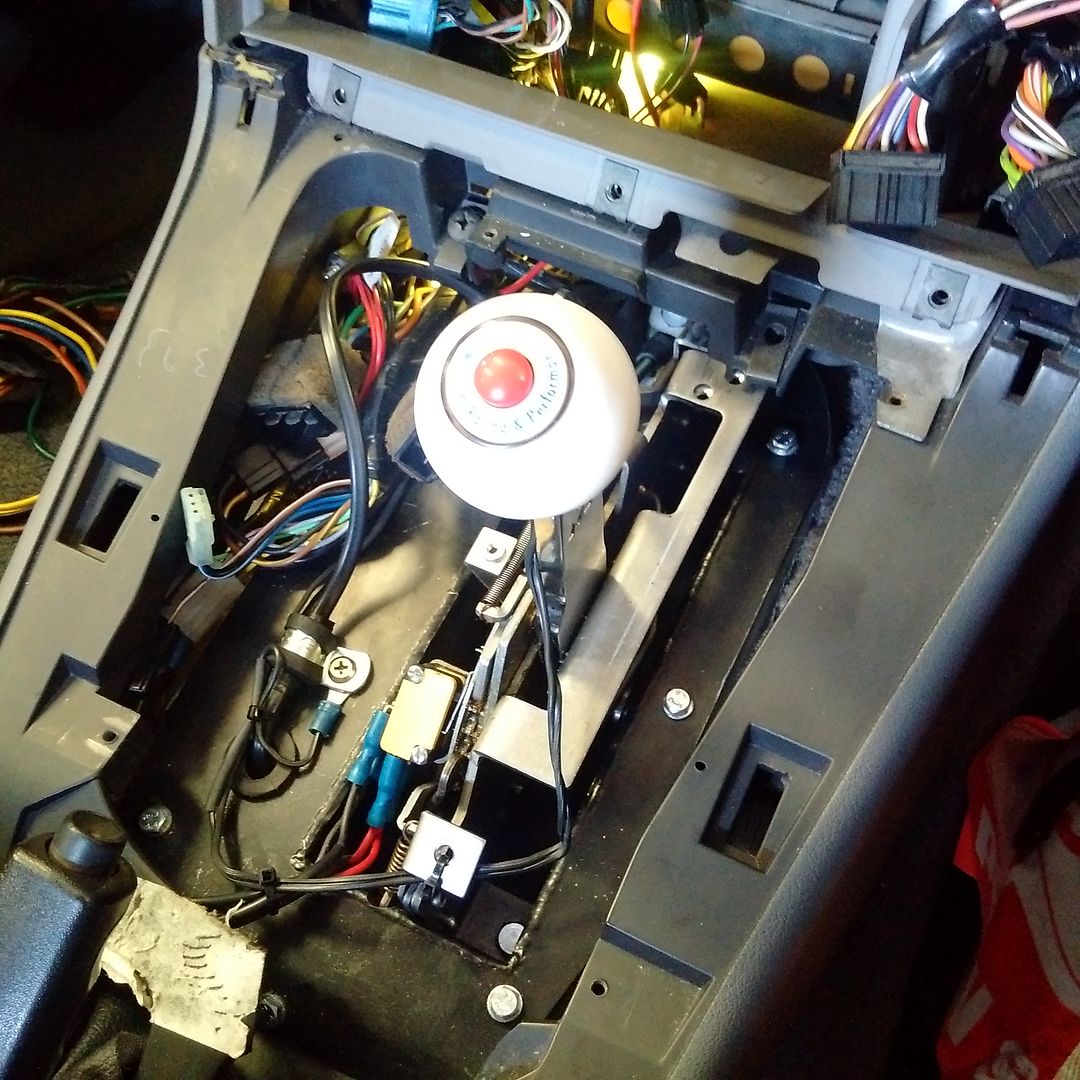
Posts: 5 777Yea I agree 100%. So went around yesterday and had a good look over it. Its looking very nice under there. never ceases to amaze me how much better something can look if you just take that little bit more time. They have come up with a really neat way to mount the speedo sensor. So pretty much the box etc is all in, the underside is done. Today its just console, wire up trans brake, then their tuner is coming around to tell the brain its a manual. Hopefully fire up anytime now, aim to go around lunch time all being well. Have decided to bring it home on the flat bed as its drizzly over here and I don’t want to risk driving it in the rain. I can then have a bit of a play with it too around home to get used to it and have some fun. Close now
 November 6, 2015 at 6:46 pm #10982
Sorry if the questions aready been asked Gary, but will it have to go back to the engineers for inspection / roadworthy now that it’s 2 speed not 4?
Looking forward to seeing this in action soon!
November 6, 2015 at 10:05 pm #10985
VRSenator065Participant- Adelaide SA
- VR Senator LSx454 1960 Kombi (project) 1921 Nash Hot Rod (future project)
View build HERE
Posts: 5 777Its a good question, and one i asked. So basically, as long as it doesn’t change anything the car was tested for then strictly speaking no it doesnt need to be retested. But…. my engineer has suggested to me that I advise them so its on record.
November 7, 2015 at 5:37 pm #11014
MichaelParticipant- VY Calais 383ci GT42 turbo.
View build HERE
Posts: 208Same gearbox. Just two of the forward gears don’t work :p
November 10, 2015 at 12:00 pm #11091
VRSenator065Participant- Adelaide SA
- VR Senator LSx454 1960 Kombi (project) 1921 Nash Hot Rod (future project)
View build HERE
Posts: 5 777Its alive
The teasers just sent me a pic, Apparently its on the ground, they have been around the block a couple of times, they are happy with the change, they gave me a listen to the note on the phone, sounded pretty tough. They are about to get their tuner to do what he has to make it think its a manual, then a few bits and pieces and wagons ho…. November 10, 2015 at 5:55 pm #11100
Just love this car
November 10, 2015 at 10:26 pm #11102Gary. What sump are you using?
I need to to buy one for mine
November 11, 2015 at 9:17 am #11112
VRSenator065Participant- Adelaide SA
- VR Senator LSx454 1960 Kombi (project) 1921 Nash Hot Rod (future project)
View build HERE
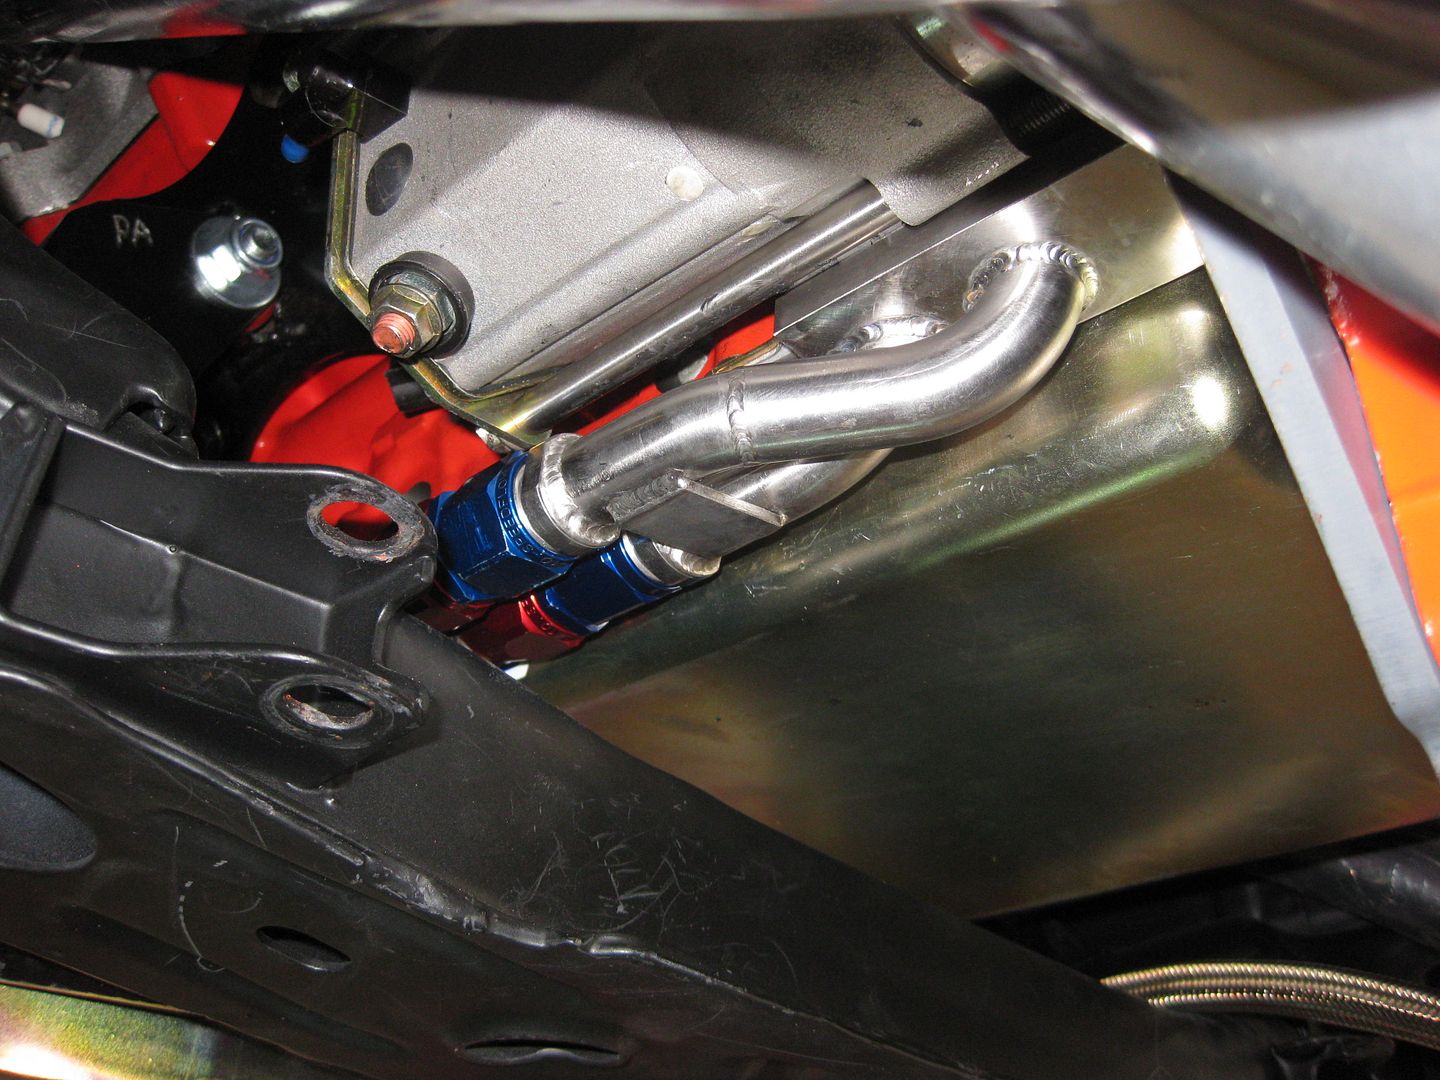
Posts: 5 777I used a Canton circuit racing sump (part number 15-276) https://www.cantonracingproducts.com/product/15-276/15-276—GM-LS1LS6-5-58quot-DEEP-FRONT-SUMP-DRIFTROAD-RACE–PAN/, its a beautiful piece of kit BUT……
I originally bought it thinking/hoping it would mean I wouldn’t need to modify the front K member. That proved out to be wrong and I still needed too. Also the design of it is you need to run an external oil filter (no biggie in fact I wanted that) but again, it just so happens this comes out pretty much directly over the steering rack. I had to design up a very nice stainless adapter to run the braided lines forward. Its very very neat, but took bloody ages to come up with how to do it and I am really happy with it but seriously its money you don’t need to spend. I do have a drawing of the adapter if you (or anyone else) goes that way I am happy to share if you wanted to get one made.
So tbh if I were to do it again, I think the easiest/cheapest/neatest solution would be to use a VY sump (best internal baffles apparently) and simply trim back the two back corners and tig weld plates into the corners. That way it will clear the K member and you lose just a few ml of oil capacity which is insignificant.
Now having said that, mines beautiful, large capacity, very very well baffled, magnetic drain plug, provision on the other side for a temp sensor or whatever. So if probably comes down to what your after.
-
This reply was modified 8 years, 5 months ago by
 VRSenator065.
November 11, 2015 at 9:37 am #11113Poor old girl looks like it needs a wash…
November 11, 2015 at 10:56 am #11125I used a Canton circuit racing sump (part number 15-276) https://www.cantonracingproducts.com/product/15-276/15-276—GM-LS1LS6-5-58quot-DEEP-FRONT-SUMP-DRIFTROAD-RACE–PAN/, its a beautiful piece of kit BUT…… I originally bought it thinking/hoping it would mean I wouldn’t need to modify the front K member. That proved out to be wrong and I still needed too. Also the design of it is you need to run an external oil filter (no biggie in fact I wanted that) but again, it just so happens this comes out pretty much directly over the steering rack. I had to design up a very nice stainless adapter to run the braided lines forward. Its very very neat, but took bloody ages to come up with how to do it and I am really happy with it but seriously its money you don’t need to spend. I do have a drawing of the adapter if you (or anyone else) goes that way I am happy to share if you wanted to get one made. So tbh if I were to do it again, I think the easiest/cheapest/neatest solution would be to use a VY sump (best internal baffles apparently) and simply trim back the two back corners and tig weld plates into the corners. That way it will clear the K member and you lose just a few ml of oil capacity which is insignificant. Now having said that, mines beautiful, large capacity, very very well baffled, magnetic drain plug, provision on the other side for a temp sensor or whatever. So if probably comes down to what your after.
Beautiful Gary. Looks like a VERY well built sump from the link. I remember you had to stuff around with the oil feeds. I was looking at a ls1 sump and then thinking of using an Improved Racing Baffle kit + crank scraper. ASR also make a modified windage tray which also looks like a nice piece of gear.
Just tossing up which was is best value for $$$
November 11, 2015 at 11:00 am #11126
VRSenator065Participant- Adelaide SA
- VR Senator LSx454 1960 Kombi (project) 1921 Nash Hot Rod (future project)
View build HERE
Posts: 5 777Get asked a lot about what parts I have used etc, so thought I would post up a bit of a summary. Hopefully I have captured most of the important stuff, if I have missed anything let me know and I will update the list. Hopefully its helpful to someone else doing a conversion.
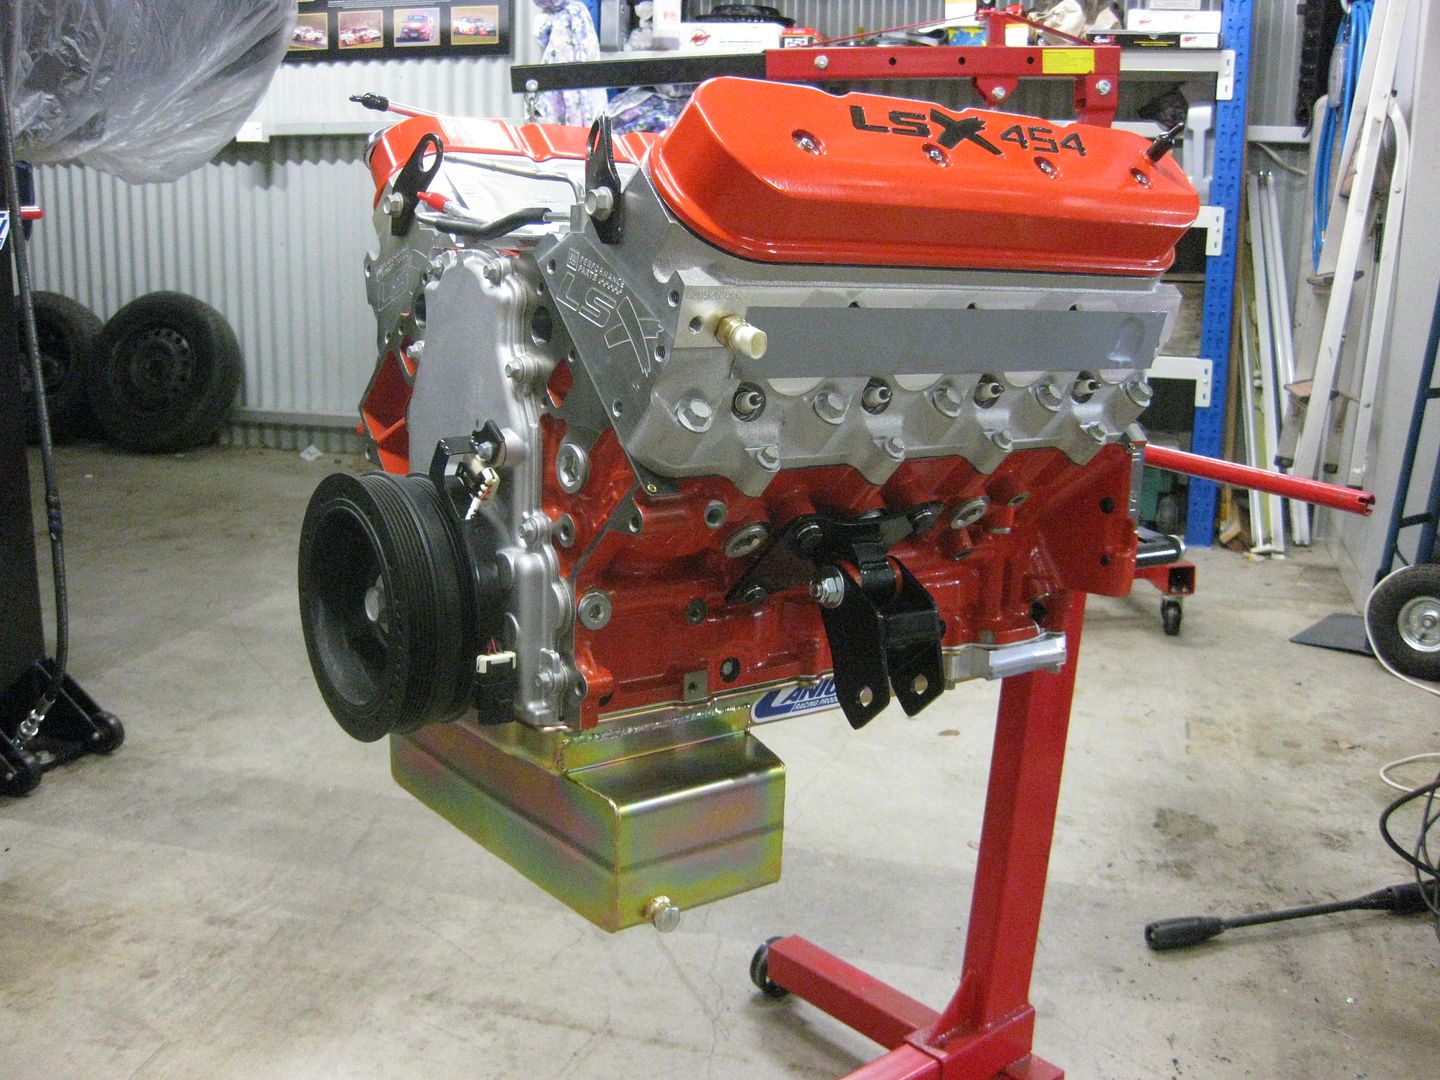
Engine : LSx454 Iron Block Crate Motor
http://www.chevrolet.com/performance/crate-engines/lsx-454.htmlExhaust Headers ; CRE 1-7/8” 4 into 1 (#CH80A), 3” Collector, Ceramic Coated
http://www.caenterprises.com.au/hs_dbase/ch_more.php?details=Li9jaF9oZWFkZXJzX2RldGFpbHMuY3N2fENILTgwQXxDT01NT0RPUkUgVkItVkMtVkgtVkstVk4tVlAtVlItVlMgV0lUSCBHRU4gSUlJIGFuZCBMUzIuIDQgSU5UTyAxIERFU0lHTiB3aXRoIDEgNy84aW4gUFJJTUFSSUVTIGFuZCAzaW4gT1VUTEVUd2l0aCAzaW4gMiBCb2x0IEZsYW5nZS58JDE1NTB8aHR0cC0vL3d3dy5jYWVudGVycHJpc2VzLmNvbS5hdS9pbWFnZXMvaGVhZGVycy9jaC04MGEuanBnEngine oil Cooler : B&M Remote Engine Oil Cooler (#BM 70298)
http://www.summitracing.com/int/parts/bmm-70298Windscreen Washer : Remote 1.2L 12v Pump Water Bottle
http://www.ebay.com.au/itm/1-2L-12v-NEW-Windscreen-Washer-Pump-Water-Bottle-Jets-/360275413891?hash=item53e2168b83Cooling : Radiator PWR Custom, 68mm 2-Pass Crossflow Radiator, SPAL 16″ 3000CFM Fan, integrated front mount trans oil cooler – 280 x 255 x 19mm (-6AN fittings)
Engine Sump : Canton racing sump (#15-276)
https://www.cantonracingproducts.com/product/15-276/15-276—GM-LS1LS6-5-58quot-DEEP-FRONT-SUMP-DRIFTROAD-RACE–PAN/Front Engine Mounts : Tuff Mounts, rear original Holden rubber
http://www.ebay.com.au/itm/like/321884799935?limghlpsr=true&hlpht=true&ul_noapp=true&hlpv=2&chn=ps&lpid=107&ops=true&viphx=1Starter Swap Kit : CRS LS1 Left Hand Starter Motor Conversion Kit
http://www.rodshop.com.au/index.php/bellhousings/chev-ls1-2-3/ls1-left-hand-starter-motor-conversion-auto.htmlWater Pump : Meziere Enterprises Electric Water Pump (#WP319U)
http://www.summitracing.com/int/parts/mez-wp319u/overview/make/chevroletRemote Oil Filter : Hamburger (#3301) to accept HP5001 filter
http://www.summitracing.com/int/parts/ham-3301/overview/Timing Cover : Edelbrock Split Front Timing Case, (#4255)
http://www.summitracing.com/int/parts/edl-4255Flex Plate : – Heavy-Duty 8 Bolt Flexplate (#TSI 399756)
Spark Plug Leads & Coils : Accel ceramic angled plug leads, Accel Supercoil #140043
Induction: Jenvey 60mm 8 ITB fuel injection, Injector Dynamics ID725 injectors.
http://www.jenvey.co.uk/products2/throttle-body-kits/chevrolet-ls7-sfd60-taper-throttle-kit-ckct02http://injectordynamics.com/injectors/id725/
Fuel Tank: Bain Racing custom alloy tank with 3L inbuilt surge
http://www.bainracing.com.au/Fuel Pumps : Main pump Weldon (#DB2015) with PWM controller, 5/8″ supply & 1/2″ return lines, Weldon pressure regulator, Pierburg duel lift pumps.
http://www.weldonracing.com/product/10-6/D2015-A_%28-8_inlet___outlet%29.html
http://www.ebay.com.au/itm/E85-safe-Fuel-pump-suit-lift-pump-for-surge-tank-or-carburetor-Pierburg-/171342801263?hash=item27e4d3a96f:g:AewAAOSwT5tWQXcfTransmission: Powerglide, Reid case, Sonnax gear set, 1400hp input shaft, Pro ratchet shifter, custom dropbox (Ryan, 0409 958 227)
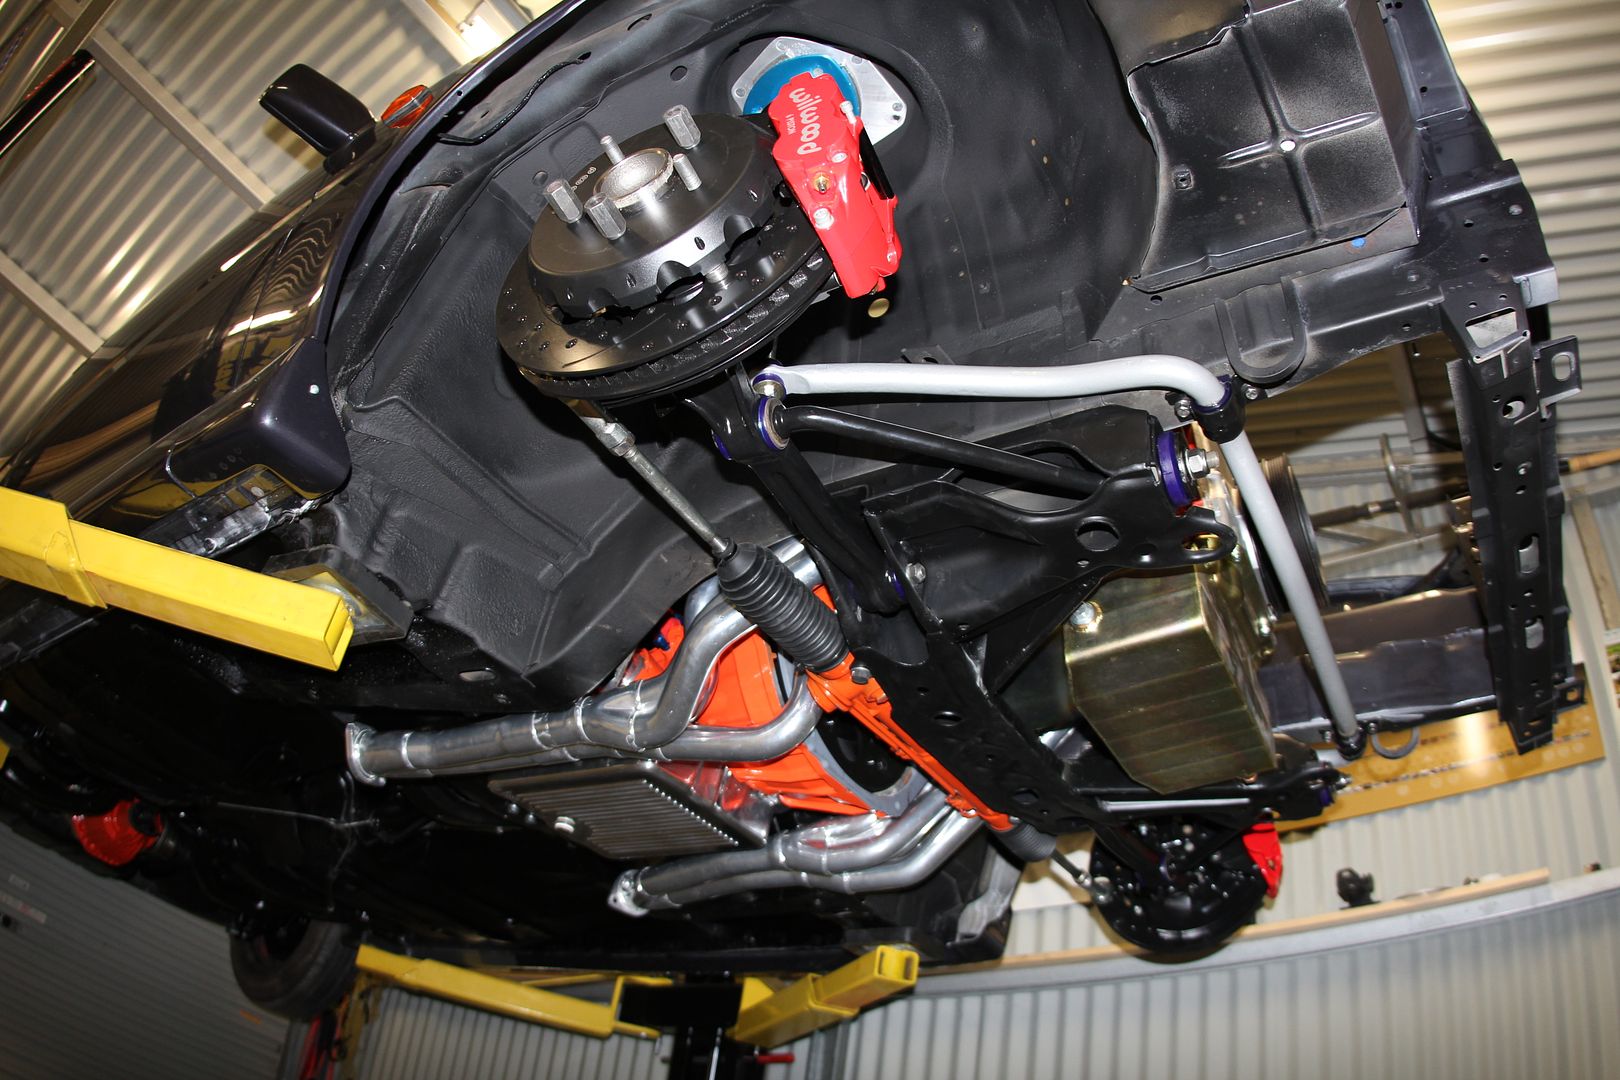
Brakes : Wilwood 2004 GTO, (#140-8753) 6-Piston Front Kit, 332mm Rotor Diameter front. (#140-8754) 4-Piston Rear Kit, 310mm Rotor Diameter, 4 piston rear.
http://www.wilwood.com/BrakeKits/BrakeKitSearch.aspx?year=2006&make=Pontiac&model=GTO&option=All&whl=17Suspension: XYZ coil overs, rear springs Pedders adjustable height
http://www.ebay.com.au/itm/HOLDEN-COMMODORE-VR-VS-VT-VX-VY-VZ-COILOVERS-XYZ-RACING-COILOVER-KIT-HO01/252114814459?_trksid=p2141725.c100338.m3726&_trkparms=aid%3D222007%26algo%3DSIC.MBE%26ao%3D1%26asc%3D20150313114020%26meid%3D08e089cbfcb14a22aeeef286d852546e%26pid%3D100338%26rk%3D7%26rkt%3D10%26sd%3D262080808397Differential: Harrop 12 Bolt, 3.55:1, Detroit locker
https://www.harrop.com.au/shop/harrop-truetrac-12-bolt-differential-assembly-holden-vr-vzDrive Shafts : G Force Level 3, Porsche 930 turbo CV’s, billet cages
http://www.shop.gforce1320.com/product.sc?productId=84&categoryId=918Tail Shaft: Custom 2 piece, Chrome moly tube, Strange Yokes, HD centre mount (Hardy Spicer)
http://www.hardyspicer.com.au/driveline_products.aspRear Rims : Custom 17 x 10 rims to match OE rims, CAD work by me, manufactured by Dragway http://www.dragway.com.au/
-
This reply was modified 8 years, 4 months ago by VRSenator065.
-
This reply was modified 7 years, 8 months ago by VRSenator065.
November 12, 2015 at 10:26 am #11152
VRSenator065Participant- Adelaide SA
- VR Senator LSx454 1960 Kombi (project) 1921 Nash Hot Rod (future project)
View build HERE
Posts: 5 777Yea baby, just been around, fired it up, sounds epic :) Had a really good look at the reverse lock out lever, I think I have come up with a really cool way to sort that, want to get it home in my shed with my tig and own tools so I can have a play (hopefully this week end) Hopefully on the week end I can also get it up on my hoist and I will do a full write up on fitting the glide and also the CAE extractors. They just simply don’t fit off the shelf, they are good, just not perfect, but I will do a full write up hopefully with some pics to show what we had to do. Also for the very first time actually sat in it and played with the pro ratchet, already I love it, so happy so far its looking awesome, might be home tonight
-
This reply was modified 8 years, 5 months ago by VRSenator065.
November 12, 2015 at 11:14 am #11154So really only major change was the headers and it sounds very different? How so?
November 12, 2015 at 11:32 am #11155
VRSenator065Participant- Adelaide SA
- VR Senator LSx454 1960 Kombi (project) 1921 Nash Hot Rod (future project)
View build HERE
Posts: 5 777Cant really comment on how so exactly, I need to drive it a bit more, just sounds different.
November 12, 2015 at 2:22 pm #11171
VRSenator065Participant- Adelaide SA
- VR Senator LSx454 1960 Kombi (project) 1921 Nash Hot Rod (future project)
View build HERE
Posts: 5 777Just been for a drive, wow, double wow, its bloody awesome. That gearbox and stall is just perfect for that car, coupled with the ratchet its just so much fun and I only went around the block a couple of times. It just has so much torque throughout the rev range you just don’t need or want a handful of gears, just awesome
Its coming home tonight, happy days!November 12, 2015 at 5:01 pm #11191
MichaelParticipant- VY Calais 383ci GT42 turbo.
View build HERE
Posts: 208I’m happy that you are enjoying the auto so much. I really hope it stays this way and doesn’t goto manual in the future.
November 12, 2015 at 8:25 pm #11198
VRSenator065Participant- Adelaide SA
- VR Senator LSx454 1960 Kombi (project) 1921 Nash Hot Rod (future project)
View build HERE
Posts: 5 777Its home, there is a small gremlin in the elecs, but i will sort that. Took it for a short drive, so far gotta say I am in love with the trans and ratchet, brutal as ever but now I feel in total control. Took the future son in law for a drive. His description “its like star wars when you go to warp speed” i know its a bit self indulgent, but shit i love driving this car
-
This reply was modified 8 years, 5 months ago by
-
AuthorPosts


You must be logged in to reply to this topic.
