
Home›Forums›Members’ Builds and Rides›VB – VC – VH – VK – VL›VK L98 T56 Build
This topic contains 83 replies, has 16 voices, and was last updated by ![]() Heron SSV 4 years, 10 months ago.
Heron SSV 4 years, 10 months ago.
-
AuthorPosts
-
April 30, 2016 at 9:08 pm #16475

rayray07Participant- Newcastle
- 6.0L VK In the build
View build HERE
Posts: 41UPDATE.
Progress has been a little slow lately due to work commitments and waiting on engine parts.
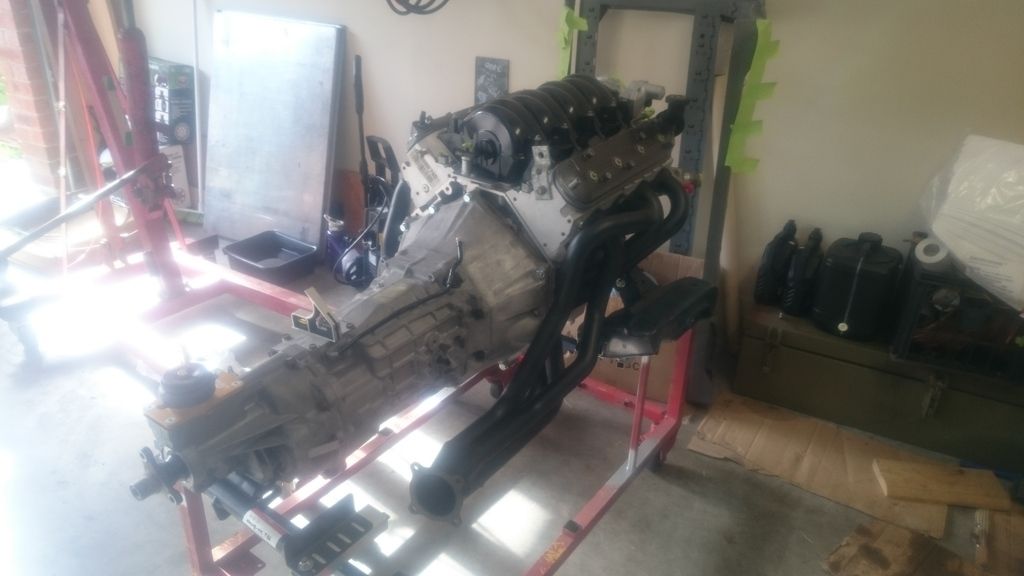
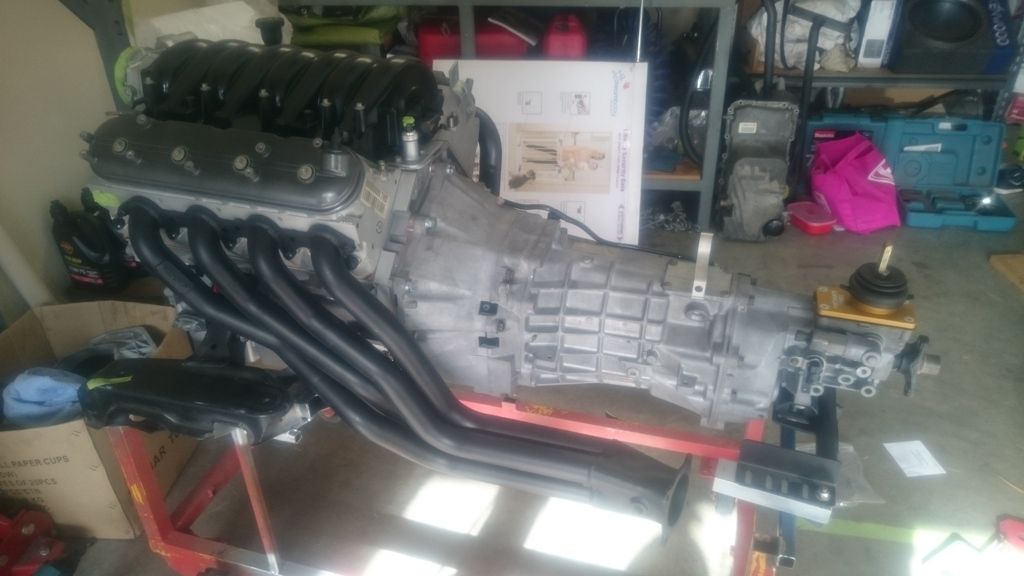
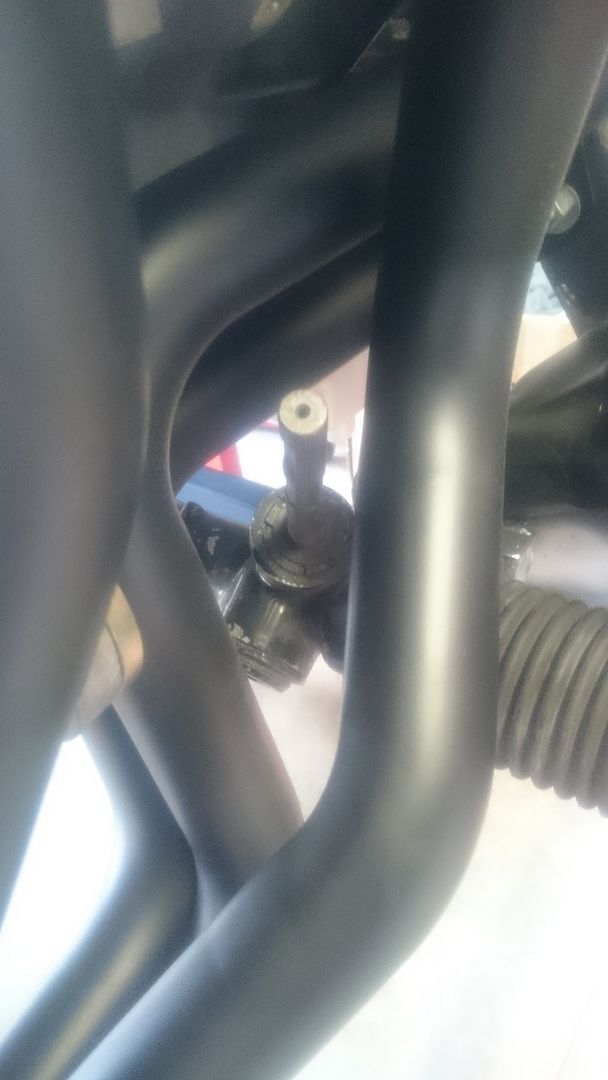
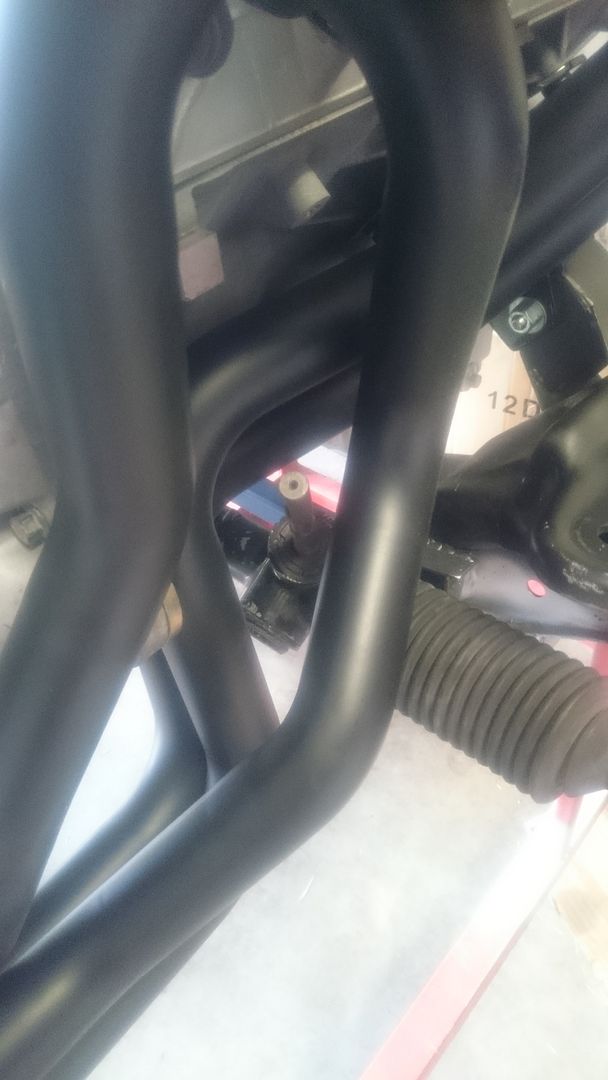
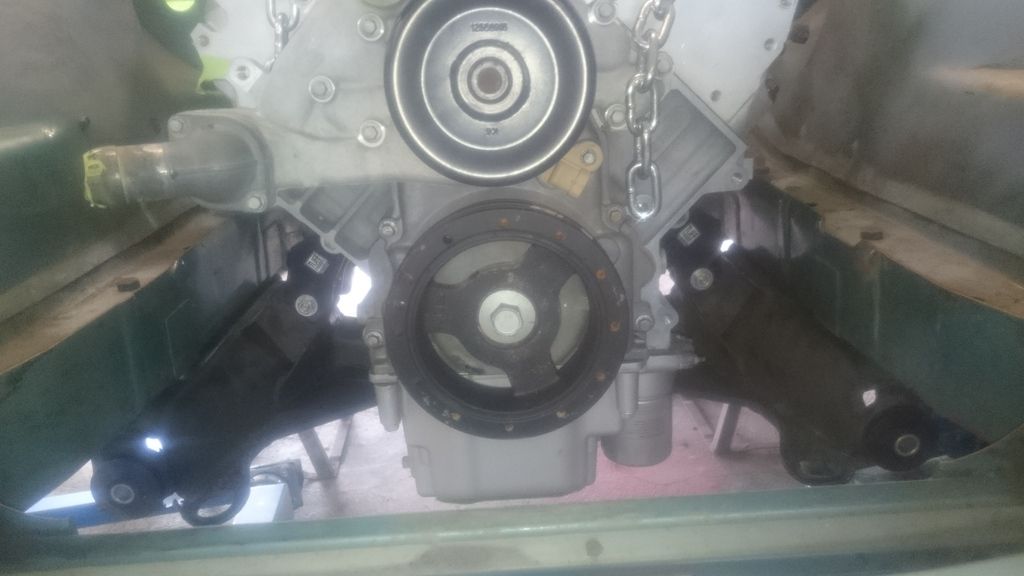
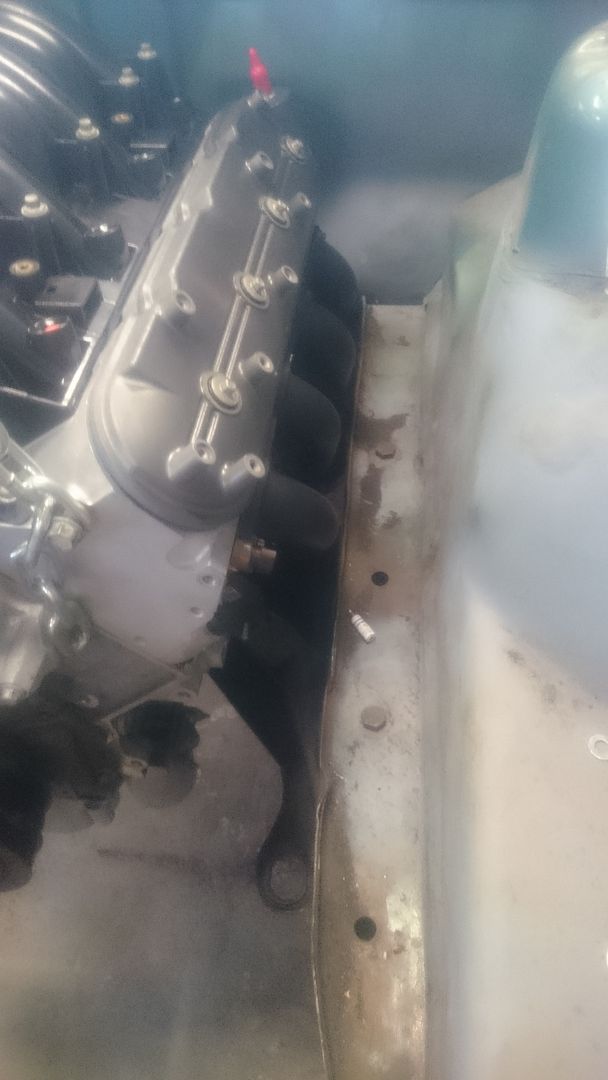
The motor is just about all back together and the car is off the rotisserie ready for engine fitment. While waiting for parts, I made up an engine/gearbox stand out of some scrap and an old damaged K-frame I had laying around. This helped me with checking all the clearances with headers, steering rack, starter ect. Very happy with the clearance around the intermediate shaft, but LH header comes really close to the starter motor terminal. RH Header have just enough clearance around the bell housing.
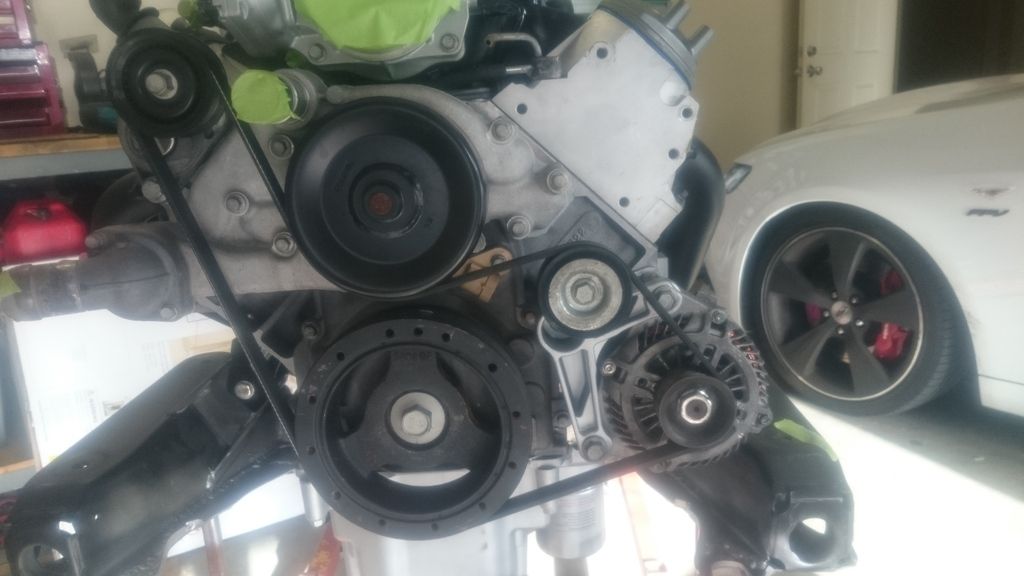
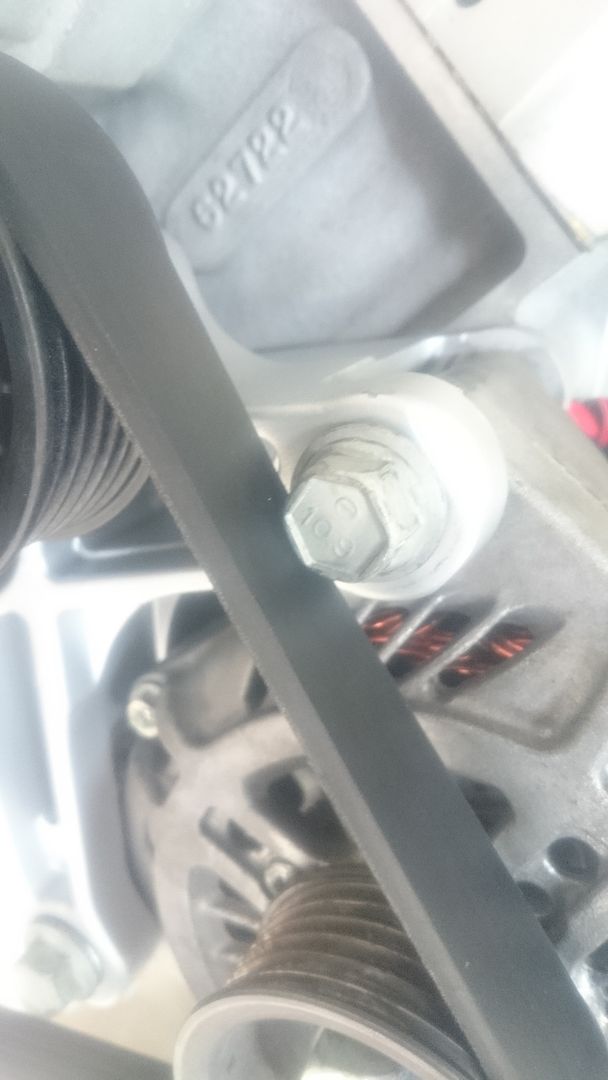
With my accessory drive setup, I used a Dayco ribbed belt (P.N. 5060548) and Dayco pulley (P.N. 89015). All fits well aside from the belt contacting the head of the top alternator bolt. I should get clearance if I mill the bolt section on the bracket down approx. 6-7mm and take a few mm off the head of the bolt so it will sit flush with the bracket.
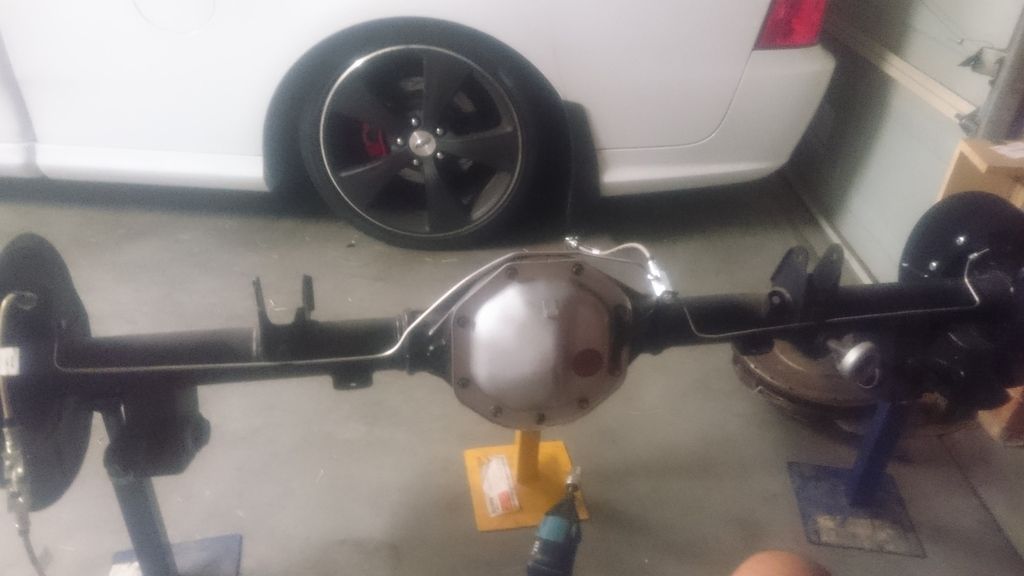
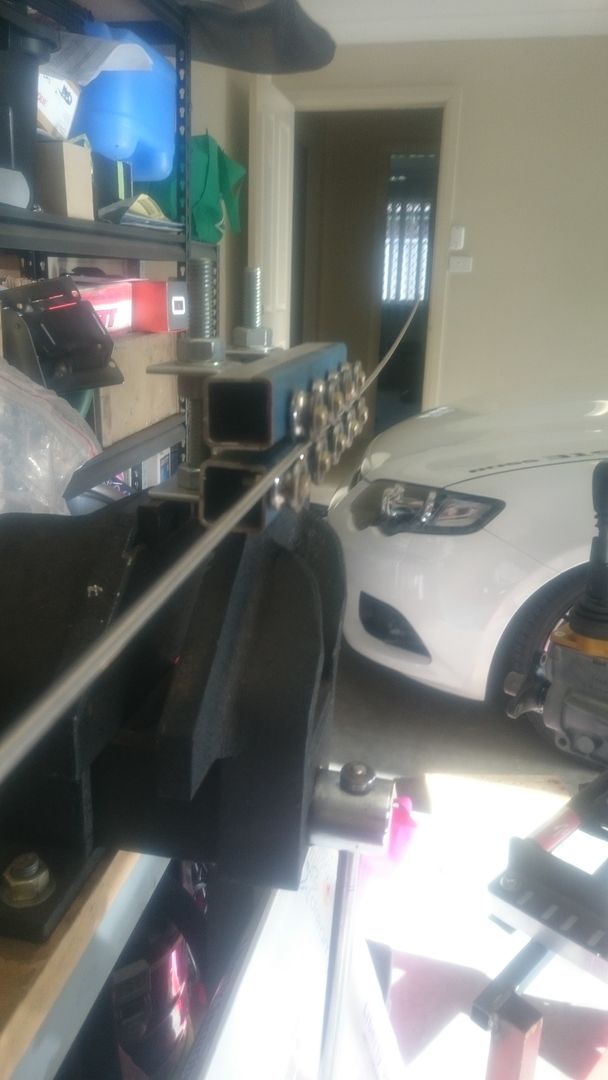
I also made up the 3/16″ SS brake lines for the diff. First time I had done this and I found it quite easier than I had first thought, just don’t forget to put the tube nuts on before you do your final flare like I did :disappointed: . I had to remake the entire brake line again. I also made a tube straighter out of some scrap RHS, threaded rod and some cheap eBay bearings, works awesome and beats paying the ridiculous amount for a proper one.

Here are some more pictures of the clearances with the headers.
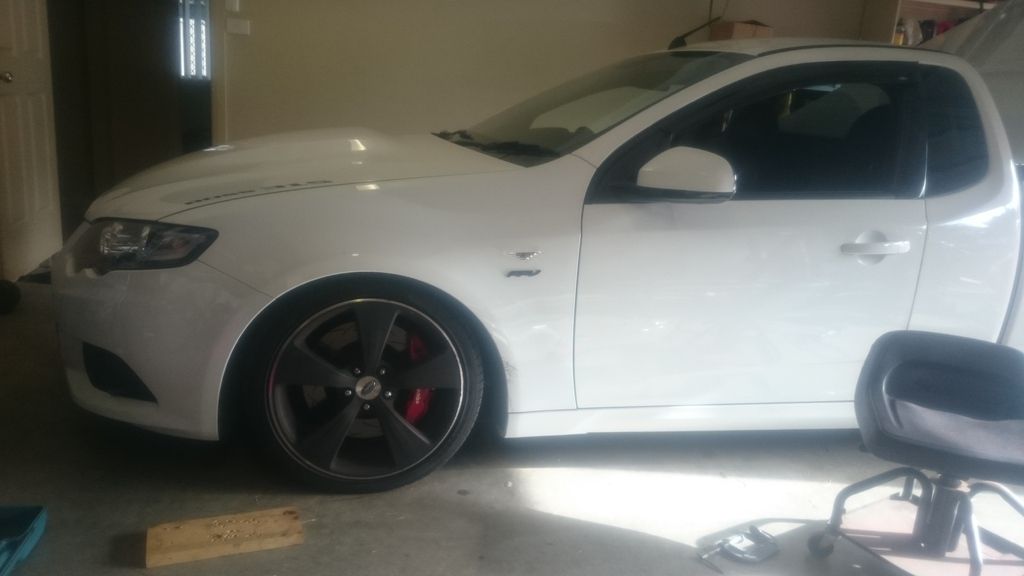
And for those wondering about the FPV in the background, Yes that is my ute. FPV GS Ute currently putting out just shy of 400RWKW and it is one hell of a car to drive. I was tossing up for a while between it and a VE SSV ute and I am very happy I chose it.

 May 1, 2016 at 10:46 am #16488
VRSenator065Participant- Adelaide SA
- VR Senator LSx454 1960 Kombi (project) 1921 Nash Hot Rod (future project)
View build HERE
Posts: 5 777
Great update mate, and great progress. Exhaust clearance looks really good. Love the brake line straightener, I thought about making my own up to, but never got around to it, love the ingenuity!!. And I reckon everyone who has ever made up a brake line at least once does the flare then realizes they haven’t put the nut on! Carry on
 May 5, 2016 at 8:26 pm #16587
Hi, Have done same engine swap into my VK. Got engineered and licensed about 6 months ago. Exhaust wise I run the try Y extractors from castle engineering which I had to modify a bit. 2 and 1/2 inch secondaries out of extractors and into a single 3 and 1/2 inch with one muffler and one resonator at the rear as per standard just larger. What compression ratio do you end up with after removing 20 thou off the heads and does the intake still line up o.k?
May 6, 2016 at 5:53 am #16604What headers are they ?
May 7, 2016 at 9:24 pm #16672
rayray07Participant- Newcastle
- 6.0L VK In the build
View build HERE
Posts: 41Gday Dave, I’m actually trying to figure out how exactly to go about my exhaust. I had a long chat with one of the blokes from sureflo exhaust during the week about going with a single 3 1/2 ” system, But I’m still tossing up between that and a twin 2 1/2″. How exactly did you go with your single 3 1/2″? What mufflers did you use? How was it for sound/drone? The bloke I was speaking to at sureflo was pretty certain I wouldn’t get a single 3 1/2″ below 90dB for engineers. Do you have pictures or even a video/sound clip? haha Sorry for all the questions, I just don’t want to spend a heap of money and time building a system that sounds garbage or won’t pass engineers.
As for the compression ratio mate, I’m not 100% sure, But I had a play around with a C/R calculator and it bumps it up from 10.1:1 to 10.9:1. The intake lines up fine.
Cava454, The header are CRS 1 7/8″ 4 into 1. Probably a little big for a standard 6.0L, but I do plan on a S/C down the track.
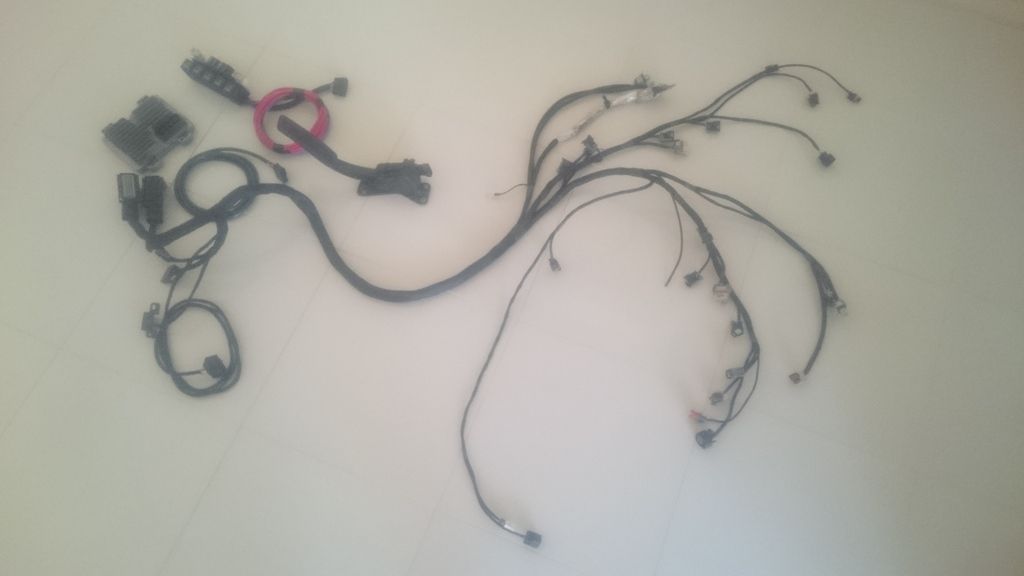
I also got my stand alone loom back from Killa Kustom Kables during the week. I am very happy with the workmanship and quality of the loom, It was completely wrapped in braided sleeve and was wrapped in heat protection in the right places. Loom was built to relocate the ECU behind the firewall using all new wire, Fuses and relays were all built in and all the necessary outputs from the ECU. Only issue I had with the loom was that the reverse light plug to the box, which was just too short and was actually the wrong plug. I know a lot of guys had recommended ultimate conversion wiring, but he wanted to charge $200 more to just rip out the wires I didn’t need and keep the ECU in the engine bay
 .
.
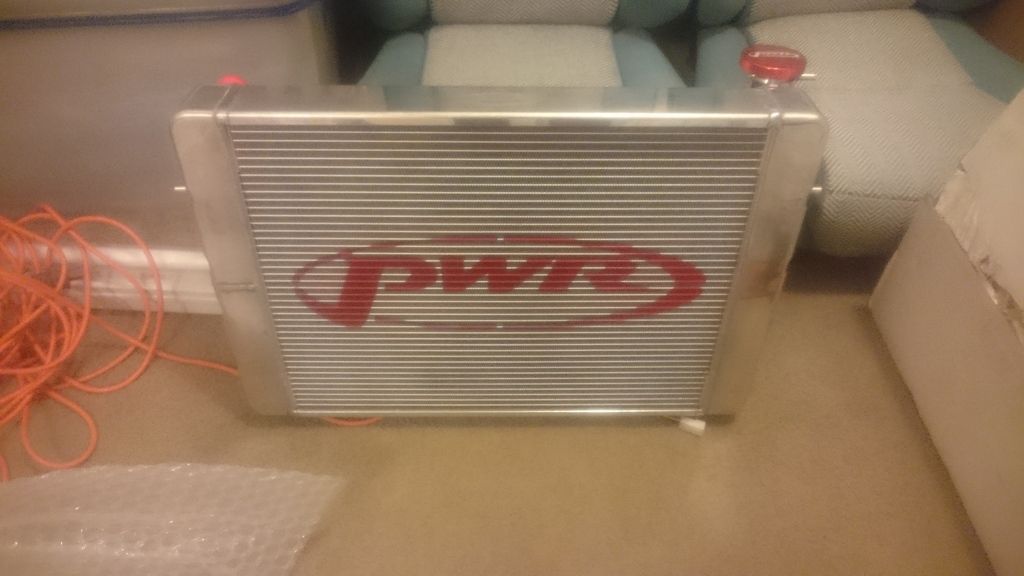
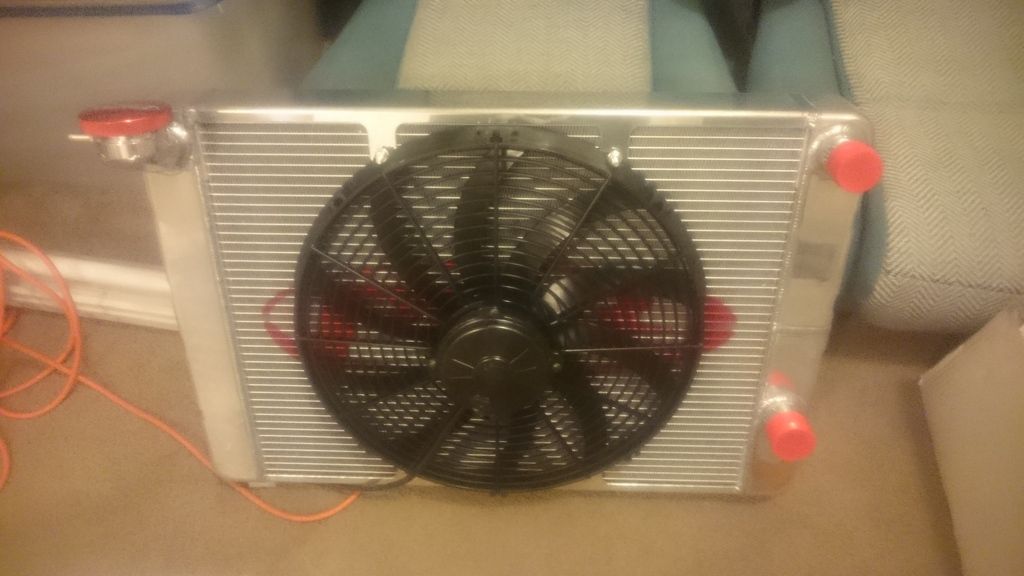
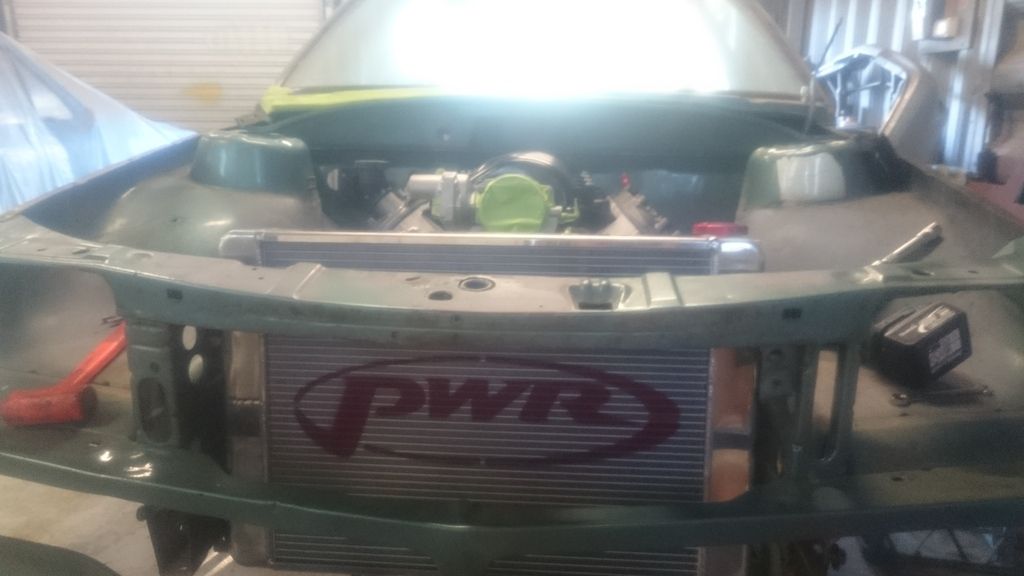
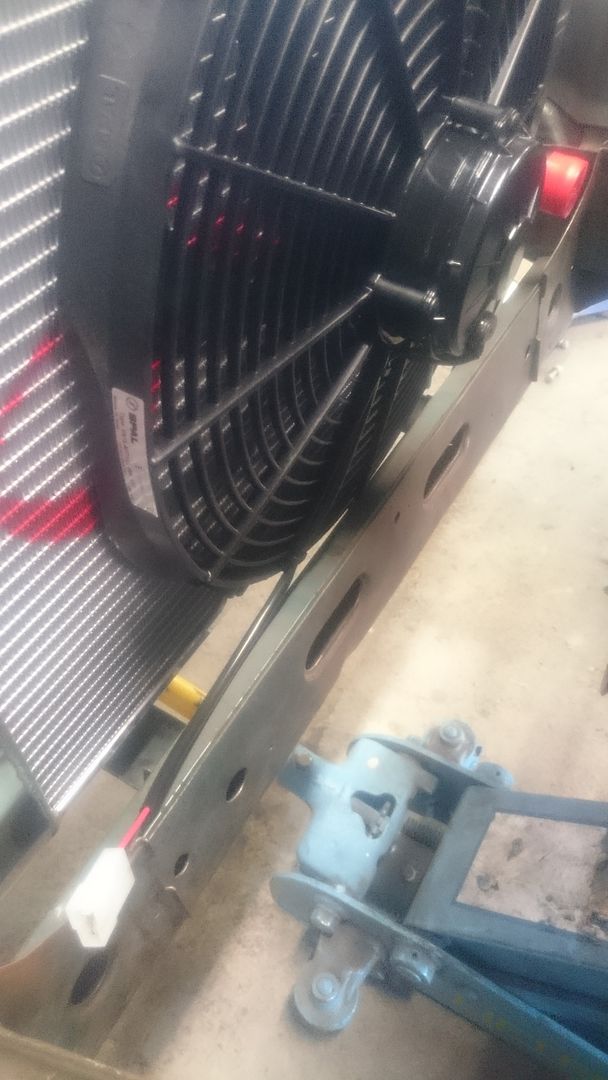
Also, I got my radiator and thermos setup. Decided to go with the PWR rad and single SPAL thermos.
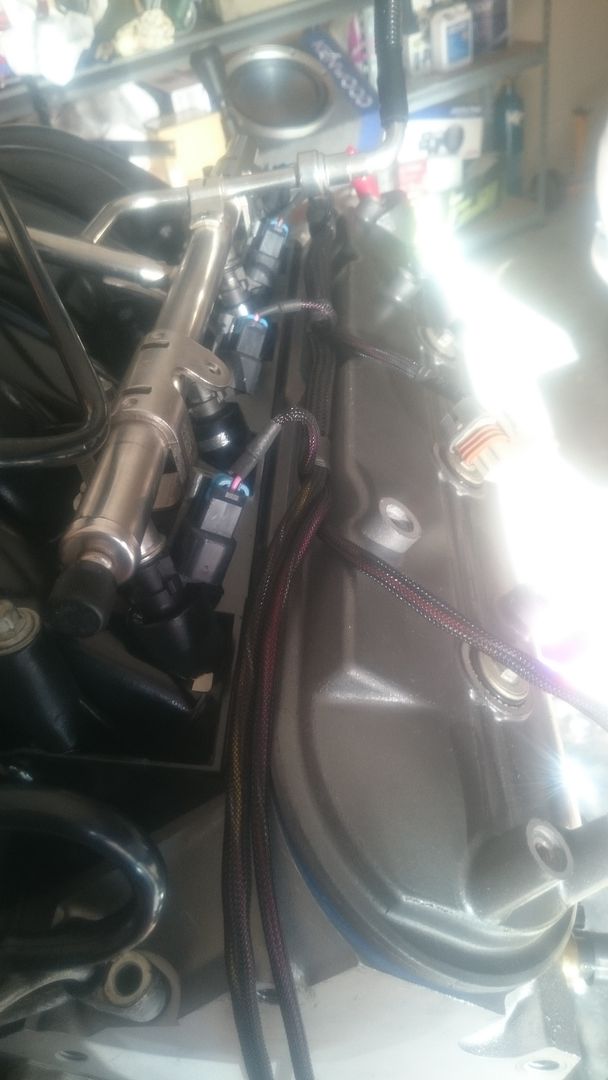
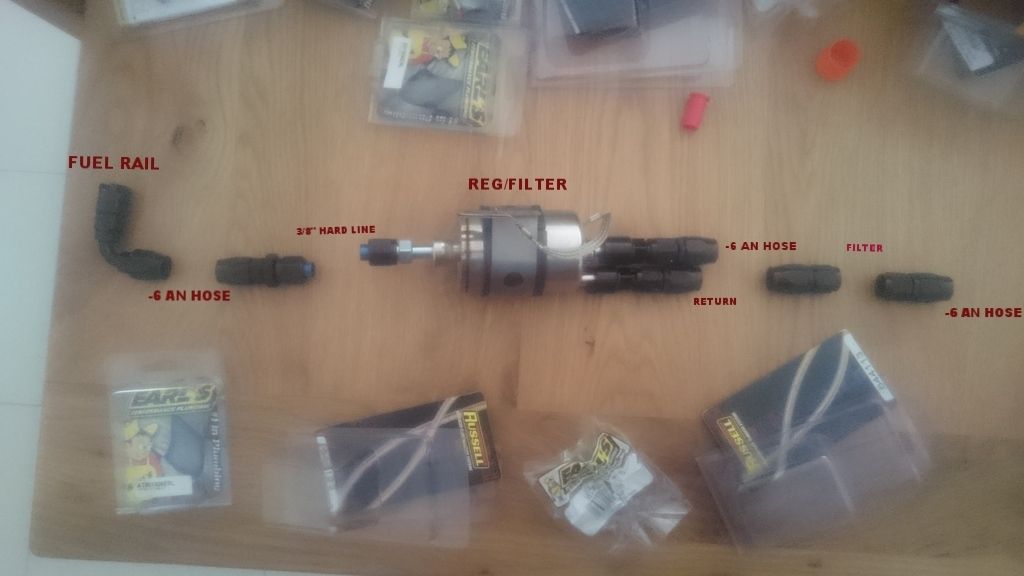
With my fuel system I decided to go with a Walbro GSS342 intank pump straight into a filter then into a WIX regulator/filter (PN 33737) with return, from there up to the fuel rail all using -6 AN hoses/fittings and 3/8″ SS hard line.
I will have the motor and box dummy fitted in the next couple days, so I will post back up on how it all went.
May 7, 2016 at 9:34 pm #16673
VRSenator065Participant- Adelaide SA
- VR Senator LSx454 1960 Kombi (project) 1921 Nash Hot Rod (future project)
View build HERE
Posts: 5 777I am interested to see how you find the CRS headers, I honestly don’t know one single person who has actually managed to make them fit/work. But there is always a first!! That rad set up you have is exactly what i have with no issues. Loom looks like beautiful quality.
May 7, 2016 at 10:29 pm #16675There will come a point where you want to attack those headers with a demo saw. I couldn’t fit mine
May 7, 2016 at 11:08 pm #16680
VRSenator065Participant- Adelaide SA
- VR Senator LSx454 1960 Kombi (project) 1921 Nash Hot Rod (future project)
View build HERE
Posts: 5 777^your not alone….
May 7, 2016 at 11:27 pm #16681If you have problems fitting them just cut them into individual pipes and use a slip on collector
May 8, 2016 at 8:16 pm #16698
rayray07Participant- Newcastle
- 6.0L VK In the build
View build HERE
Posts: 41VRSenator065, I heard a lot of mixed reviews with the PWR rad/thermo setup, but after reading your build and how well it had worked with a 454, I couldn’t really see a 6.0L having cooling issues with it.
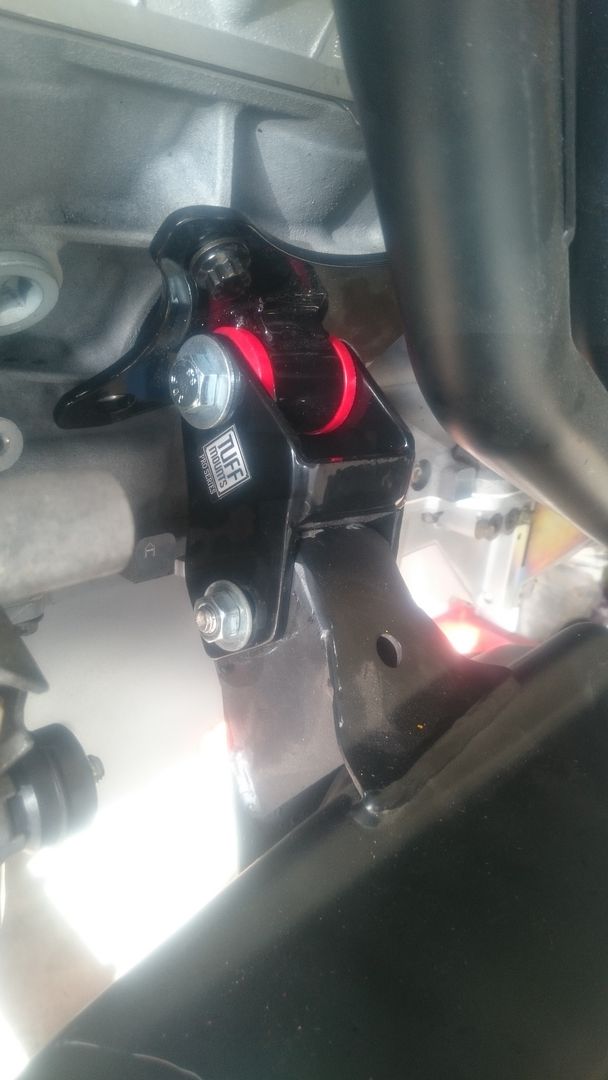
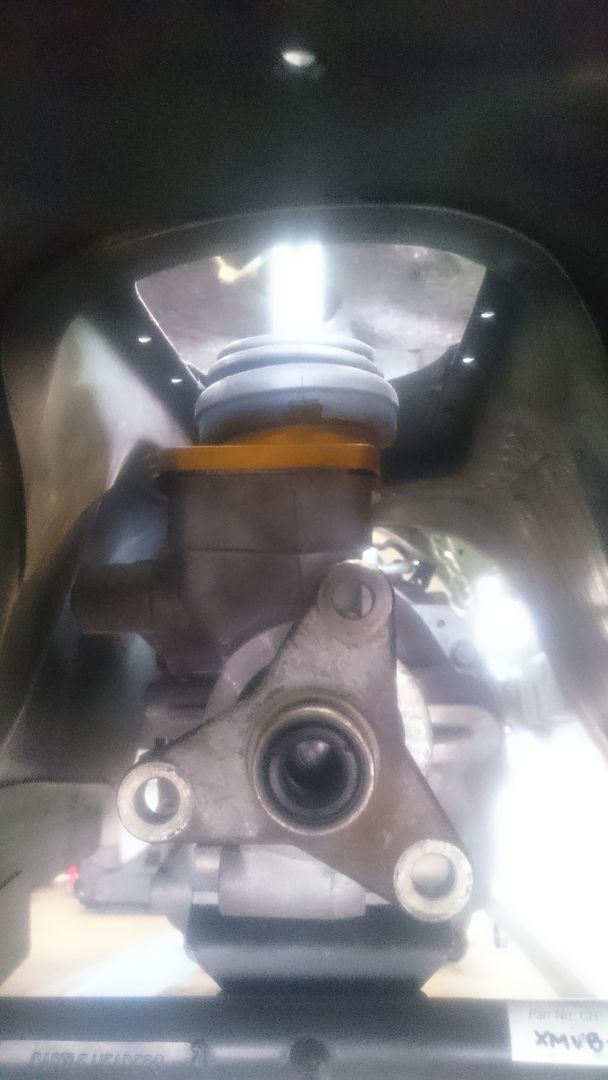
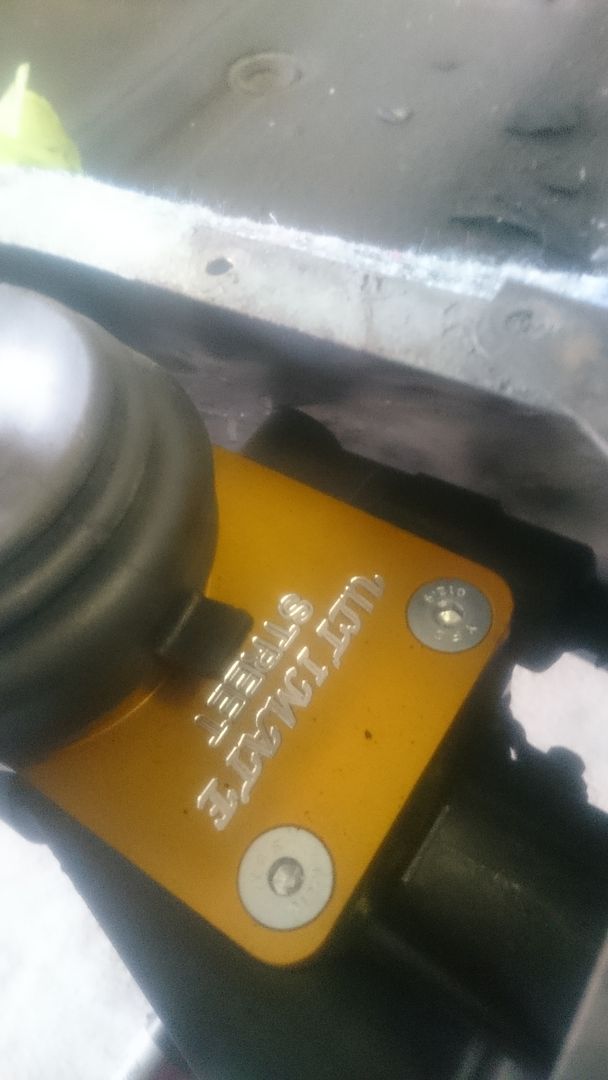
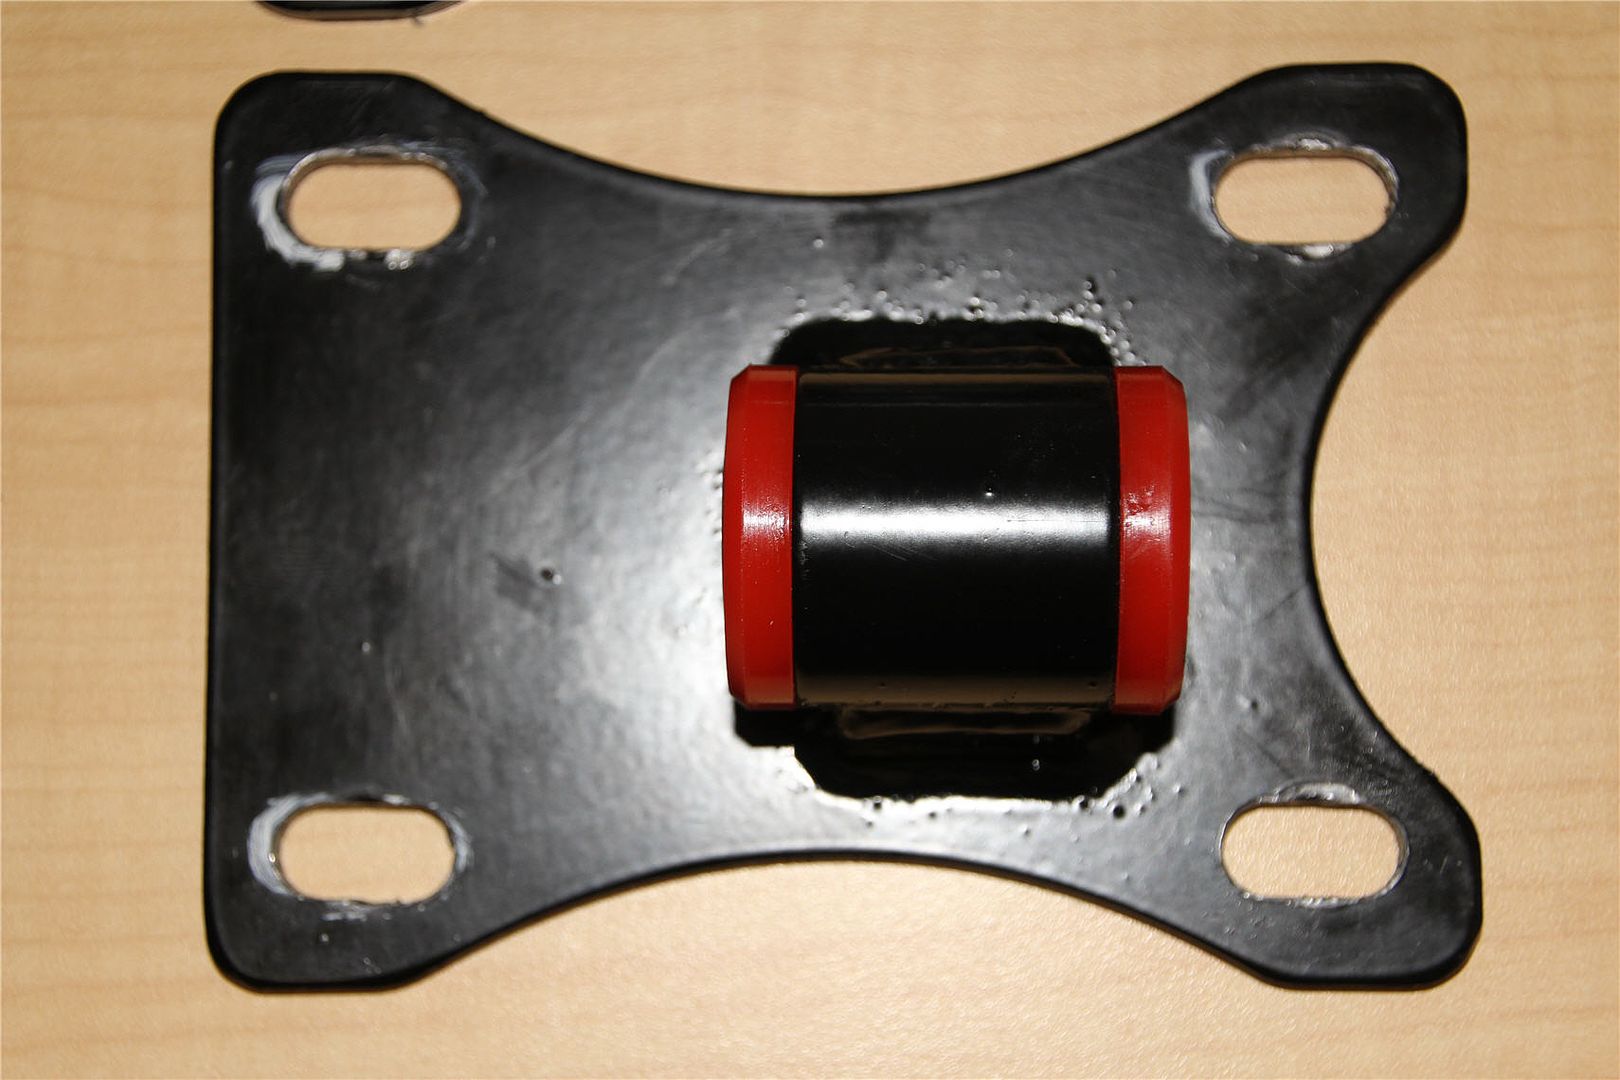
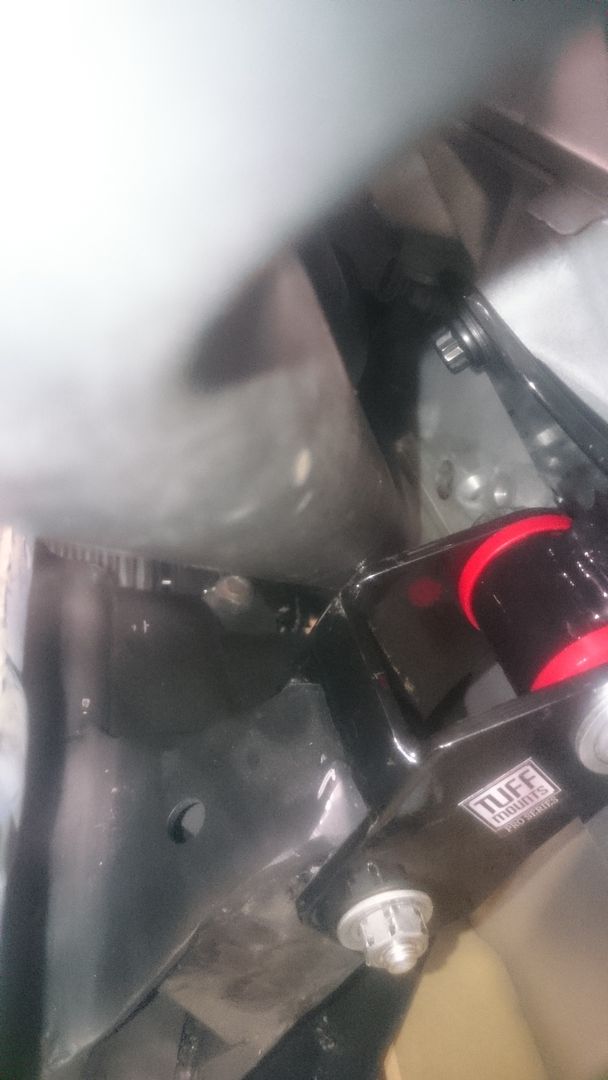
Haha no one is instilling any confidence in me with these headers, But I have actually spoken to a couple of guys on a FB page that got them to fit with Tuff Mounts and only a small bit of modification. Most of their issues were with the power steering rack/column. I am using manual steering as well, so I hope I pick up a little room there and I have already mocked up the headers with the rack. Only problem will be the final angle on the column and the chassis rails, but hey, if all goes pear shaped, I do love a challenge.
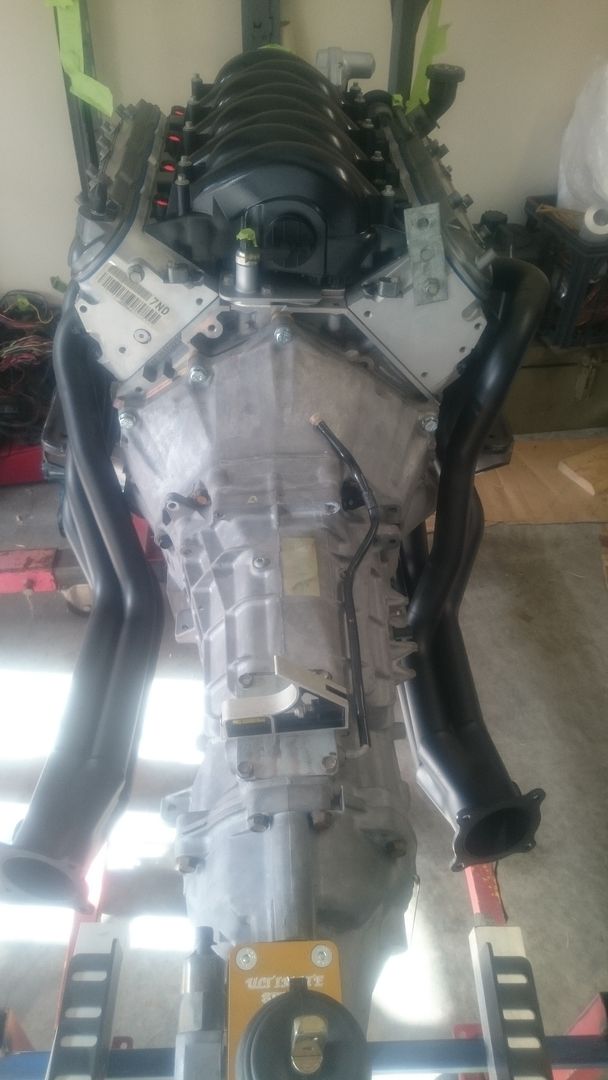
I got the motor and box in today just to get all the angles right and everything centred until I noticed the T56 cross member I got from CAE was far off the mark. It looks as if the centre mount for the box was welded offset to the wrong side and when I looked it up on their website, it actually looks very different from the LS/T56 cross member, but very much (exactly) like the 5.0L/T56 cross member. It wants to push the box way to far to the passenger side. I’m a little disappointed I had to stop there, I was really looking forward to seeing how these headers were going to fit
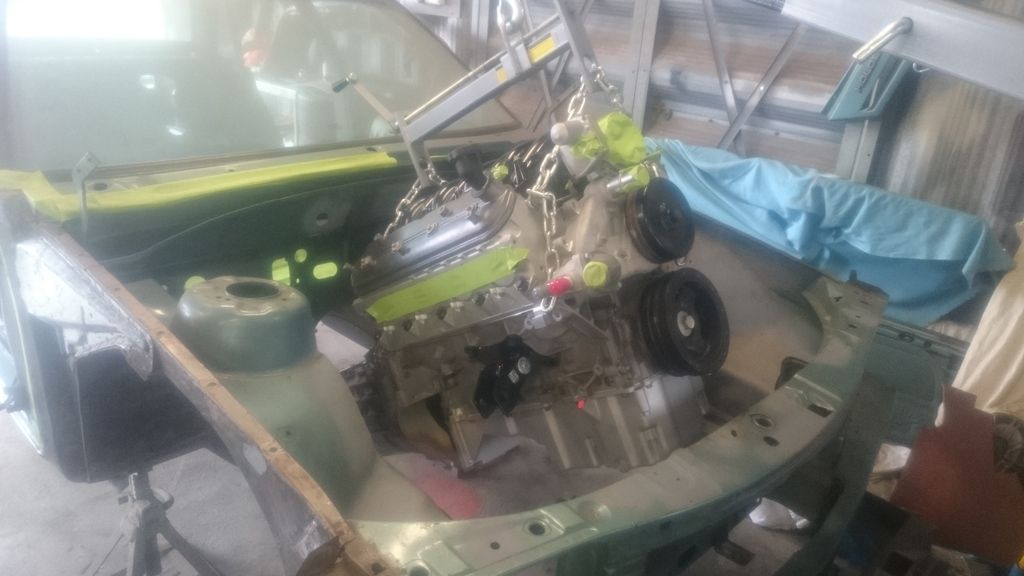
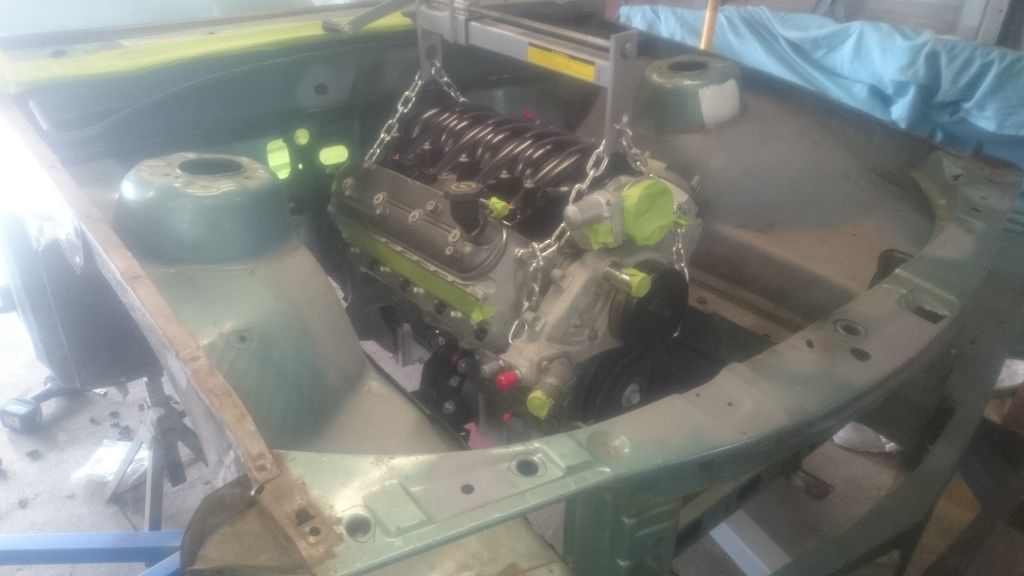
 . Anyway, I will be calling them first thing tomorrow sorting that out. Obvious mods had to be made such as massaging the tunnel a little to clear the reverse lockout solenoid and bashing the chassis lips back to clear the headers, other than that, there was plenty of room around the back of the motor and around the box. I will dummy up the brake booster and clutch master tomorrow. I also recommend removing the shifter when fitting the motor and box, it just gets in the way and a load leveller will be the best investment you make when doing this job.
Here are some pictures, I like pictures
.
 May 8, 2016 at 8:23 pm #16699
I still wish you best of luck.
I’m using CRS mounts, manual rack and its in a VR bay slightly more room. I gave up.
I I believe only way to make them fit is to do what Vs Manta said. Convert to a slip on collector and make the drivers side 4 individual pieces.
But it prove me wrong
May 8, 2016 at 9:08 pm #16702
VRSenator065Participant- Adelaide SA
- VR Senator LSx454 1960 Kombi (project) 1921 Nash Hot Rod (future project)
View build HERE
Posts: 5 777One of the best days of a build i reckon, first time you drop the motor in!
May 8, 2016 at 9:21 pm #16705One of the best days of a build i reckon, first time you drop the motor in!
Wears a bit thin after the 25th time though
 May 8, 2016 at 9:35 pm #16706
VRSenator065Participant- Adelaide SA
- VR Senator LSx454 1960 Kombi (project) 1921 Nash Hot Rod (future project)
View build HERE
Posts: 5 777Come on, you know you love it
May 11, 2016 at 11:43 am #16787
rayray07Participant- Newcastle
- 6.0L VK In the build
View build HERE
Posts: 41Yes indeed, it was good to see the motor in bay, the build starting make some real traction.
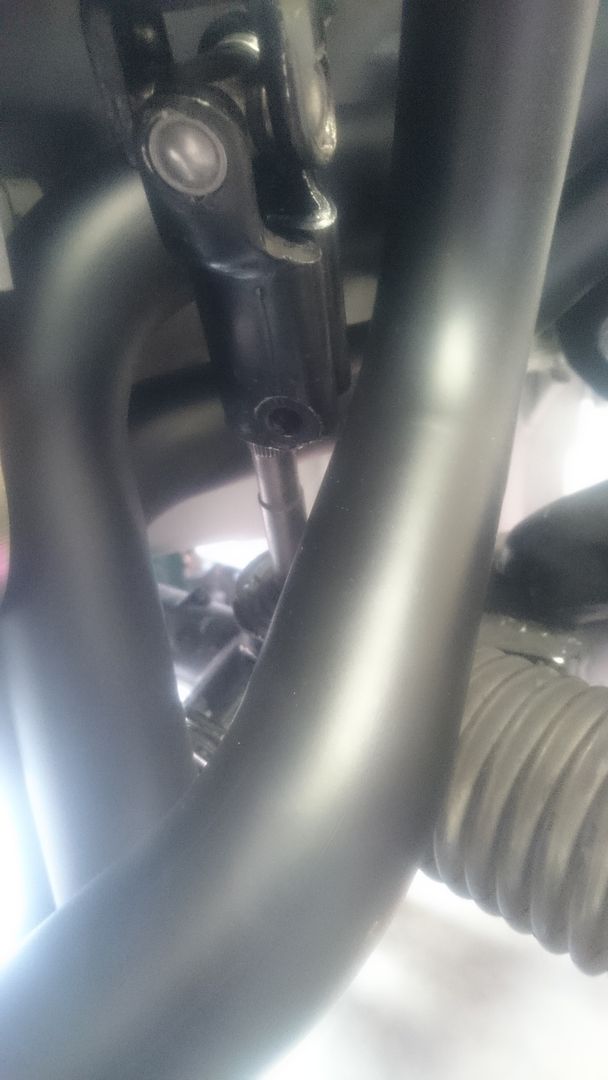
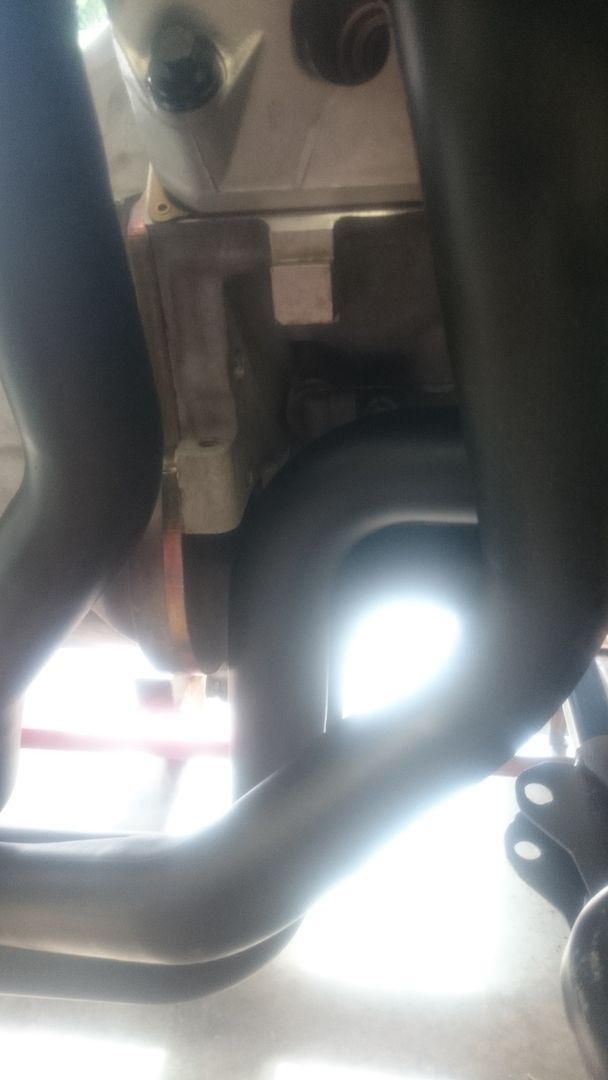
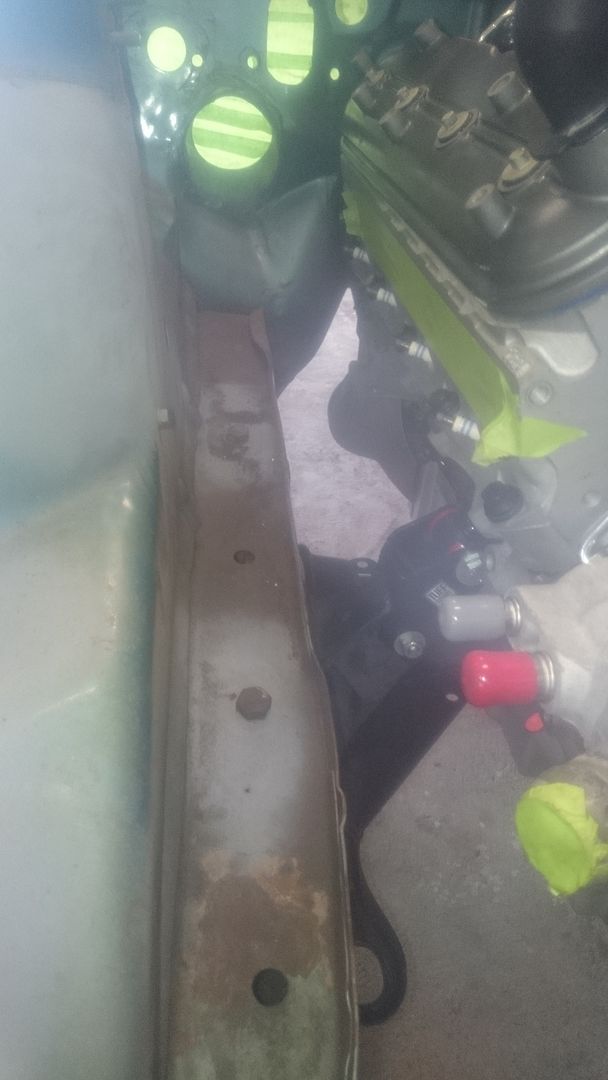
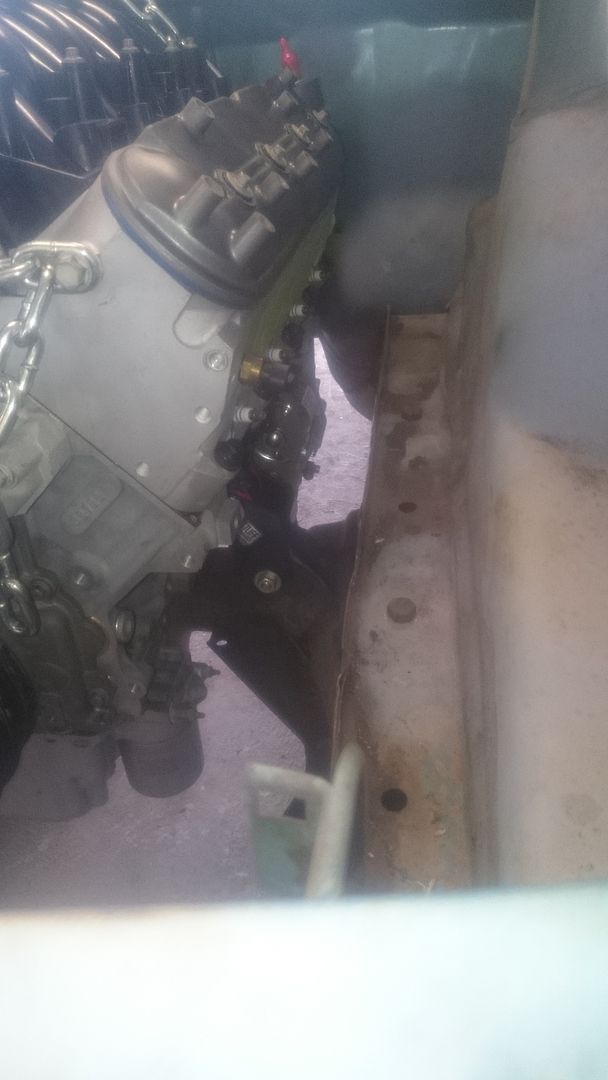
Back to the headers though, I have fitted headers and to my surprise there is plenty of clearance from the rails. Only real issue is the collectors hitting the floor, stopping the gearbox fitting right up into the tunnel. The pipes will need to be heated and bent down a little, collectors need to move approx 1″ down. The intermediate shaft and Drivers side engine mount are a little close for my liking, but should open more room up once I can get the box up into the tunnel properly. Overall, I don’t see any major mods to be done to the pipes at this stage, but ill have to wait and see once I get the gearbox in its final position.
Getting the headers in initially was an absolute nightmare (as expected), how I did it was hoist motor and box in feed headers up from underneath then bolt k-frame and rack up, it probably wouldn’t have been as hard if the collectors weren’t hitting the floor which was actually stopping me from bolting them up in the right position. Only advice I can give is make sure you don’t have your new spark plugs fitted, I broke 2 of them, and have lots of patience. I did kick the passenger side header across the floor at one stage Haha.
I also spoke to a guy from muscle garage about the TuffMounts I bought from them, he was more than happy to help out which is much more than I can say about CRS. CRS wouldn’t help me out one bit with fitment. Bloke from muscle garage says TuffMounts push motor to passenger side 10mm and are designed to angle motor/box back 3 degrees, also said get the motor level and square first then get box up into tunnel. The TuffMounts bolt holes to the motor are horizontally slotted and are there to compensate for different chassis/k-frames, so the mounts don’t have to be bolted up in the same position which is what I assumed and couldn’t get the motor square. Last advice he had was you should just work on getting your motor/box positioned and angled correctly and then just get custom headers made which I now wish I had done, aaaaannd CRS are garbage Haha.
I do have a stack of pictures I will post up in the next few days as I am on my phone right now.
May 11, 2016 at 4:16 pm #16788
VRSenator065Participant- Adelaide SA
- VR Senator LSx454 1960 Kombi (project) 1921 Nash Hot Rod (future project)
View build HERE
Posts: 5 777The TuffMounts bolt holes to the motor are horizontally slotted and are there to compensate for different chassis/k-frames
Kinda think he might have got the slotted idea from a certain guy fitting an LSx chatting to him
With mine, I lowered the engine down and sat it supported on a jack with a piece of timber with the engine mounts loose as. I then moved the engine around (with the headers on) fwd/back, left/right etc until I got the engine and trans exactly where I wanted it with the clearances all optimum. I then fitted and locked up the mounts. So far not even a rattle
I reckon if you have to heat up and bend headers to fit they are doing it wrong. Trouble comes when you want to do something as simple as an exhaust gasket change. Its just about an engine out job. Not a fan. Build is awesome though, carry on

-
This reply was modified 7 years, 11 months ago by
 VRSenator065.
May 11, 2016 at 5:05 pm #16795Hi, I will get some pics of my exhaust and put up for you in a couple of days. Harness looks real nice. I put my ECU in the windscreen wiper plenum and extended the plenum cover over it. Mine is the standard 6 litre E38 ecu which is a lot smaller than the earlier ones. Mine passed noise test fine with exhaust I have. If it is too loud you could put some restrictor plates in temporaraly to pass noise test.
May 13, 2016 at 8:21 pm #16826
rayray07Participant- Newcastle
- 6.0L VK In the build
View build HERE
Posts: 41Does anyone have some pacemaker conversion headers for sale??
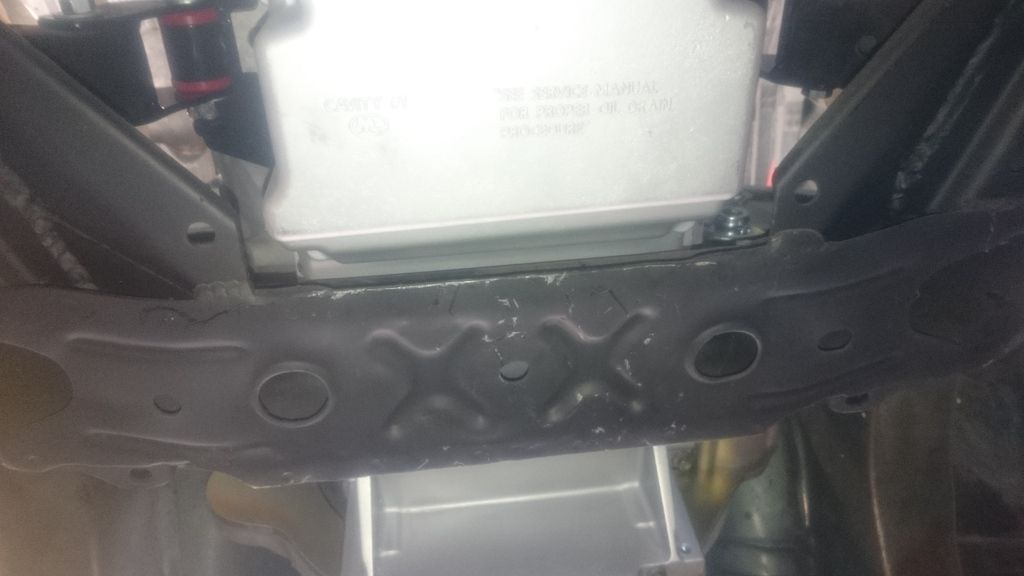
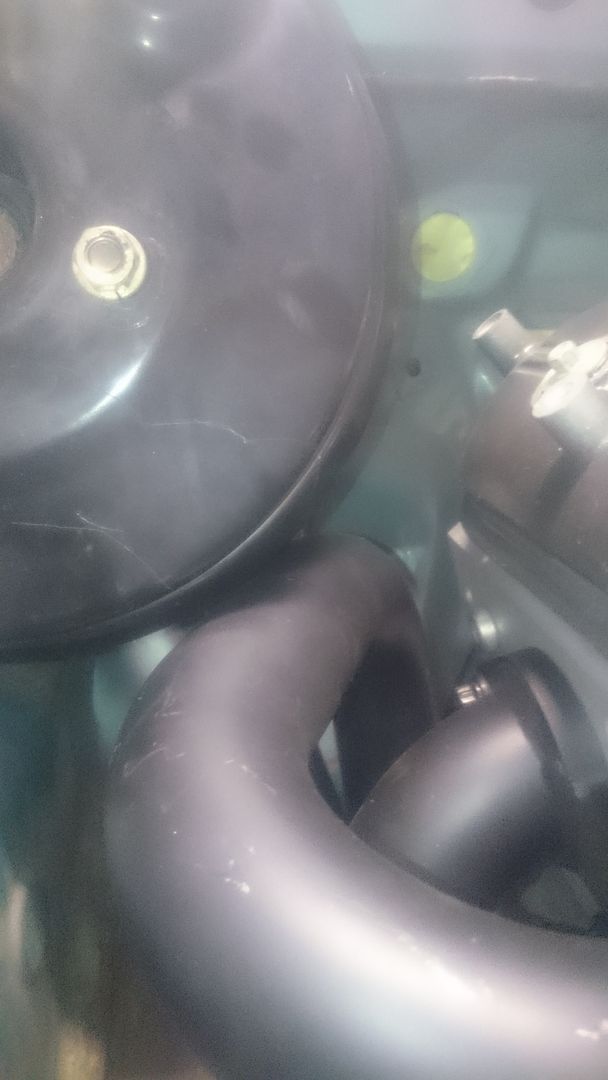
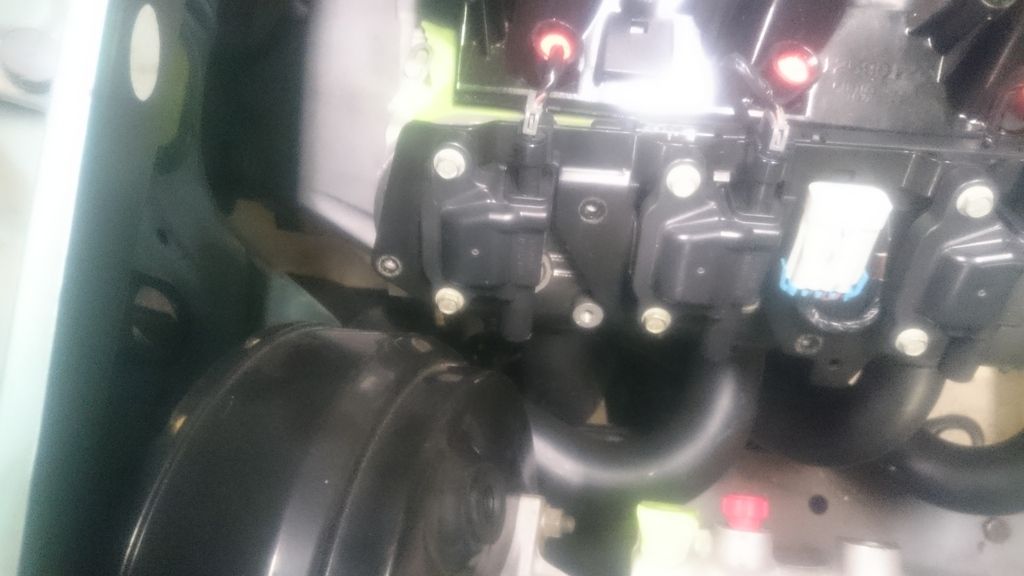
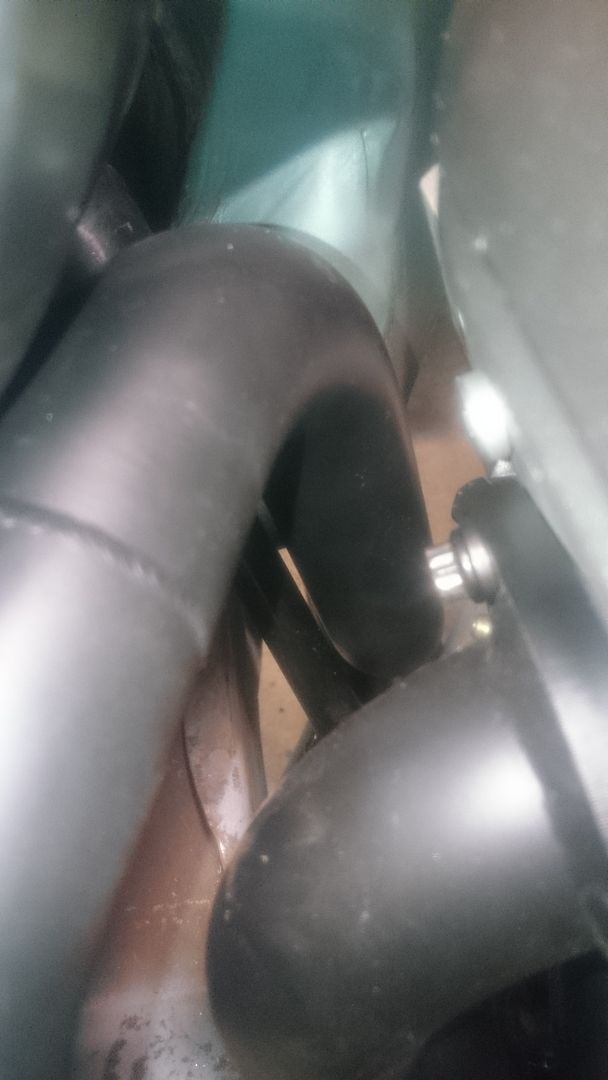
That’s how good my day has been with fitting these CRS headers. I knew there would be some modifying to be had, but not to the extent I’m going to need to do to get these headers to fit. I wish I had listened to everyone and just gone with the paceys. Just to get these headers up into position, I had to chop the collectors off and once they were in drivers side pipes foul on engine mount, brake booster and intermediate shaft in 2 different places. Passenger side is a bees dick from the rail and where they bend to straighten out under the car, they exit straight onto the chassis rail (why I had to chop it). The good/stupid thing is, is that there is plenty of room for the pipes to clear everything, but are just all routed incorrectly. I will attempt to fix them over the weekend with the oxy torch, but I’m starting to think I might just try find some paceys.
On top of all that, the SPAL thermo mounted on the radiator fouls on the radiator support. It’s not too bad, I will just need to push the bottom of the radiator forward about 10mm.
Ok, thanks Dave. I’m running E38 ECU as well, but will be mounting it behind the firewall.
Some pictures.
 May 14, 2016 at 12:00 am #16840
Jesus thats close to the booster
Also yeah in my research I could tell those headers were bad news Pacey’s are very good.
-
This reply was modified 7 years, 11 months ago by
 dazedv3.
May 14, 2016 at 8:43 am #16842
rayray07Participant- Newcastle
- 6.0L VK In the build
View build HERE
Posts: 41Yeah mate, its a joke. CRS need a serious look at there quality control. I have seen these headers fit a few cars, but even if I drop the motor to sit on the K-frame, the collectors would still hit the floor.
-
AuthorPosts


You must be logged in to reply to this topic.
