
Home›Forums›Members’ Builds and Rides›VB – VC – VH – VK – VL›VB LSA Commodore build
This topic contains 380 replies, has 16 voices, and was last updated by ![]() Judge1 Frazer 2 years, 6 months ago.
Judge1 Frazer 2 years, 6 months ago.
-
AuthorPosts
-
August 22, 2019 at 7:17 am #29535
ImmortalityParticipant- 97 HSV Senator 185i 02 VX L67 Calais
View build HERE
Posts: 535https://www.youtube.com/watch?v=LzTz227uWCk
At about the 30 minute mark they show how a supercharger belt behaves with a manual tensioner and then how a OEM style tensioner maintains belt tension. This car was loosing 100hp due to belt slip even with the manual tensioner tightened as much as they could get it.
October 6, 2019 at 6:18 pm #29991
Judge1 FrazerParticipant- new zealand
- 1983 VB LSA MG9 6060 6 speed
View build HERE
Posts: 775
Hey all can some tell me the thread pitch for the engine mounts on the lsa I have four two on each side 10/1.50 but it won’t go into the other four , are they suppose to be the same
October 7, 2019 at 6:22 am #29994I always thought they were m10x1.0
October 7, 2019 at 9:19 am #29995
VRSenator065Participant- Adelaide SA
- VR Senator LSx454 1960 Kombi (project) 1921 Nash Hot Rod (future project)
View build HERE
Posts: 5 777Pretty sure mine are all the same. M10x1 is very fine Cav, I think that’s the rear irs drive shaft bolts. I am thinking m10x1.5.
-
This reply was modified 4 years, 6 months ago by
 VRSenator065.
October 7, 2019 at 12:38 pm #29996<p style=”text-align: left;”>Pretty sure mine are all the same. M10x1 is very fine Cav, I think that’s the rear irs drive shaft bolts. I am thinking m10x1.5.</p>
Your probably right….. but imcertain the bolts on each side are all the same size. One of the bolts on the passenger side head is slightly longer as it has the bracket for the alternator support on it also.
You can find a photo of this on my thread on the last page.
October 7, 2019 at 4:28 pm #29998
Judge1 FrazerParticipant- new zealand
- 1983 VB LSA MG9 6060 6 speed
View build HERE
Posts: 775Cheers Guys I would assume they would all be the same m10x 1.5 fits on four but binds up on the other four may have to put a thread tap in there see if there is sit in there
-
This reply was modified 4 years, 6 months ago by
 Judge1 Frazer. Reason: spelling
October 7, 2019 at 10:44 pm #30000
VRSenator065Participant- Adelaide SA
- VR Senator LSx454 1960 Kombi (project) 1921 Nash Hot Rod (future project)
View build HERE
Posts: 5 777Doesn’t hurt to run a tap in there by hand just to clean it all up.
October 8, 2019 at 4:33 pm #30005
Judge1 FrazerParticipant- new zealand
- 1983 VB LSA MG9 6060 6 speed
View build HERE
Posts: 775yip have rechecked them and m10.150 bind up and a 3/8 binds up too so will have to tap them, I thought maybe one or to be screwed but not four both front ones
October 12, 2019 at 8:08 pm #30202
Judge1 FrazerParticipant- new zealand
- 1983 VB LSA MG9 6060 6 speed
View build HERE
Posts: 775Hey all got some fuel rails this week aero flow really nicely made put them on but before that trim the aluminium from the back of the blower so can get fittings in there later ,have also order the starter relocation kit should be here next week , A mate is coming up for Bathurst tomorrow so going to pull motor put gear box on and sort out were motor and box will sit
 20191012_085028 by Frazer Russell[/url], on Flickr
 20191012_171009 by Frazer Russell[/url], on Flickr
Looks good from drivers seat
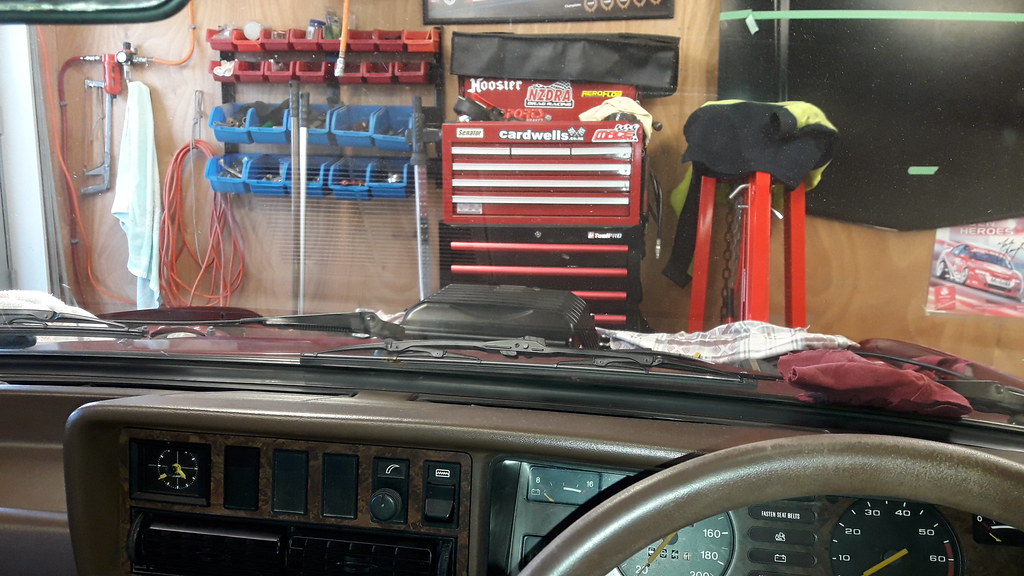 20191012_171028 by Frazer Russell[/url], on FlickrOctober 15, 2019 at 6:27 pm #30224
Judge1 FrazerParticipant- new zealand
- 1983 VB LSA MG9 6060 6 speed
View build HERE
Posts: 775busy weekend trimmed the sump mated the gearbox to the motor and slipped it in ,gearbox is good where it is motor has a 3degree lean back but would be nice to lower motor down more I have the motor sitting back a lot also got my CRS starter conversion kit looks good will fit it when motor comes out and trim the bellhousing going to see what a 25mm spacer is like under x member
Sump trimmed
 20191013_162716 by Frazer Russell[/url], on Flickr
 20191013_162726 by Frazer Russell[/url], on Flickr
motor mated to gearbox
 20191013_164615 by Frazer Russell[/url], on Flickr
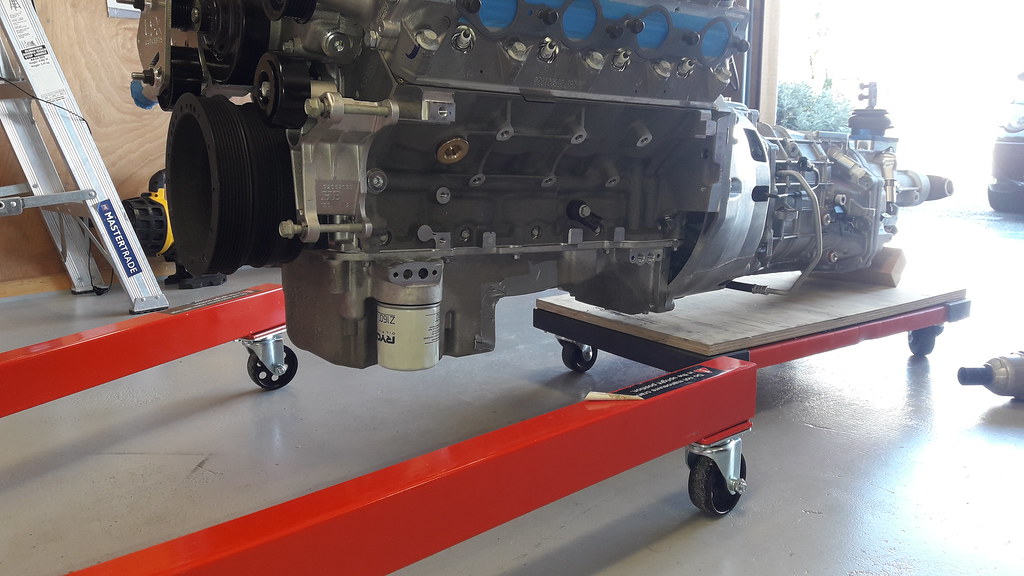 20191013_164636 by Frazer Russell[/url], on Flickr
motor and box in
 20191013_212522 by Frazer Russell[/url], on Flickr
sits high
 20191013_212541 by Frazer Russell[/url], on Flickr
 20191013_212557 by Frazer Russell[/url], on Flickr
 20191014_172019 by Frazer Russell[/url], on FlickrOctober 16, 2019 at 11:23 am #30238
VRSenator065Participant- Adelaide SA
- VR Senator LSx454 1960 Kombi (project) 1921 Nash Hot Rod (future project)
View build HERE
Posts: 5 777How nice does it look in there though!! Nice work on the sump. Do you know if an engineer will pass it with spacers under the K frame?
October 16, 2019 at 12:04 pm #30240Good luck with keeping the sump flat when you weld it up…
Gonna be a fun toy when it’s done
 October 16, 2019 at 7:12 pm #30243
ImmortalityParticipant- 97 HSV Senator 185i 02 VX L67 Calais
View build HERE
Posts: 535October 16, 2019 at 7:26 pm #30244
Judge1 FrazerParticipant- new zealand
- 1983 VB LSA MG9 6060 6 speed
View build HERE
Posts: 775How nice does it look in there though!! Nice work on the sump. Do you know if an engineer will pass it with spacers under the K frame?
Hey Gary Yip looks awesome in the bay ,as for spacers the engine certifier suggested them to me
Good luck with keeping the sump flat when you weld it up… Gonna be a fun toy when it’s done

what you telling me I can not keep the race tape and carboard
 October 16, 2019 at 8:22 pm #30245
Is it waxed cardboard?
Have seen a few try and fail, I’d try and bolt it to a block and preheat it before starting, might have some success that way not sure..
October 17, 2019 at 6:16 pm #30260
VRSenator065Participant- Adelaide SA
- VR Senator LSx454 1960 Kombi (project) 1921 Nash Hot Rod (future project)
View build HERE
Posts: 5 777Good to know it’s legal, nice and easy.
October 17, 2019 at 7:31 pm #30261
Judge1 FrazerParticipant- new zealand
- 1983 VB LSA MG9 6060 6 speed
View build HERE
Posts: 775Good to know it’s legal, nice and easy.
Yip here in nz not sure in oz just got to make sure the recesses are in the space so they are kind of locked in so mirror x member
October 17, 2019 at 7:46 pm #30262
Judge1 FrazerParticipant- new zealand
- 1983 VB LSA MG9 6060 6 speed
View build HERE
Posts: 775forgot to mention that I had to tap out 6 bolt holes “total” in the block 4 in the mounts and two for the bellhousing were slightly cross threaded all perfect now , got some 10mm plate for the start of the mounts going to cut the x member mounts off and move them back so I can run the air con pump , the motor is sitting back 30-40mm (I’m guessing here ) from where it would sit with of the shelf mounts be it TUFF or CRS , pros and con more room in one place less in others will just have to work around it less weight forward is a good thing , means I can bring radiator back towards motor , more room in front for aircon radiator and interchiller setups plus going to have radiator lower for a custom otr (air intake) modifying the snout and throttle to turn more into centre, big plans
-
This reply was modified 4 years, 6 months ago by Judge1 Frazer. Reason: spelling
October 19, 2019 at 11:10 am #30271forgot to mention that I had to tap out 6 bolt holes “total” in the block 4 in the mounts and two for the bellhousing were slightly cross treaded all perfect now
 , got some 10mm plate for the start of the mounts going to cut the x member mounts off and move them back so I can run the air con pump , the motor is sitting back 30-40mm (I’m guessing here ) from where it would sit with of the shelf mounts be it TUFF or CRS , pros and con more room in one place less in others will just have to work around it less weight forward is a good thing , means I can bring radiator back towards motor , more room in front for aircon radiator and interchiller setups plus going to have radiator lower for a custom otr (air intake) modifying the snout and throttle to turn more into centre, big plans
 What are you trying to achieve. You have lost me
October 21, 2019 at 12:38 pm #30288
-
AuthorPosts
You must be logged in to reply to this topic.
