
Home›Forums›Members’ Builds and Rides›VT – VX – VY – VZ›My VX Acclaim Wagon!
This topic contains 26 replies, has 7 voices, and was last updated by ![]() Nick 7 years, 3 months ago.
Nick 7 years, 3 months ago.
-
AuthorPosts
-
April 24, 2015 at 6:14 pm #5541

NickParticipant- Adelaide, SA
- Series 1 VX Commodore Wagon
View build HERE
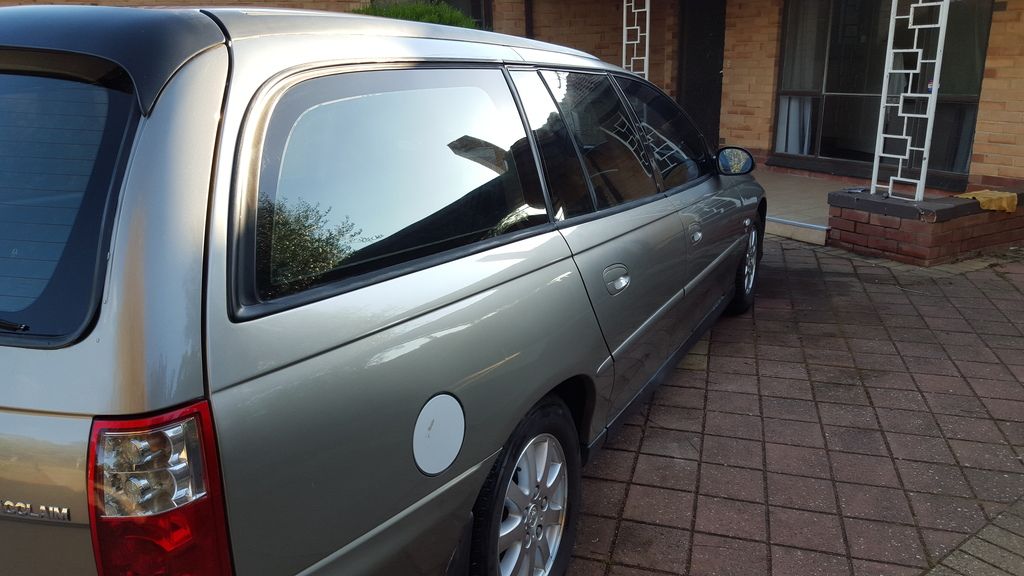
Posts: 75Hey guys, here’s my VX Acclaim Wagon!
This is copied from another forum because I’m lazy and it’s too long to write again on a Friday haha
The VS wagon compared to this new car is an absolute POS to drive and maintain, finally realizing this I bought a new wagon. Bigger, boatier, better, BASSIER!
Here’s the first pics I got the night I bought it.
 Audio system is bone stock, which means the wiring harness is still in tact!
Replaced the POS battery that came with the car for my D3400, the stock earth wouldn’t reach so we improvised.
It works and that’s what matters, this will be re-visited soon enough, properly.. Had a LPG backfire within the first week, which split nearly all the air intake pipe ribs.
Was “fixed” by the dealership with electrical tape, which melted the glue from the tape and just peeled off, genius!!

 Replaced the intake pipe and done a major service- all oils and filters, spark plugs and leads, the usual!
Found a pair of VY wiper and indicator stalks WITH plugs, as the plugs are different for VXII onwards.


Got rid of those aidz ass wheels for some mint VX Berlina wheels, then got some fresh tread for them too


 Alternator regulator fried, gauge needles dropped when driving and the batt and ABS lights came on so I pulled over, checked the voltage and it was at 17.2V, ouch!
Okay, so the bass bug may have bitten me, but bitten me damn hard… Doing a temp install similar to my last one in the VS for the final round of SOSS this year, so much for doing it once and doing it right LOL.
To start off, I felt like splashing the cash and got 9M of Shok Industries Competition OFC


 That’s it, until next time..
-
This topic was modified 9 years ago by
 Nick.
Nick.
April 24, 2015 at 6:21 pm #5543
NickParticipant- Adelaide, SA
- Series 1 VX Commodore Wagon
View build HERE
Posts: 75First, installed the new Aerpro single din facia kit for VT-VX, sweet!

This setup netted a 151.1db @45Hz, was fun to beat on while it lasted.


Next one was a bigger, more badass box for my two prototype 18″ subs!
Bunnings screwed up at the register, so I only paid $30ish for 3 sheets of 16mm MDF LOL.

My mates piss farting around, discussing how stupid this is going to be (in a good way)


Each corner of the box got a steel radius to maximize efficiency in air flow.
Gotta make that cable as neat as possible!


Big f*ck off radius round overs on the front.


For size reference, my mate is similar size to me, and because lolz.

Few pics of installation.


 April 24, 2015 at 6:21 pm #5544
NickParticipant- Adelaide, SA
- Series 1 VX Commodore Wagon
View build HERE
Posts: 75Then me and 10 other guys haulled ass to Echuca Moama for a car audio event one weekend and cleaned up quite nicely.
By cleaning up, I mean winning most of the trophies LOL!
Best score I got from that setup was 151.5db @41hz musically.
Done hair tricks too!!


Then I broke one sub and it was over.

Upgraded to VY tail lights with looms for cheap.

Got a dash cam at the opening night of my friend’s audio and electronics business.

-
This reply was modified 9 years ago by Nick.
April 24, 2015 at 6:29 pm #5551
NickParticipant- Adelaide, SA
- Series 1 VX Commodore Wagon
View build HERE
Posts: 75Okay, time to continue!
Next on the agenda was some custom A-pillars for the small drivers I had bought quite a while ago.
Callum at AV-DC was more than awesome to turn these around in 3 days, still not quite completed but they are 90% of the way there!


Next day, hand sanded then filled, ready for primer.


-
This reply was modified 9 years ago by Nick.
April 24, 2015 at 6:33 pm #5553
NickParticipant- Adelaide, SA
- Series 1 VX Commodore Wagon
View build HERE
Posts: 75Okay, continuing form where we left off.
These pillars are eventually going to be painted beige to colour match the rest of the interior beige trims.
We were so damn close to leaving them in black texture coat..


But no we didn’t, we ended up painting them white because that’s all the paint store had at the time.
Near finished pic of them.

At this point the car was sounding the best it ever had, even running off the head unit!
This happened mid December, hadn’t touched it since.
April 24, 2015 at 6:34 pm #5554
NickParticipant- Adelaide, SA
- Series 1 VX Commodore Wagon
View build HERE
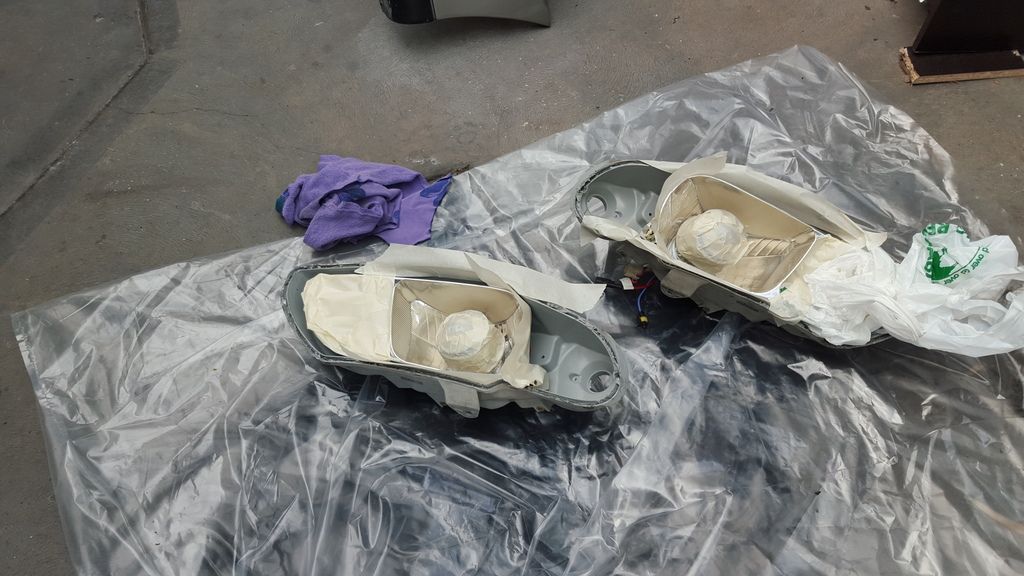
Posts: 75Okay, I forgot to add that I bought some eBay Altezza lights with projectors, shown below installed not long after buying the car.
These projectors were f*cking terrible for light output, even with Philips +60 globes in and literally hours of trying to adjust them with the beam not moving.
0/10 do not recommend.

I have a good friend who does custom car lighting and accessories as a hobby, so he hooked me up a good deal.
I dropped off my old headlights that came from the car and he worked some damn good magic with them.
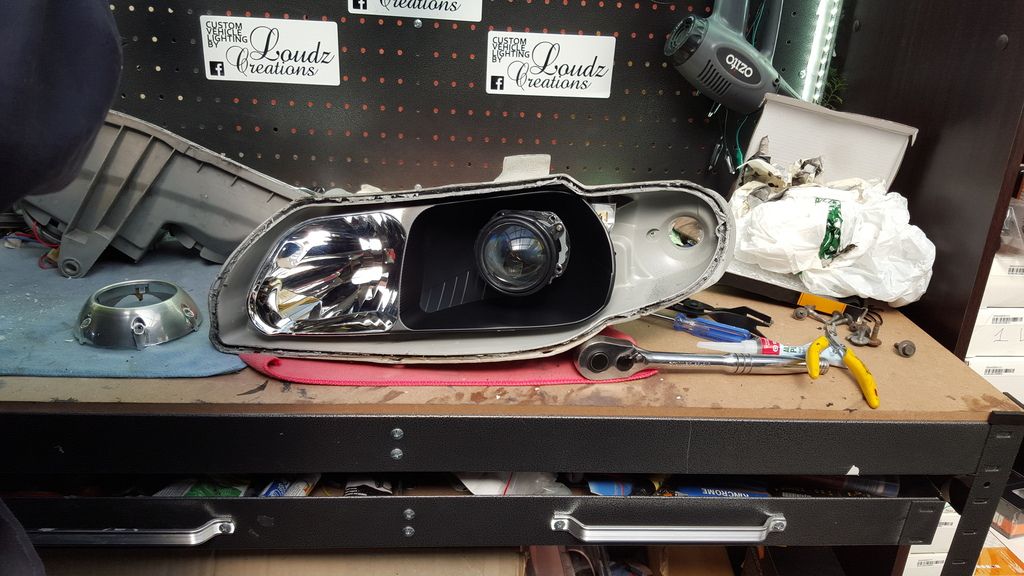
Wanted to keep a stock OEM style look and I reckon it was achieved quite well.
Lenses before being restored to near new, 15 years old and not looking so pretty.

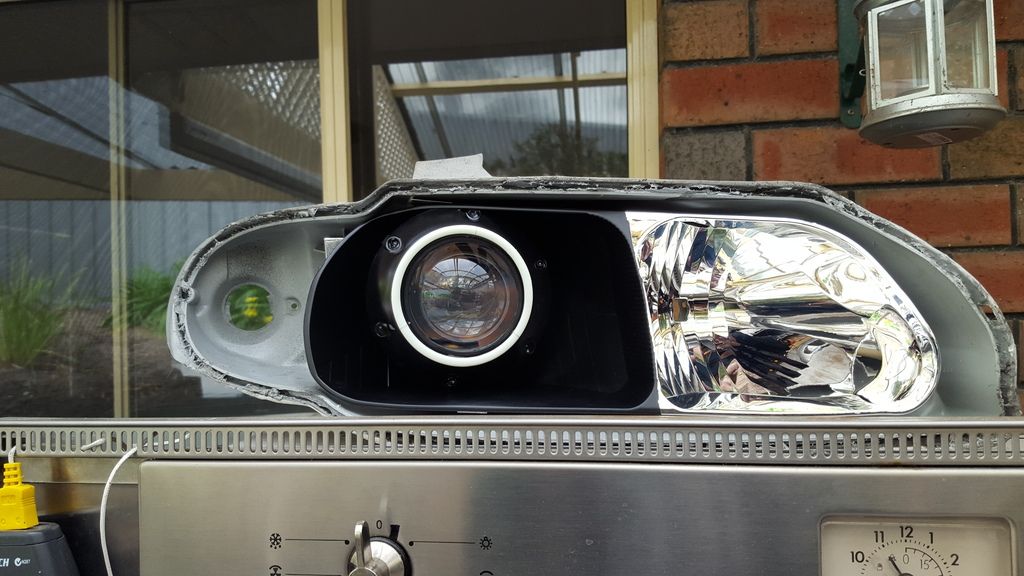
After being restored and with 3 coats of clear on the lense, that way the lense will NEVER fade or go yellow and hazy, AGAIN!

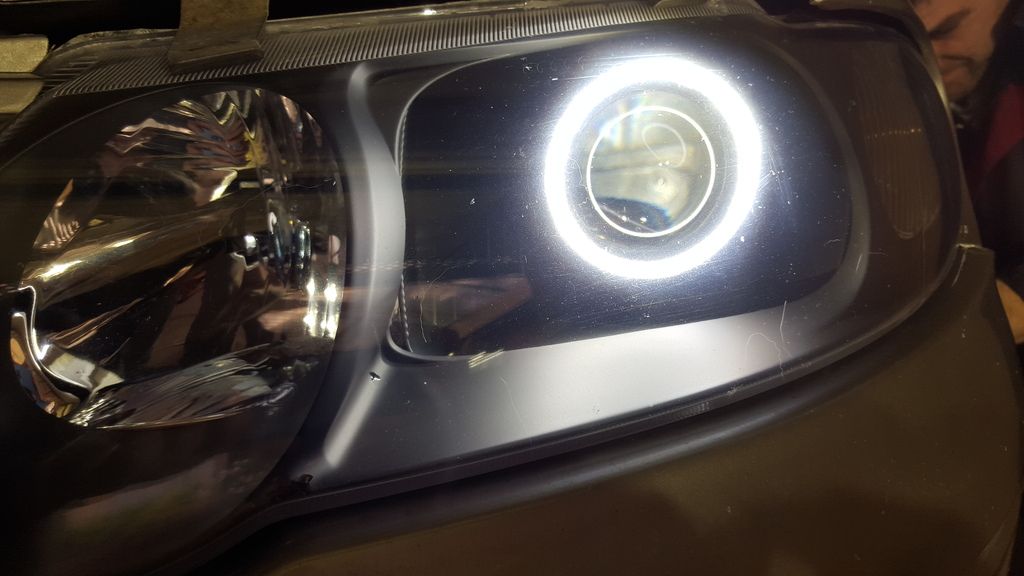
The new headlights have high quality Morimoto projectors and housings retro fitted, along with a custom park light setup.


During the installation process.

Done!!


Now some pics of lighting day and night.


Finally done, thanks for looking.
April 24, 2015 at 6:36 pm #5556
NickParticipant- Adelaide, SA
- Series 1 VX Commodore Wagon
View build HERE
Posts: 75Done front pads and rotors, then a swapped my stock grey series 1 dash pad with a black series 2 calais dash pad, including all of the lower dash bits

Future tutorial will be added when I take it out again, for a certain reason… ;)

 April 24, 2015 at 6:43 pm #5557
NickParticipant- Adelaide, SA
- Series 1 VX Commodore Wagon
View build HERE
Posts: 75And the most recent update as of yesterday:
Erm…

 April 24, 2015 at 7:35 pm #5565
ajvx01Participant- adelaide
- VC 308 taxi bt1 wanna be!
View build HERE
Posts: 102
wow, pretty nuts install! Is your mate Callum from coin slot by any chance? I know he changed business names recently?
April 24, 2015 at 8:08 pm #5567
NickVRParticipant- Adelaide
- VR V8 Exec, VR SS, VF Redline Reserve
View build HERE
Posts: 264Looking awesome mate, some great work being put in to it. I have seen Loudz Creations work on Facebook and am a huge fan. One day I would like to get some done for the VR one day but need to buy the aftermarket Altezza lights for him to modify. Plus would cost a bit to get done too.
April 24, 2015 at 8:40 pm #5576
NickParticipant- Adelaide, SA
- Series 1 VX Commodore Wagon
View build HERE
Posts: 75wow, pretty nuts install! Is your mate Callum from coin slot by any chance? I know he changed business names recently?
Hey mate, thanks!
Yes, same Callum- his new business is called AV-DC and now located in Panorama
Looking awesome mate, some great work being put in to it. I have seen Loudz Creations work on Facebook and am a huge fan. One day I would like to get some done for the VR one day but need to buy the aftermarket Altezza lights for him to modify. Plus would cost a bit to get done too.
Jamie has done some awesome work with Loudz, we originally discussed what we were going to do with my VS headlights, you will need the altezza headlights for the clear lenses, as the stock glass lenses will screw with light projection :whistle2:
I will not publicly put a price on what mine cost but if you’re curious with roughly how much it will cost PM me Nick April 24, 2015 at 10:23 pm #5580
ajvx01Participant- adelaide
- VC 308 taxi bt1 wanna be!
View build HERE
Posts: 102thought so,a mate of mine has done work for him from time to time.
April 27, 2015 at 5:50 pm #5726
RichardParticipant- Macquarie Fields
- VT Commodore
View build HERE
Posts: 91Very cool build – I also can attest to altezza’s being rubbish! Just miss my HIDs I had running in them
Sent from my iPhone using Tapatalk
April 27, 2015 at 9:35 pm #5751
NickParticipant- Adelaide, SA
- Series 1 VX Commodore Wagon
View build HERE
Posts: 75Thanks for that Richard, I’ve been following your build for some time now, keep the good work up too
April 30, 2015 at 9:47 pm #5984love a good sterio car
there gonna be more vy/z in itthan vx soon.keep up the good work
August 31, 2015 at 8:44 pm #8890
NickParticipant- Adelaide, SA
- Series 1 VX Commodore Wagon
View build HERE
Posts: 75Long time no update!!
Finally finished the pillars with Callum, decided to go matte black as I’ll be doing the rest of the trims black eventually.Ooooh, factory finish!


Washed, clayed, polished and waxed my car with what I had in the shed for the first time in the year I’ve owned the car. (I have only went to car washes up until this point, stupid me).

Roof and front end have seen better days, might fix it one day. Yes, that is after polishing and waxing.

Went back to see Jamie at Loudz Creations to do some more work to my headlights.
The LED’s that were in the projector shroud had all died due to heat, so we replaced them with proper Morimoto LED angel eyes that will withstand the heat and will look great for many years.
Masked and prepared for paint.
Quick test out of the box to make sure they work.
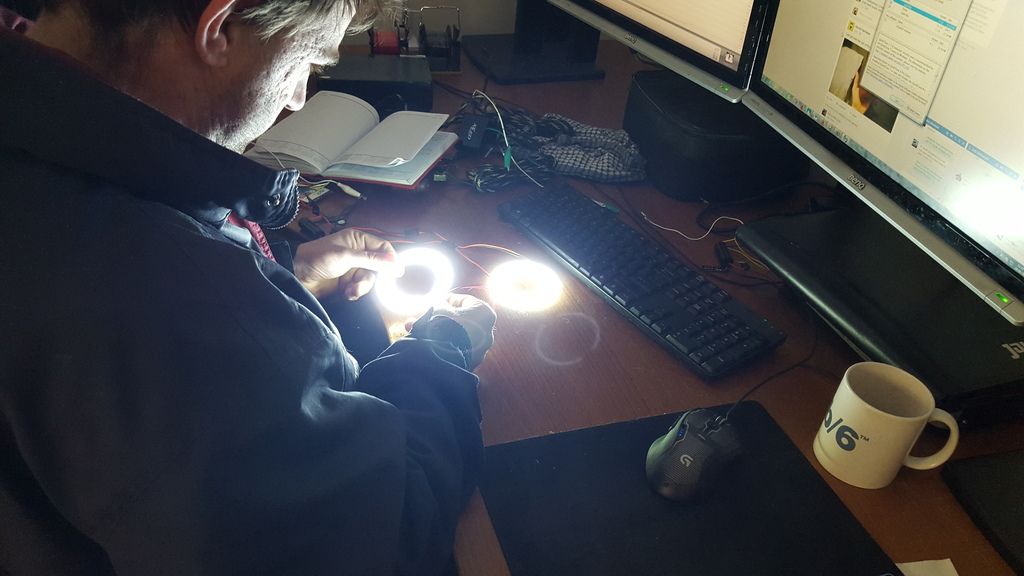
Angel eyes installed, headlights sealed and installed again, husky approved.

And one more shot, just because.

Oh and now my gas converter is leaking from the breather and inlet line, will have to get that replaced real soon.
Thanks for looking
August 31, 2015 at 9:22 pm #8894
VRSenator065Participant- Adelaide SA
- VR Senator LSx454 1960 Kombi (project) 1921 Nash Hot Rod (future project)
View build HERE
Posts: 5 777Cool build, is it just me or do your new headlights match your dogs eyes….
August 31, 2015 at 10:24 pm #8895
NickParticipant- Adelaide, SA
- Series 1 VX Commodore Wagon
View build HERE
Posts: 75Haha, that’s not my dog unfortunately, that is Jamie’s from Loudz Creations, works out of his shed.
If you noticed from the second last picture, there’s even husky hair on the headlight lens haha.My girlfriend and I are planning to get a miniature Dachshund sometime during September as a first pet, so that should be fun!
Little dog, little poop, no problems September 2, 2015 at 8:41 pm #8924
I noticed the Husky crazy eyes aswell hahaha
Good job on the pillar installs how did you get the factory texture?
September 3, 2015 at 11:19 am #8932
VRSenator065Participant- Adelaide SA
- VR Senator LSx454 1960 Kombi (project) 1921 Nash Hot Rod (future project)
View build HERE
Posts: 5 777^ yea I have same question, they came up great, how did you get the texture? Btw you don’t know a guy with a hearse called Adam do you? He is into the crazy, melt your ears, sound system stuff…
-
AuthorPosts
You must be logged in to reply to this topic.
