
Home›Forums›Technical – General›Brakes›how to change drum to disk brakes on a VL
This topic contains 0 replies, has 1 voice, and was last updated by ![]() twr-92 9 years, 1 month ago.
twr-92 9 years, 1 month ago.
-
AuthorPosts
-
March 2, 2015 at 10:15 pm #1531

twr-92Participant- Brisbane
- ve sv6 vy 6 Vl walky replica
View build HERE
Posts: 14I wrote this up a back in feb 2012 after doing the job and not being able to find a good guide.
After doing the job I found a descent guide on another forum.
I’m posting this so that it may help someone else in the future.SUMMARY
Why would you complete this conversion.
Estimated time to complete.
Parts Needed
Removing VN parts at the wreckers
Removing the VL drum brakes.
Gotchas.WHY WOULD YOU COMLETE THIS CONVERSION.
You may want to replace the drum brakes on your VL simply for better braking performance, or because you have bolted on a Turbo or converted to a V8 and the bigger brakes are required legally. The recommended change to make is to swap the whole diff for a 28 spline V8 or Turbo diff which will take more punishment and comes standard with disk brakes. 28 spline VL Turbo/V8 diffs are becoming scarce and expensive, so if you are not going to abuse the diff, then swapping the drums for disks is a cheap option.ESTIMATED TIME TO COMPLETE (incase your wife wants to know how long you will be out for
1.5 Hours at the wreckers.
3 hours working on the car.PARTS NEEDED
VL disk brake hand bake cable ($140 from eBay)
10 vl Turbo / v8 wheel studs ($3 each from repco)
2 VL Turbo / V8 axel bearing kits ($20 each from repco)
2 VN rear disks ($40 each from repco)
1 set of rear disk pads ($40 from repco)
2 VN rear calipers, back plates and dust plates (from the wreckers)
1 brake bleed kit ($20 from repco)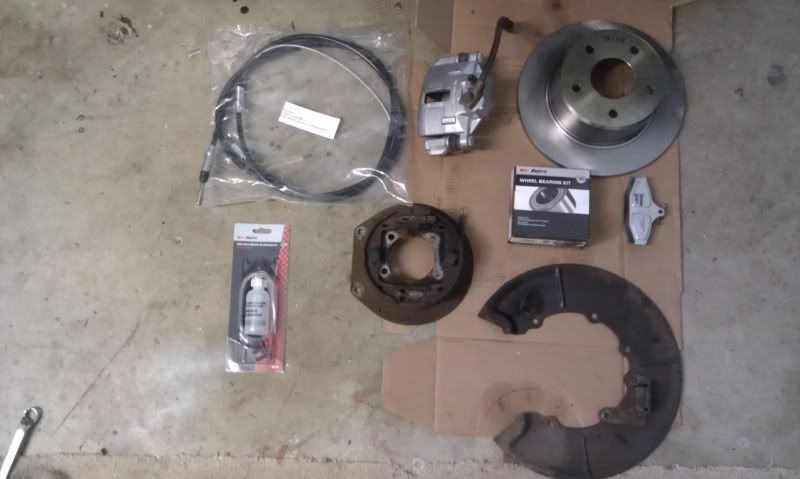
REMOVING VN PARTS AT THE WRECKERS
If you need to remove the rear brakes from a car at the wreckers yourself, follow:keep all the screws, nuts, bolts, brackets and springs you remove.
find the most well looked after VN you can.
remove the wheels if they are still on it.
remove the 2 bolts holding the calipers to the backing plate. (keep the bolts)
remove the hand brake spring at the bottom of the assembly. (keep the spring)
pull the handbrake cable around and off the lever it is attached to
remove the remaining screws holding the dust cover on. (keep the screws and handbrake cable bracket)
if the nuts holding the metal brake line into the brake hose won’t undo, bend the metal line back and forth to heat it, then snap or cut it.
I did this and then took it home to remove the metal lines.
look through the big hole in the axel ends to find 4 nuts holding the backing plate onto the diff.
you may need to use a screw driver to lever the hand brake shoes away from some nuts to fit the socket on.
use a socket to undo and remove each of the 4 nuts. I needed extra leverage to make the first turn.
put the disk onto the studs backwards and put some wheel nuts on with a couple of turns so that you can use the disk as a slide hammer.
the axel will come out after a couple of pulls. remove it and take the backing plate/brake shoe assembly.
now repeat the process on the other side.If you sourced parts from a wrecker they could probably do with a good clean.
I scrubbed the calipers with a wire brush before giving them a squirt of silver brake caliper paint.
if you paint them, mask all rubber parts, the hose and the bleed nipple.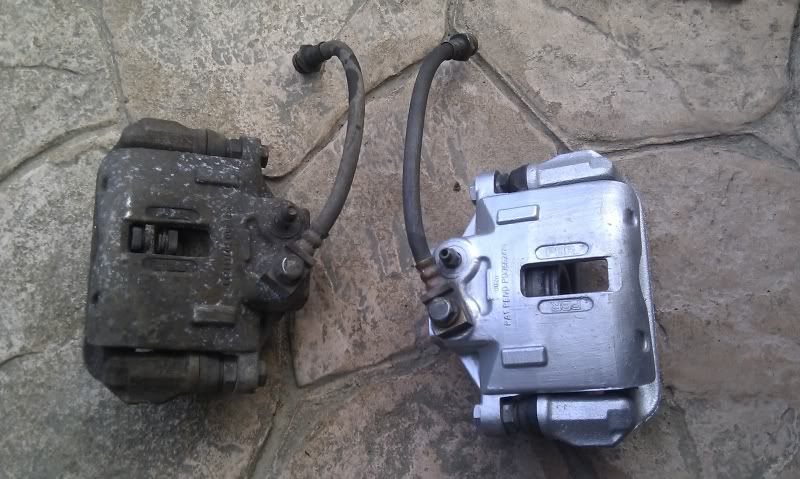
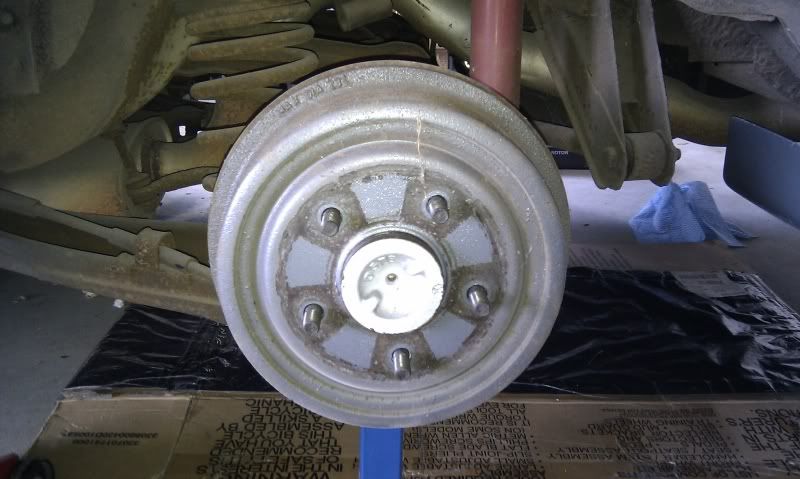
REMOVING THE VL DRUM BRAKES.
Jack up the back of the car and put stands under it. Never work under a car held up by a jack.remove the wheels.
Under the middle of the car, loosen the handbrake cable enough so that the cable can be pulled off of its bracket.
Use a flat head screwdriver to lever the cover off the drum brake assembly.
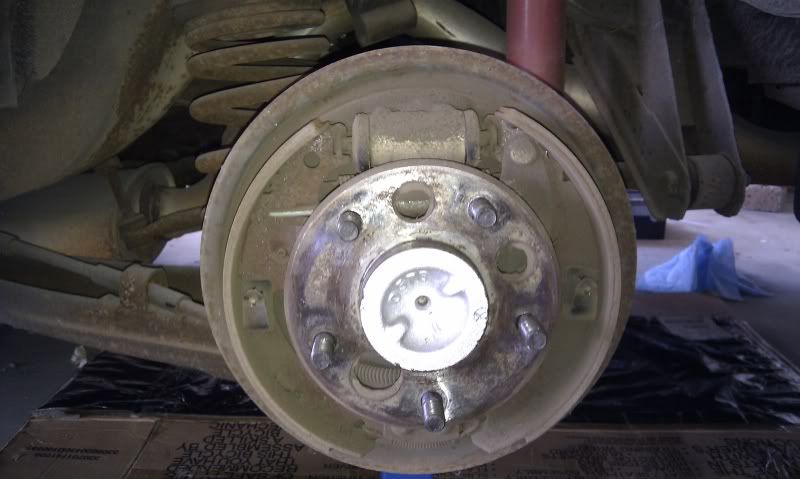
look through the big hole in the axel ends to find 4 nuts holding the backing plate onto the diff.
you may need to use a screw driver to lever the hand brake shoes away from some nuts to fit the socket on.
use a socket to undo and remove each of the 4 nuts. I needed extra leverage to make the first turn.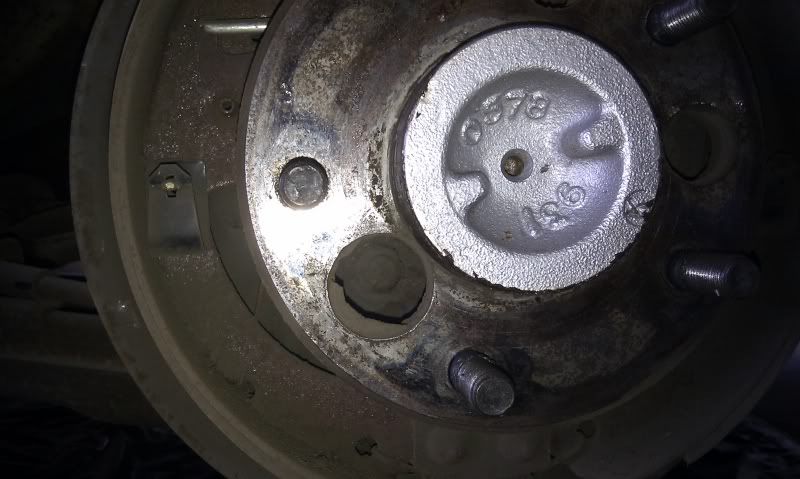
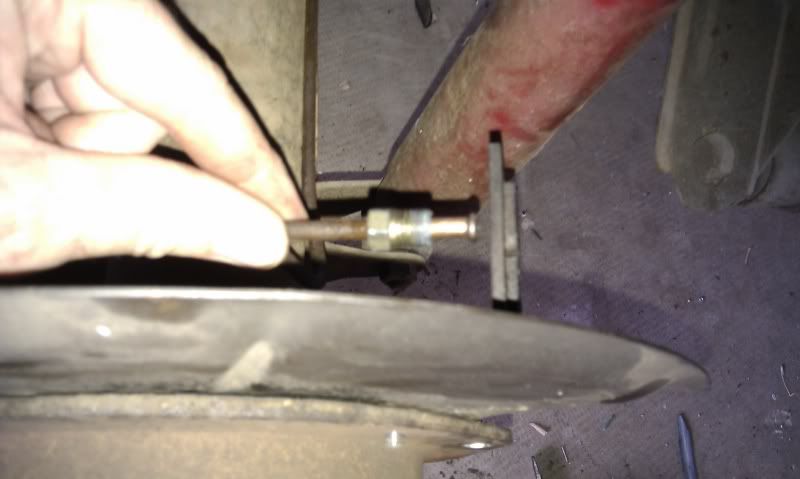
Use a 10mm spanner to remove the soft metal nut holding the brake line into the baxking plate of the drum assembly. note that this is a soft nut so be careful not to round it.
The soft 10mm nuts on the end of my VL,s metal brake lines were not the same thread as the vn calipers hose. This became obvious when I stripped the thread on the nuts when connecting them to the calipers.
I had 11mm nuts put onto some new brakelines I had made up and they fit like a charm.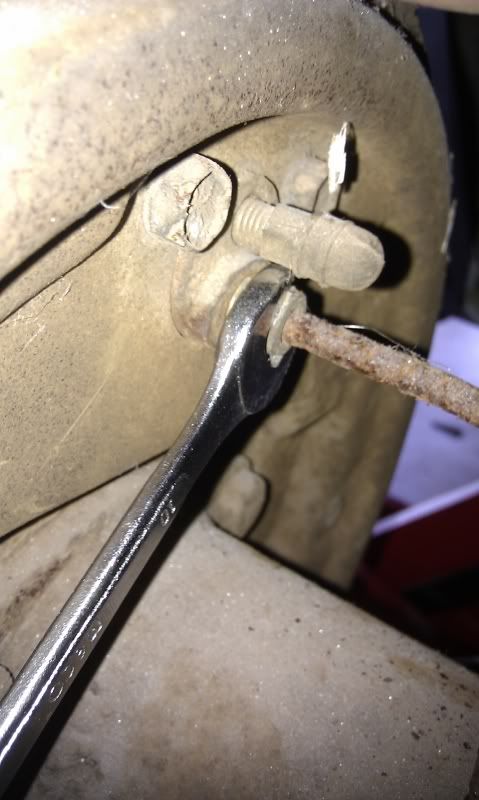
put the disk onto the studs backwards and put some wheel nuts on with a couple of turns so that you can use the disk as a slide hammer.
the axel will come out after a couple of pulls.
slide it out and mark which side it came from on.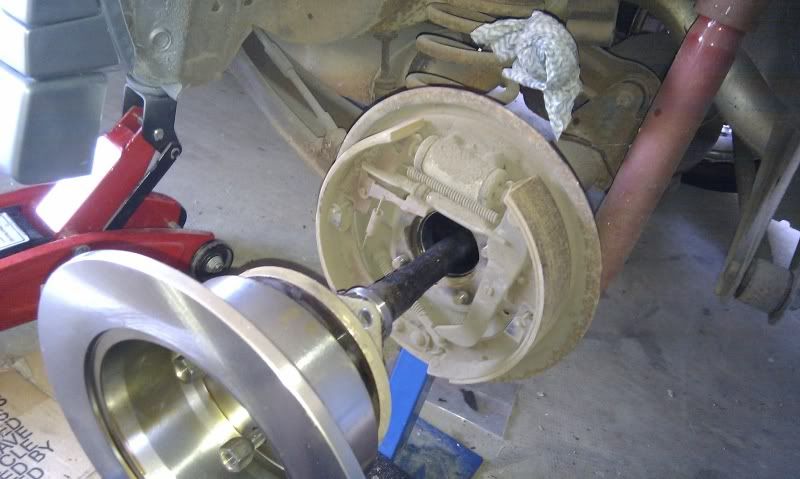
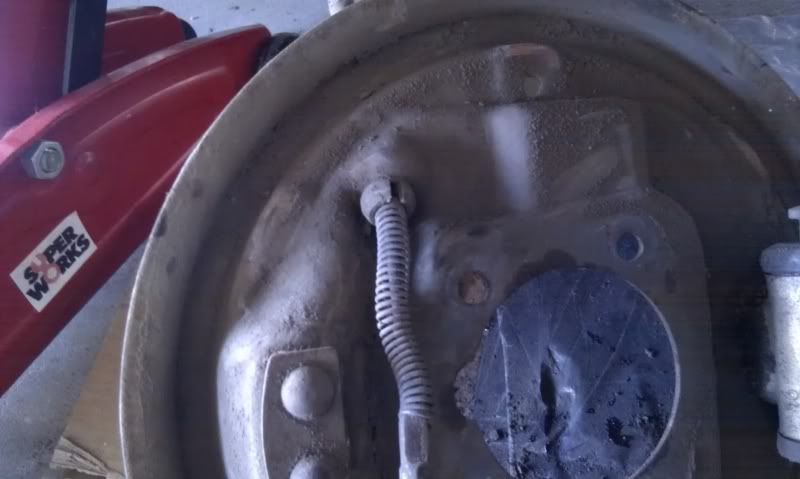
on the backing plate remove the rubber collar holding the hand brake cables spring in. Use a flat head screw driver to open it at the split and pull it off. this gives you more play in the cable to remove the end from the hook it attaches to.
If the outer collar of the bearing has stayed in the diff, remove them. your new bearings have new outer collars and they only need a light tap from behind.
After you have removed both axels, take them with your bearing kits to AZ mechanic with a press. The mechanic at my local servo swapped mine for half an hours labour. don’t try swapping the bearings and rubber collars yourself unless you have a press. it only cost me $40 to have the old ones removed and new ones installed.
BOLTING ON THE DISK BRAKE ASSEMBLY.
When you get the axles back, knock the studs out with a hammer, and push the new studs in. when you bolt the wheels back on they will pull all the way through.Put the backing plate over the 4 studs on the end of the diff.
slide the axles back into the diff. They will need a wiggle to get the spline to line up and go all the way in.
the axle plates go past the hand brake shoes and hold the backing plate in place once the nuts are done up again.
Tighten the nuts using a socket through the large hole in the ends of the axle.

bolt the dust plate and hand brake bracket onto the backing plate.
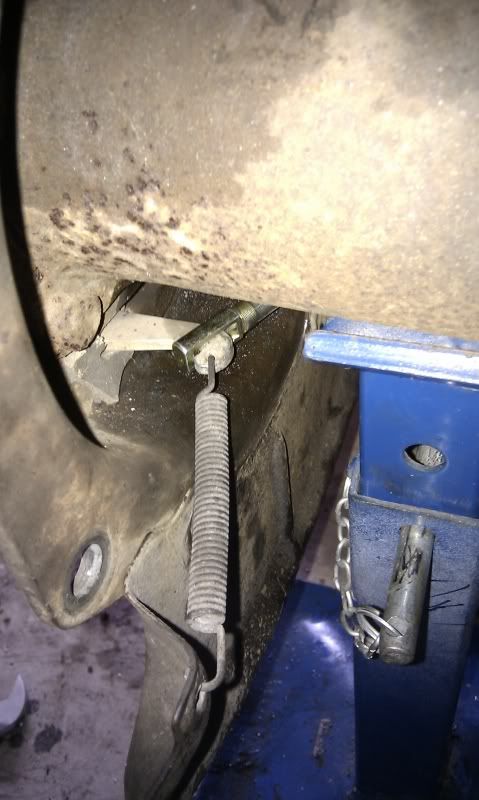
feed the new handbrake cable through the brackets that held the old one in place and attach the end onto the hook behind the backing plate. connect the spring from the hook to the dust plate
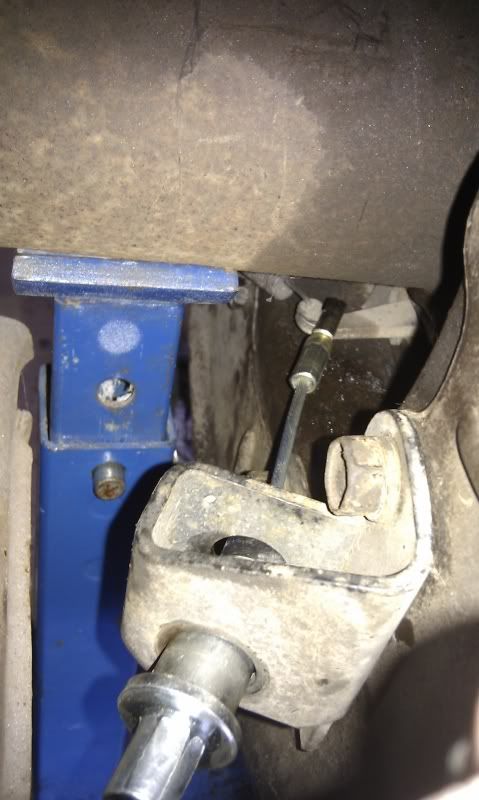
slowly bend the metal brake line so that it points straight to the centre of the hole in the bracket that holds the flexible calipers hose.
Put the new disk over the stubs, and bolt the caliper with new pads onto the backing plate.
I screwed the metal line to the flexible line before locking the flexible hose into the bracket. this allowed me to ensure I screwed the nut in straight and not strip it due to being on any angle.
bleed the brakes as per the instructions on the back of the kit.
bolt the wheels back on, clean you hands and get ready for a test drive.
the brakes need to be bedded in as per the manufacturers instructions.GOTCHAS
The soft 10mm nuts on the end of my VL,s metal brake lines were not the same thread as the vn calipers hose. This became obvious when I stripped the thread on the nuts when connecting them to the calipers.I had 11mm nuts put onto some new brakelines I had made up and they fit like a charm.
-
This topic was modified 9 years, 1 month ago by
 twr-92.
-
AuthorPosts
You must be logged in to reply to this topic.
