
Home›Forums›Members’ Builds and Rides›VQ – WN Statesman›Atlas Grey VQ Statesman 304
This topic contains 133 replies, has 16 voices, and was last updated by McDriveit 6 years, 2 months ago.
-
AuthorPosts
-
December 21, 2015 at 7:40 pm #12600
SmittyParticipant- Melbourne
- GEN-F R8 SV340 HSV Tourer, VK club touring race car and Kwaka ZX12R
View build HERE
Posts: 47Well this is one of those ones that everyone has an opinion. The guys that make my drive shafts, G Force in the states, purposely make their drive shafts two slightly different diameters left/right. Their theory (seems to work) is that this breaks up the resonance occurring between them and stops the tramp. ……………..
the factory and HSV do this now… different diameter drive shafts
December 22, 2015 at 1:09 pm #12615I’ve had the Astra pump in the shed for ~2 years, haven’t gotten around to doing anything with it really.
Might look into it in the new year. Just figured that while I was ordering stuff to add a couple of fittings in there (hope I got the right ones!). It’ll mean also probably spending another $300 on 200 series lines and fittings too
 And dealing with the nerves of the first few drives wondering if I’m going to lose steering all of a sudden.December 22, 2015 at 1:45 pm #12617
VRSenator065Participant- Adelaide SA
- VR Senator LSx454 1960 Kombi (project) 1921 Nash Hot Rod (future project)
View build HERE
Posts: 5 777
I’m same had mine sitting here for a while. They sound like a good idea, at least when your pulling 7k standing still the pump is just idling away not like a belt driven pump. Keep us posted.
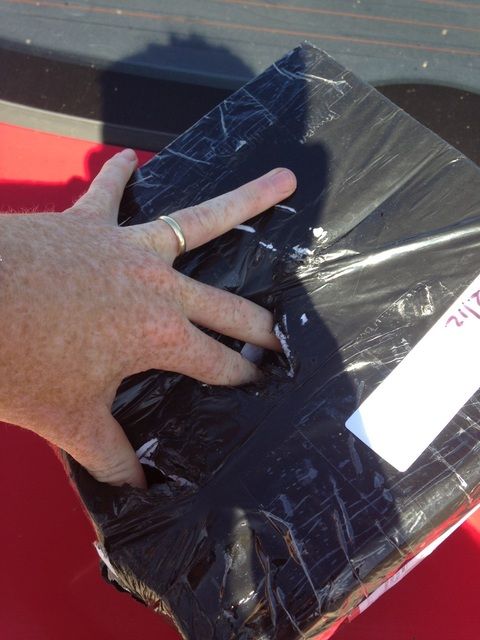
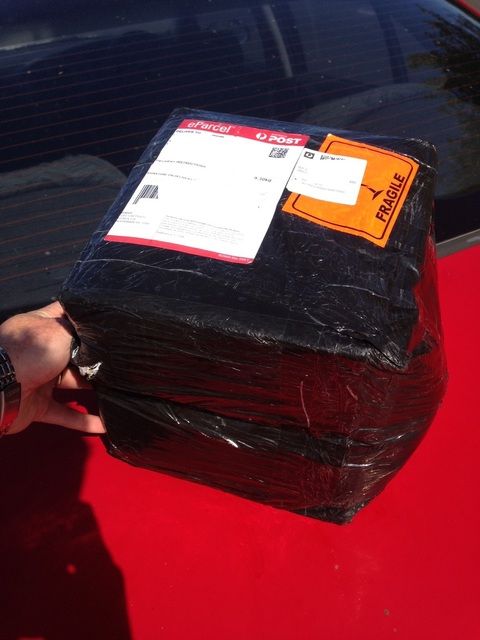
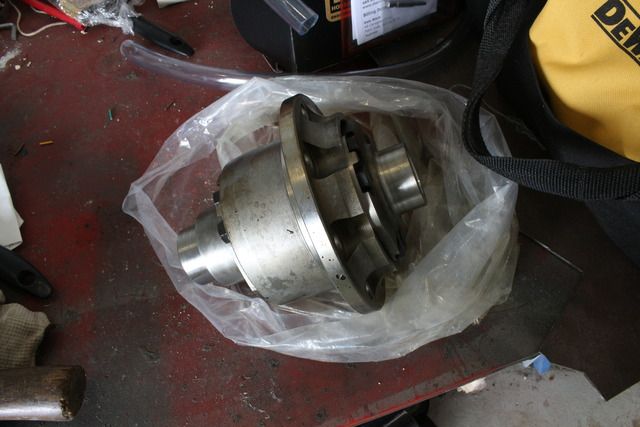
December 23, 2015 at 10:15 am #12645Diff centre arrived yesterday. Can’t say I’m very impressed at the moment.
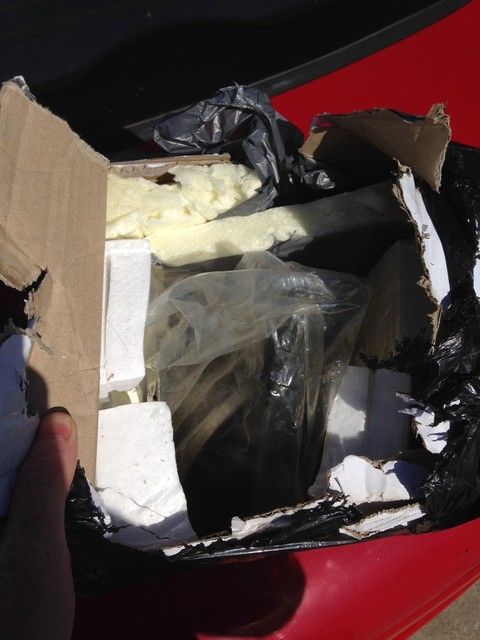
The package arrived like it had been delivered by Ace Ventura. If you’re going to put a 10kg LSD centre in the post, at least use cardboard that might stay together. I would’ve also expected the centre to arrive in something other than a plastic bag and not ‘protected’ by left over old foam.
The centre itself came completely bare with no branding/packaging, there are no brand marks on the centre itself or even a serial number on it. There was no invoice or installation instructions included.
Whilst I don’t actually need the instructions it would’ve been good to have as a reference. If I have a warranty claim how can I prove this was the unit I purchased?
All in all, pretty poor approach from Tuff Car Parts. The old owner never operated like this. I’ll drop a line to the new owner but I doubt I’ll get anywhere.
 December 23, 2015 at 2:34 pm #12655
Justin from Tuff Car Parts responded pretty quickly, even gave me a call which is surprising given the time of the year. Apparently it’s ‘normal’ to not have spec/instructions provided, and the units are supplied in the same manner as is Eaton units (i.e. in a plastic bag).
Right.
Hopefully it all goes in an works OK.
December 23, 2015 at 2:37 pm #12656That’s funny Tuff, I just got an e-mail saying they’re closed today :XD:
December 23, 2015 at 2:49 pm #12657Plot thickens.
Spoke to the manufacturer about the installation of the product. Turns out that if you have a lower ratio gear set in it (typically 3.89/4.11) you need to remove the pinion and shave a few thou off the top corner of the pinion gear teeth to provide sufficient clearance. I was told I could do this with an angle grinder (expect if I have to I might use the linisher instead!)
My first thought is why not manufacture a product which has this clearance built into the LSD case if so required? Unless I’m not thinking of this right.
Looks like this isn’t an ‘over Christmas’ job as I haven’t got a replacement crush washer on hand if I have to pull the pinion out…
 December 23, 2015 at 2:52 pm #12658
That’s funny Tuff, I just got an e-mail saying they’re closed today

Must depend how loudly you whinge ;)
December 23, 2015 at 2:57 pm #12659LOL awesome service!
December 23, 2015 at 3:42 pm #12660Plot thickens. Spoke to the manufacturer about the installation of the product. Turns out that if you have a lower ratio gear set in it (typically 3.89/4.11) you need to remove the pinion and shave a few thou off the top corner of the pinion gear teeth to provide sufficient clearance. I was told I could do this with an angle grinder (expect if I have to I might use the linisher instead!) My first thought is why not manufacture a product which has this clearance built into the LSD case if so required? Unless I’m not thinking of this right. Looks like this isn’t an ‘over Christmas’ job as I haven’t got a replacement crush washer on hand if I have to pull the pinion out…
would of been easier to do m80 conversion and use eaton truetrack.
Many mate had to lininsh to fit his 3.7’s with his Harrop track into his BW
December 24, 2015 at 8:21 am #12667No need to change from M78 in my case – I’ll never break it with the power levels I’ve got.
Plus I’m happy with the ratio, just trying to make it more ‘legal’
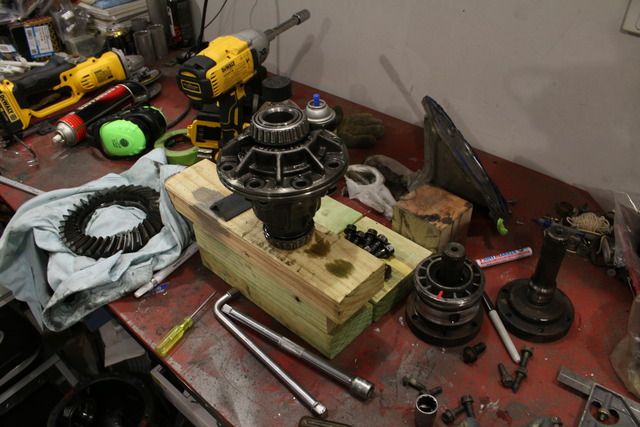
January 4, 2016 at 8:46 am #12991OK so as per usual I didn’t get much of any time to work on this over my (short) break. In fact, I only did about 3 hours yesterday
(On a side note, I bought 1/2″ cordless rattle gun for the job. It’s brilliant, should’ve bought one years ago.)
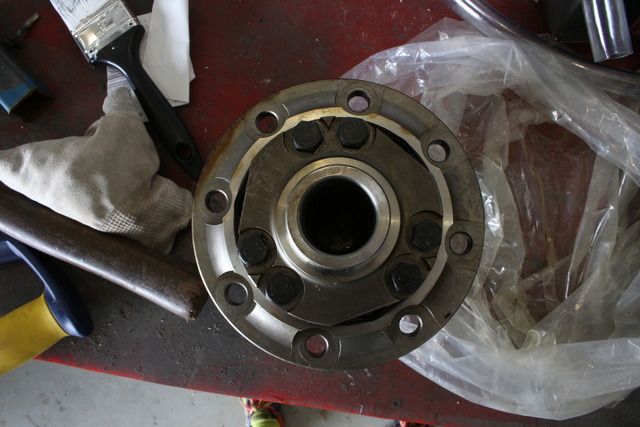
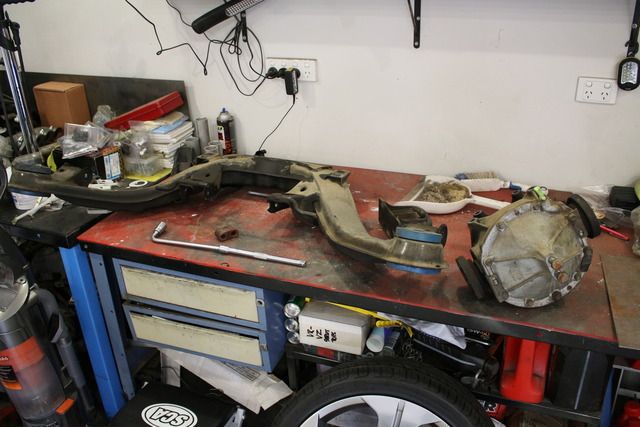
This is one of the problems I’m trying to fix:
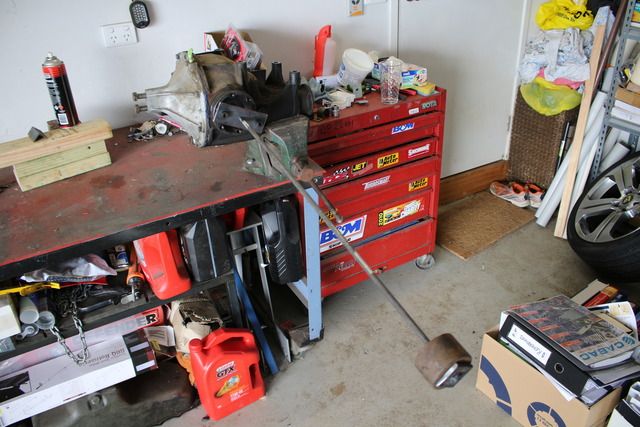
Diff centre.
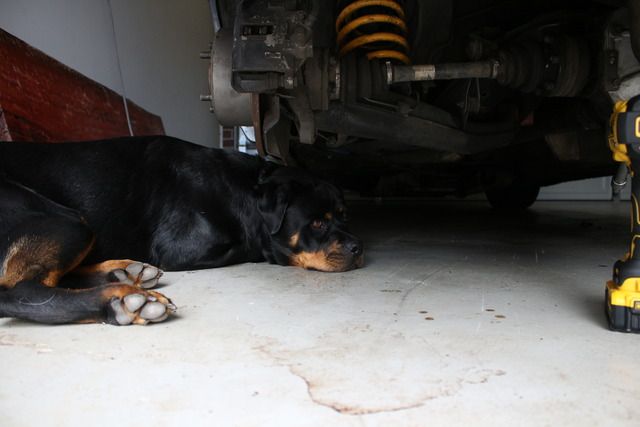
Workshop Helper.
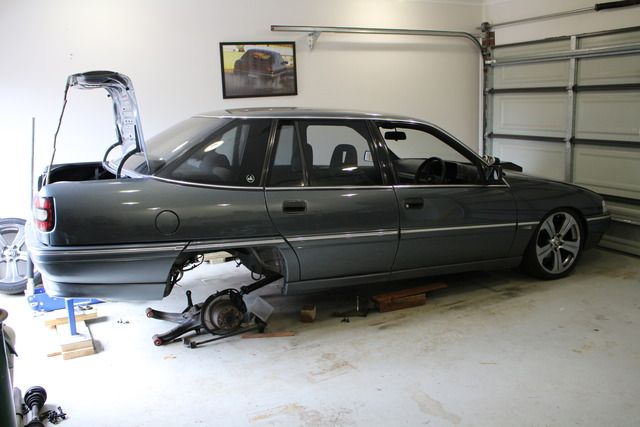
Rear end out. You can see the 10mm plate I put in probably 10 years ago. K-frame still seems to be in good shape. Nolathane bushes are also in good shape. I used to have Noltecs in there and they disintegrated.
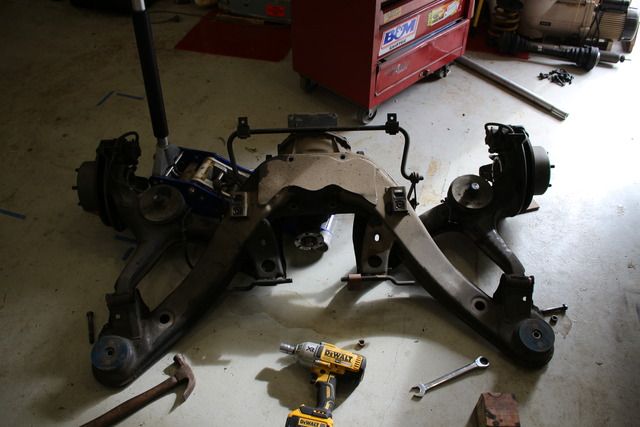
K-frame ready for mods. Diff ready for new centre and I’ll be making up a new diff mount using control arm bushes. Stay tuned.
 January 4, 2016 at 5:21 pm #13012
VRSenator065Participant- Adelaide SA
- VR Senator LSx454 1960 Kombi (project) 1921 Nash Hot Rod (future project)
View build HERE
Posts: 5 777Fark that is some serious camber…
January 5, 2016 at 2:08 pm #13038The contact patch of the 245 tyre on there is probably 40%. The outside of the tyre isn’t even scrubbed in, but the inner is on wear bars.
It has had 4pt and 2pt adjustable kits in it at various times. SSSL springs don’t help the situation. I do however have to be careful I don’t ‘over correct’ the situation as the tyres will scrub on the outer guards.
Had a false start last night. Cracked the diff cover, drained the fluid and realised I didn’t have a slide hammer to pull the stub axles out. I’ll make one tonight or tomorrow.
January 5, 2016 at 2:10 pm #13039Don’t you bloody hate that. Arms deep into a job and ur missing tools or parts
January 5, 2016 at 4:17 pm #13040I just didn’t think of it as I used to have the old man’s one but gave it back to him when I shifted.
It was all good as I’d run out of bourbon anyway
 January 6, 2016 at 9:39 pm #13097
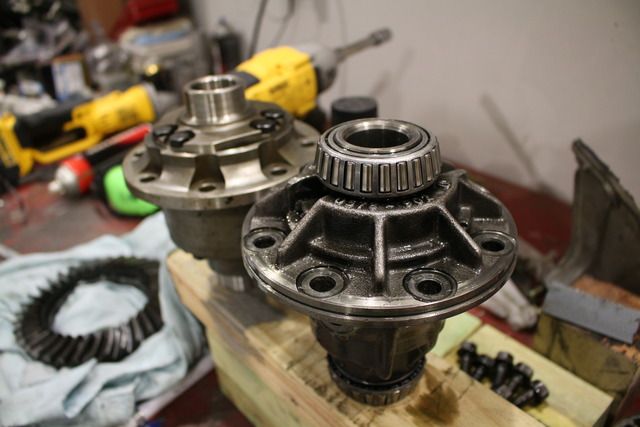
Two steps forward one step back. Made a quick ghetto slide hammer tonight in about 30 mins, did the job well. Pulled out the stub axles expecting epic twist on the splines from 7-8 years of being spooled, however no real evidence of spline twist. It looks like they weren’t manufactured with a lot of precision but given the VQ in particular had early versions of the M78 IRS diff it’s not surprising. After having my brother-in-law try and convince me to buy new stub axles while its out, and finding the only aftermarket options were the gforce1320 $599 items, I will stick with what’s there.
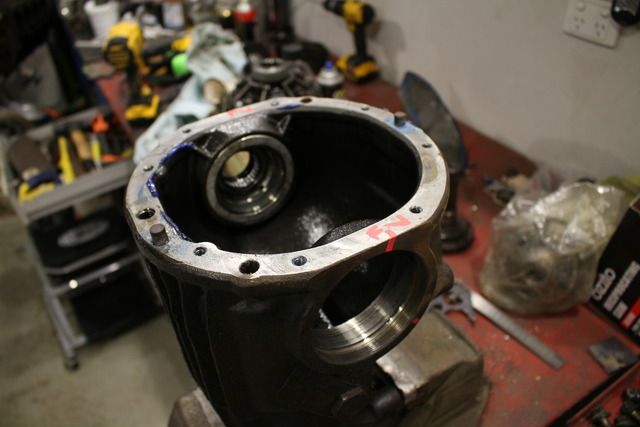
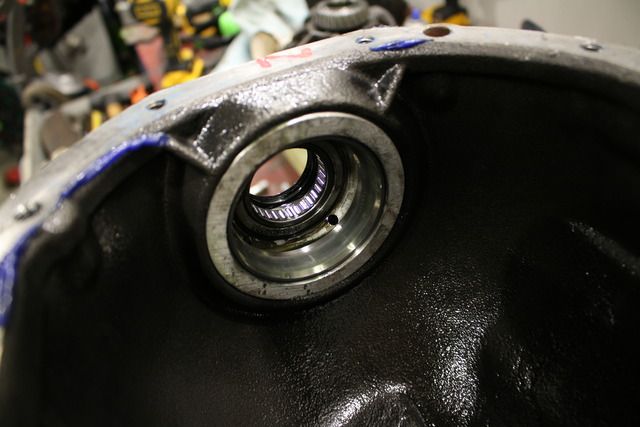
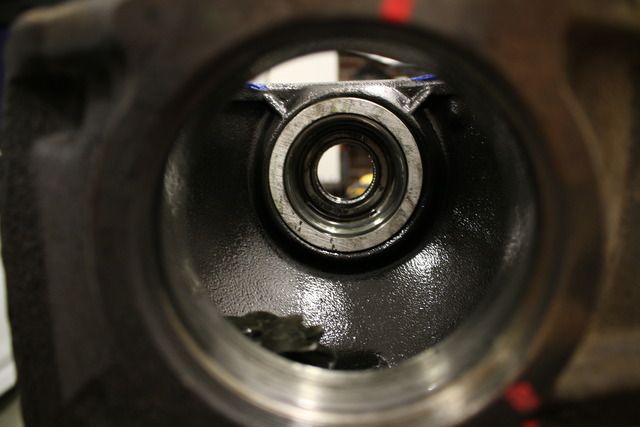
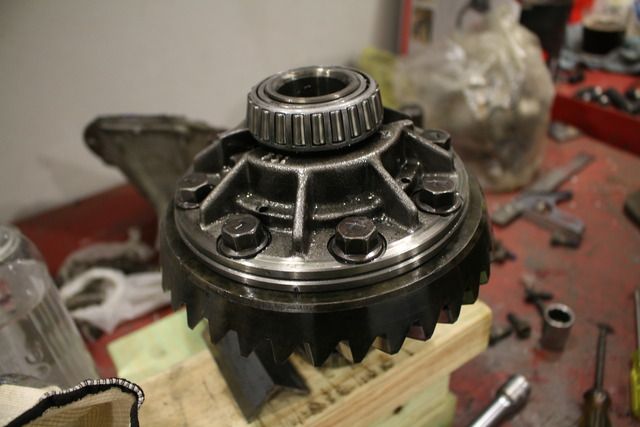
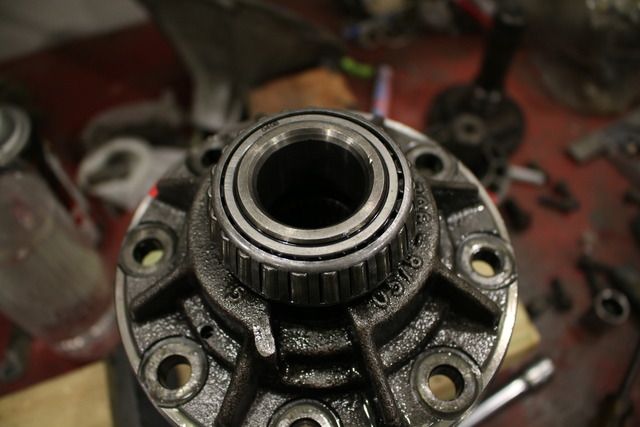
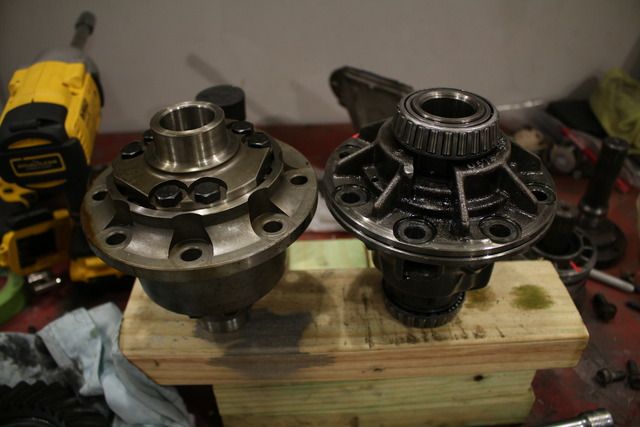
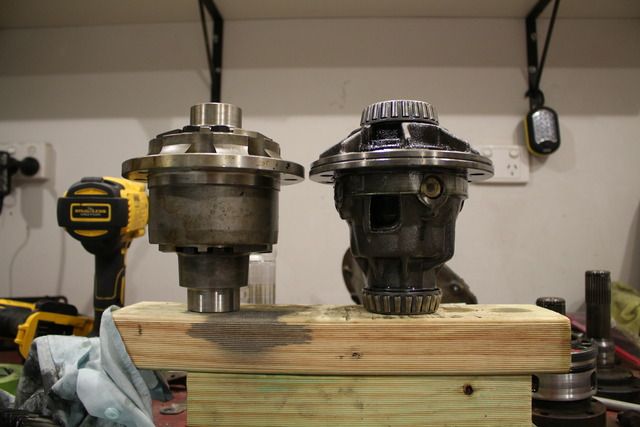
It appears, however, I’ve hit another snag. It’s been a long time since I’ve pulled a diff apart, and I didn’t take into account the mounting of the carrier bearings on to the carrier housing when I looked at the new centre. In any case, I need to source some new carrier bearings, which throws out current bearing pre-load positions as well as crown wheel and pinion meshing pattern. Looks like I’ll be doing a near full diff rebuild for the first time – eek. I’d rather build an engine as I know them better, but there’s only one way to learn.
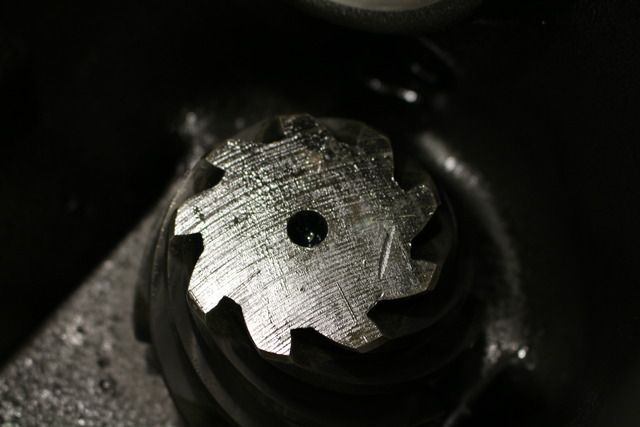
Looks also like the pinion gear may have been ground to get it to mesh properly in the housing, as I suspected. Anyone have any thoughts on this? I took the photo in the light that best picked up the surface finish, it’s not as harsh as it looks in the photo.
Pic overload while I wait for bearings. Bushes I ordered from the other side of town 2.5 weeks ago still haven’t arrived so I can’t start the diff mount. Typical Australian commerce. So it looks like the K-frame is the next on the list until I can get back into the diff.
 January 7, 2016 at 10:39 am #13105
VRSenator065Participant- Adelaide SA
- VR Senator LSx454 1960 Kombi (project) 1921 Nash Hot Rod (future project)
View build HERE
Posts: 5 777Following the diff rebuild just out of interest, never done one, have always balked at it, keen to see how you find it.
January 7, 2016 at 8:32 pm #13116Pinion might have been clearances or could just be rough from the factory. Are there any markings on the pinion end?
changing diff center so the mesh and preload would ways have to be redone, no escaping
 haha.
haha.when you seat the bearings, make sure they are fully home and square in the housing bore. Oh and double check everything. Hope all goes well!
January 13, 2016 at 3:36 pm #13284Full set of bearings/seals/crush spacer/pinion nut rocked up yesterday. Ordered it Friday night and arrived Tuesday morning. Not bad.
The bushes for the diff mount also arrived yesterday. Ordered 21st Dec from Sydney. Not so great.
However I expect next to no progress on this until after Aus Day weekend, as I’ll be busy with work.
-
AuthorPosts


You must be logged in to reply to this topic.
